Users
The Users page allows administrators to create, manage, and control system user accounts for employees.
Navigation:
Access Control → Users
User access and permissions are determined by the roles assigned to the user. For detailed information about roles and permissions, refer to the Roles document.
Overview
Users represent employee accounts in the system. Each user has:
- A unique identifier (User ID)
- Basic profile information (name, electronic ID)
- Optional group assignments for organizational structure
- Optional commission plan assignments for sales tracking
- Password for system authentication
- Time clock login capability for tracking purposes
Users are assigned roles to define their system permissions and access levels.
Initial Setup
When accessing the Kensium Point-of-Sale Admin page for the first time, a Setup Guide is displayed. During this process, required administrative details are entered to configure the system.
The Setup Guide automatically creates an initial default user with the Administrator role. This user can then create additional users and assign roles as needed.
Users List Page
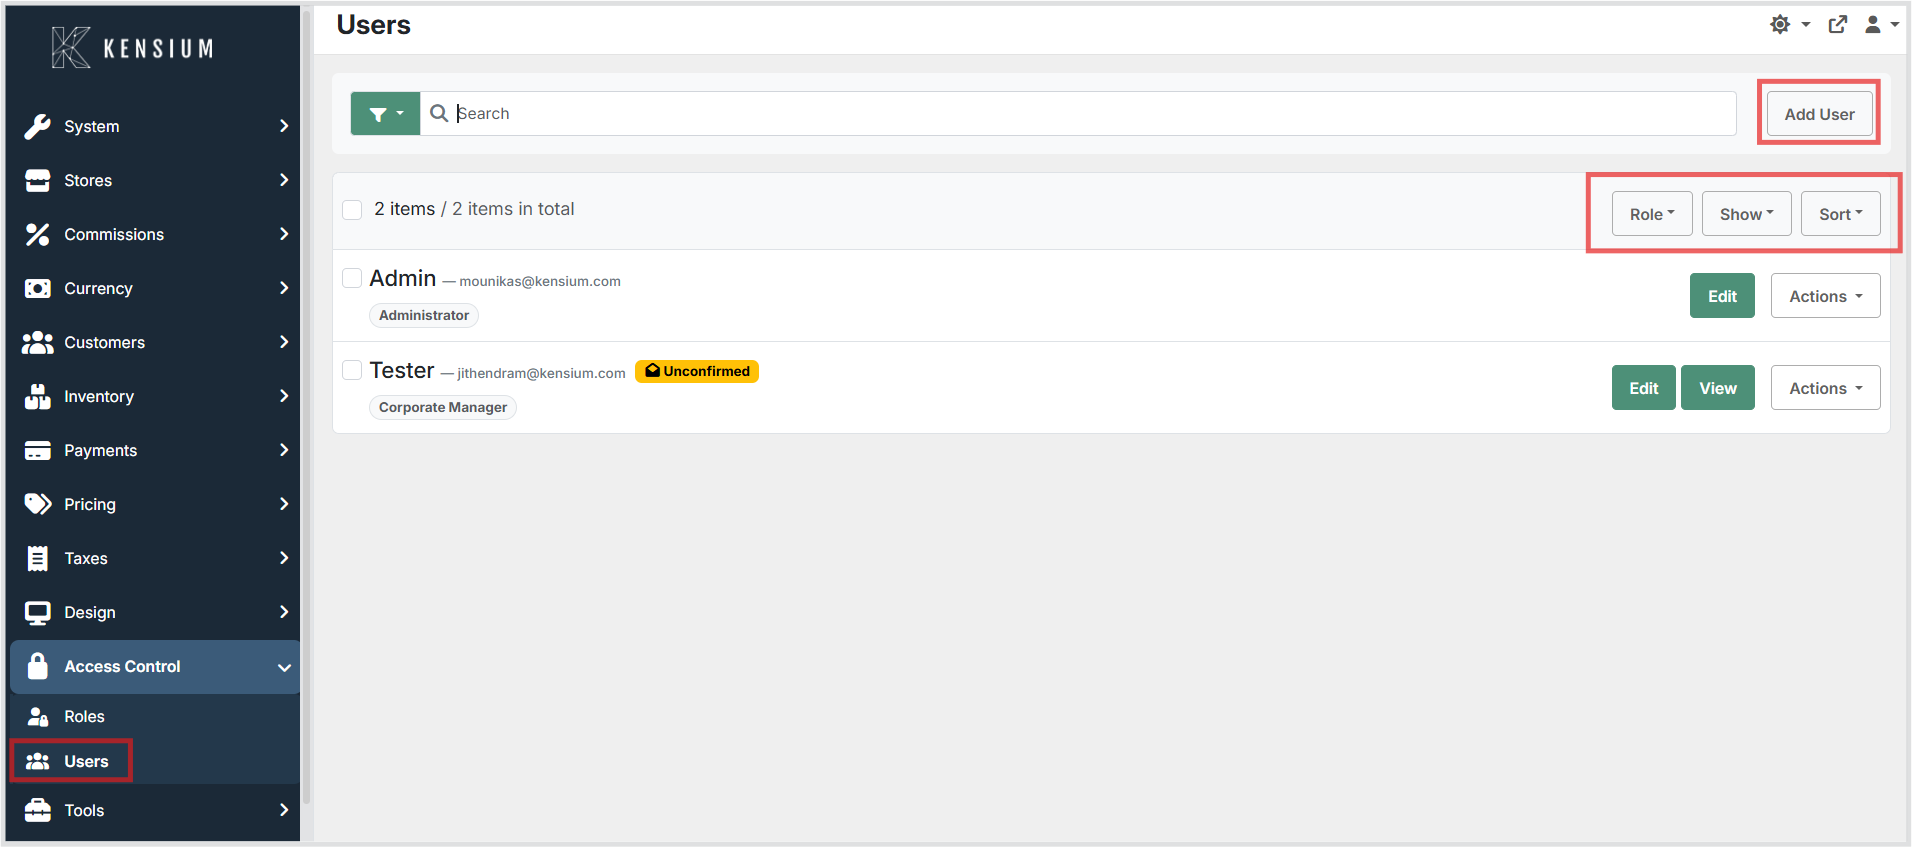
The Users page displays all configured user accounts in the system.
Page Components
Search and Filters
- Search bar - Locate users by ID, first name, or last name
- Sorting - Sort by User ID, First Name, Last Name, or Group ID
- Paging - Display 25 users per page (customizable up to 100)
User Details Displayed
Each user record in the list displays: - User ID - Unique identifier for login - First Name - Employee's first name - Last Name - Employee's last name - Group ID - Assigned user group (if applicable) - Action buttons - Edit and Delete options
Add User
Click Add User (top-right corner) to create a new user account.
Creating a User
To create a new user:
- Navigate to
Access Control → Users - Click Add User
- Enter required user information
- Set optional fields (group, commission plan, electronic ID)
- Configure password
- Click Save
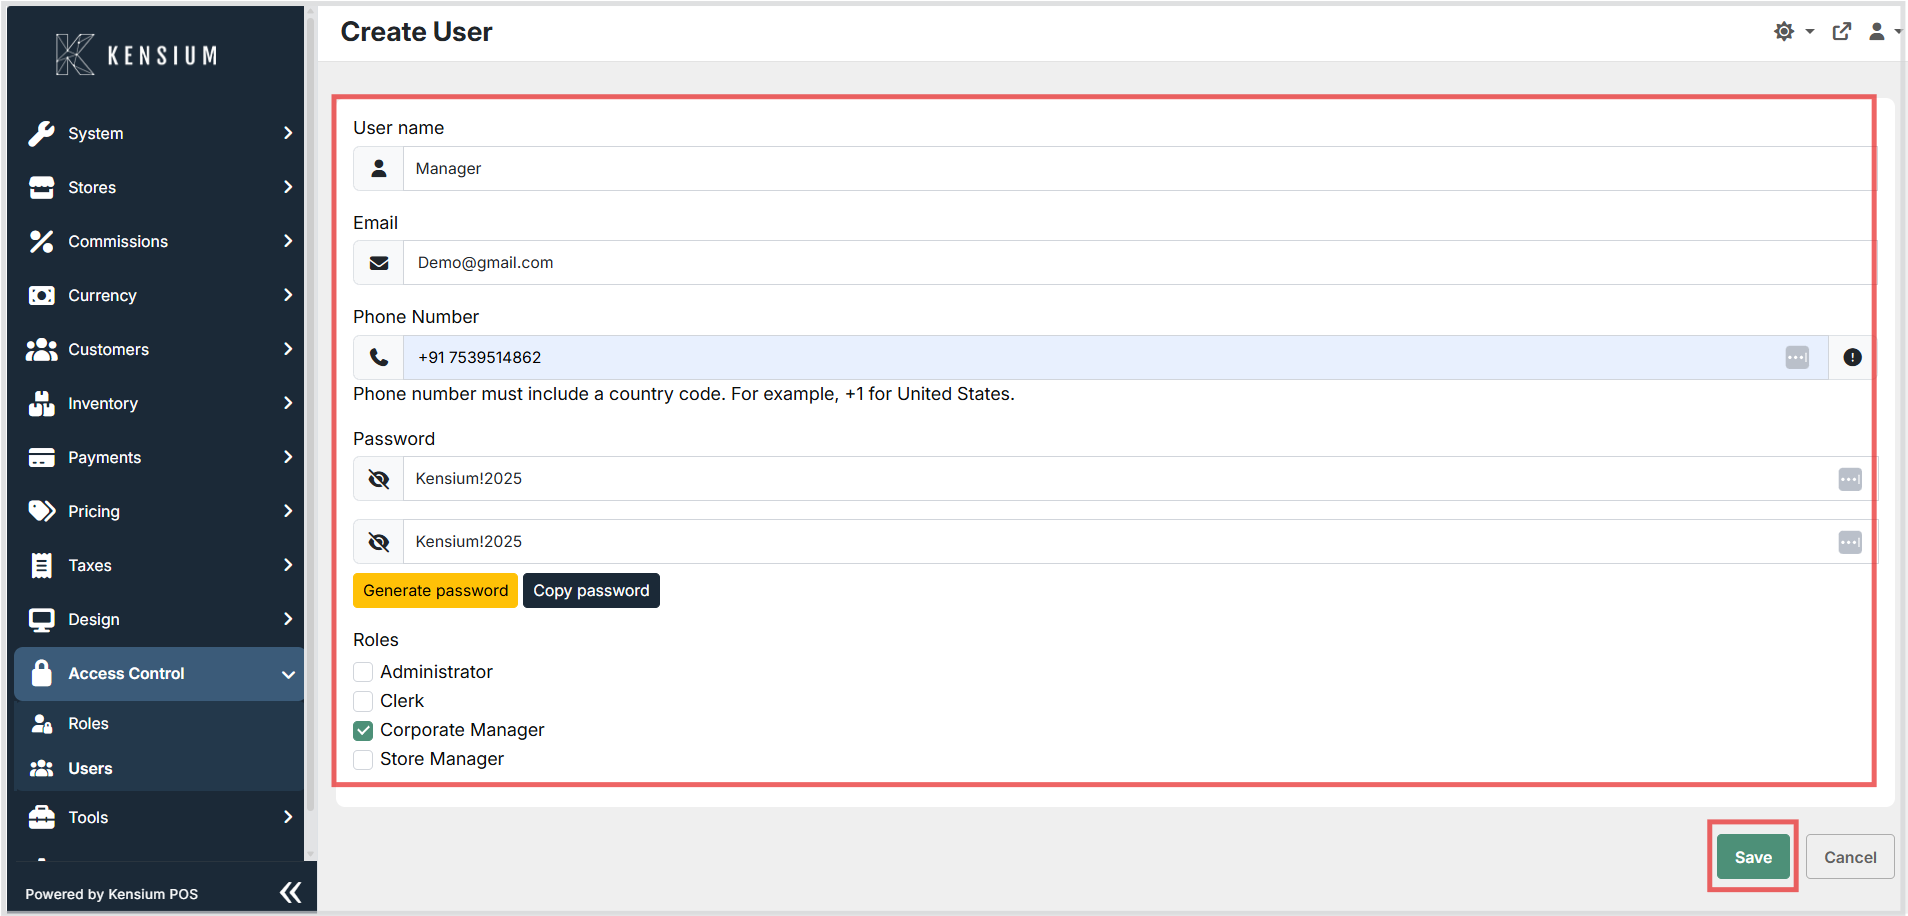
The new user account is immediately created and ready for use.
User Information Fields
| Field | Description |
|---|---|
| User ID | Unique identifier for the user. Used for system login and employee tracking. Cannot be changed after creation. |
| First Name | Employee's first name. Required field. |
| Last Name | Employee's last name. Required field. |
| Group ID | Assigns the user to a user group for organizational structure and permissions. Optional field. |
| Electronic ID | Electronic identifier (badge, card number, etc.) for the user. Optional field used for system integration. |
| Commission Plan | Assigns a commission plan to the user for sales tracking and calculations. Optional field. |
| Time Clock Login | Enables or disables time clock login capability. When enabled, the user can use time clock devices. Optional feature. |
Password Management
Password management allows secure authentication for user accounts.
| Action | Description |
|---|---|
| Set Password During Creation | Enter password and confirmation when creating a new user. |
| Password Requirements | Passwords should be secure and meet organizational security policies. |
| Edit Password | Administrators can update a user's password from the Users list by clicking the password edit option. |
| Password Security | Passwords are not displayed when editing user accounts (security best practice). Only administrators can reset or change passwords. |
User Groups
User groups provide organizational structure for managing users:
- Groups can be assigned to users for logical organization
- Groups help with access control and permission management
- A user can be assigned to one group
- Group assignments can be modified when editing a user
For detailed information about user groups, navigate to the User Groups section under Access Control.
Editing a User
To modify an existing user:
- Navigate to
Access Control → Users - Click Edit next to the user
- Update required fields (User ID cannot be changed)
- Modify optional fields as needed
- Update password if required
- Click Save
Changes take effect immediately.
Deleting a User
To delete a user account:
- Navigate to
Access Control → Users - Click Delete next to the user
- Confirm the deletion
Warning
Deleting a user account removes the user's system access. Consider disabling a user instead of deleting if you need to maintain audit history. Deleted users cannot be recovered.
User and Role Relationship
Users and roles work together to provide system access control:
- Users are employee accounts in the system
- Roles define permissions and access levels
- A user can have multiple roles assigned
- Removing a role assignment immediately removes those permissions from the user
- Modifying a role's permissions affects all users assigned to that role
For detailed information about roles and permissions, refer to the Roles document.
Recommendations
- Create users only for employees who need system access
- Assign the minimum roles required for job responsibilities
- Regularly review user accounts and role assignments
- Use user groups to organize employees by department or location
- Keep user records current by updating information as employees change roles
- Disable accounts for employees who leave rather than deleting them
- Monitor user activity and access patterns for security purposes
Best Practices
- Use clear, consistent user ID naming conventions across environments
- Ensure each user has appropriate roles for their responsibilities
- Document reasons for access level assignments
- Audit user accounts periodically to ensure accuracy
- Implement security policies for password management
- Train users on system access and responsibilities