Customer Management
Create, search, and manage customer information during sales transactions.
Customer management connects transactions to customer records, enabling loyalty programs, personalized service, and sales tracking. The system supports both new account creation and existing customer lookup.
Customer management enables:
- New customer account creation during transactions.
- Discovery and application of existing customer accounts to sales.
- Customer purchase history and account detail viewing.
- Application of customer-specific pricing and discounts.
- Customer information tracking for future transactions.
- Loyalty program benefits and tracking.
Customer accounts track purchase history, enable loyalty benefits, and facilitate better customer service.
Navigation:
Process Sales → Add Customer (Alt+A) or Search Customer
Creating a Customer
Creating a customer account enables you to attach the customer to transactions, track their purchase history, apply customer-specific pricing, and build loyalty records. Customers can be created on the fly during a sale.
Creating a new customer during sales:
- During Process Sales (F1), click the Add Customer button (or press Alt+A)
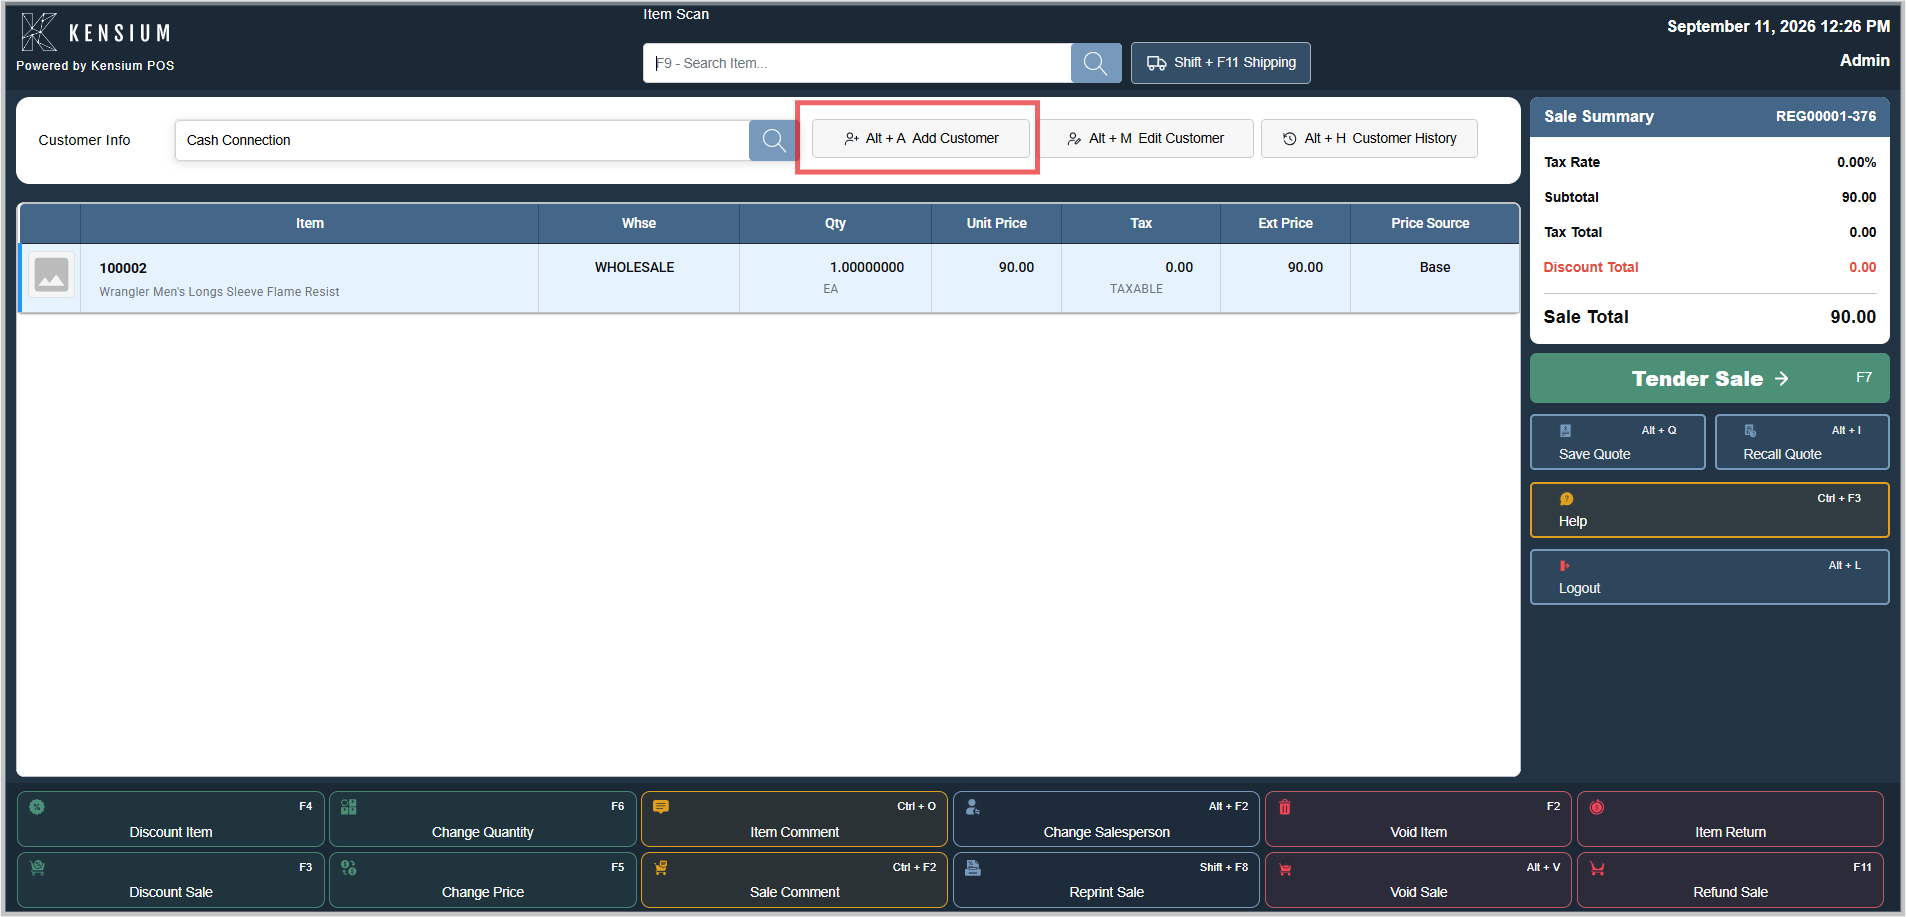
- The customer creation dialog opens with a form for entering information
- Enter customer information as available (see Available Fields below for complete list)
- Complete at least one name field (first name OR last name is required)
- Click Add Customer to create the customer record
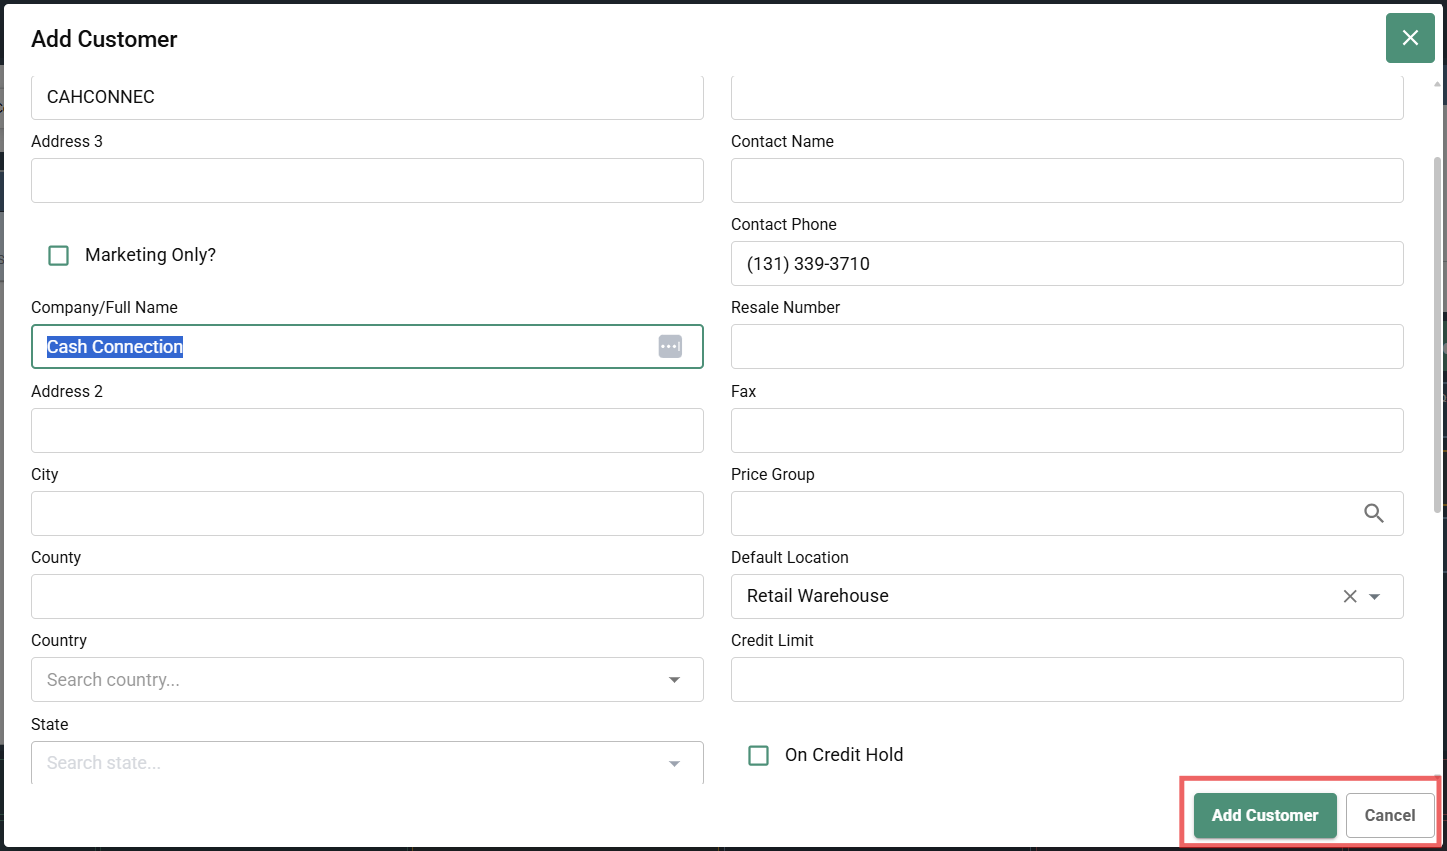
- The customer is automatically added to the current transaction
- Customer-specific pricing applies immediately if configured
Required Fields:
- First Name OR Last Name (at least one is required -both are preferred but not mandatory)
Optional Fields:
- Company, phone, email, address, and all other contact/business information
- These can be entered now or added later if the customer edits their profile
Typical workflow:
- Customer provides their name at checkout
- You search to see if they're in the system (F10)
- If not found, use Add Customer (Alt+A)
- Enter first name and last name (and any other info they provide)
- Click Save
- The sale continues with the customer attached
Searching for Customers
Finding and selecting an existing customer:
- The Search Customer or Select Customer button should be clicked.
- The search box should be used to find the customer.
- The customer should be selected from results.
- The customer is added to the transaction.
- Customer-specific pricing applies automatically.
Search works by: Last name, first name, phone number, company name, customer ID.
Search tips:
- Search by partial name (for example, "Smith" finds all Smiths).
- Use phone number to locate the customer.
- Create a new customer if not found.
Customer Information Fields
| Field | Required | Description |
|---|---|---|
| First Name | Optional | The customer's first name. |
| Last Name | Optional | The customer's last name. At least one name is required. |
| Company | Optional | Company or organization name. |
| Phone | Optional | Customer contact phone number. |
| Optional | The customer's email address. | |
| Address | Optional | Street address and location information. |
| Customer ID | Auto-generated | Unique identifier assigned by the system. |
Custom Customer Fields
Additional customer fields can be created and modified using Field Definitions in the Admin module. Administrators can add custom fields to capture business-specific information such as customer preferences, loyalty details, or special attributes. These custom fields will appear in customer creation and edit dialogs at the register.
Viewing Customer History
Viewing a customer's purchase history:
- A customer should be selected or searched for.
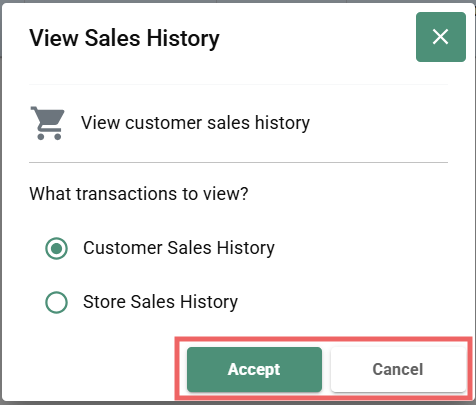
- Alt+H should be pressed or Customer History should be clicked.
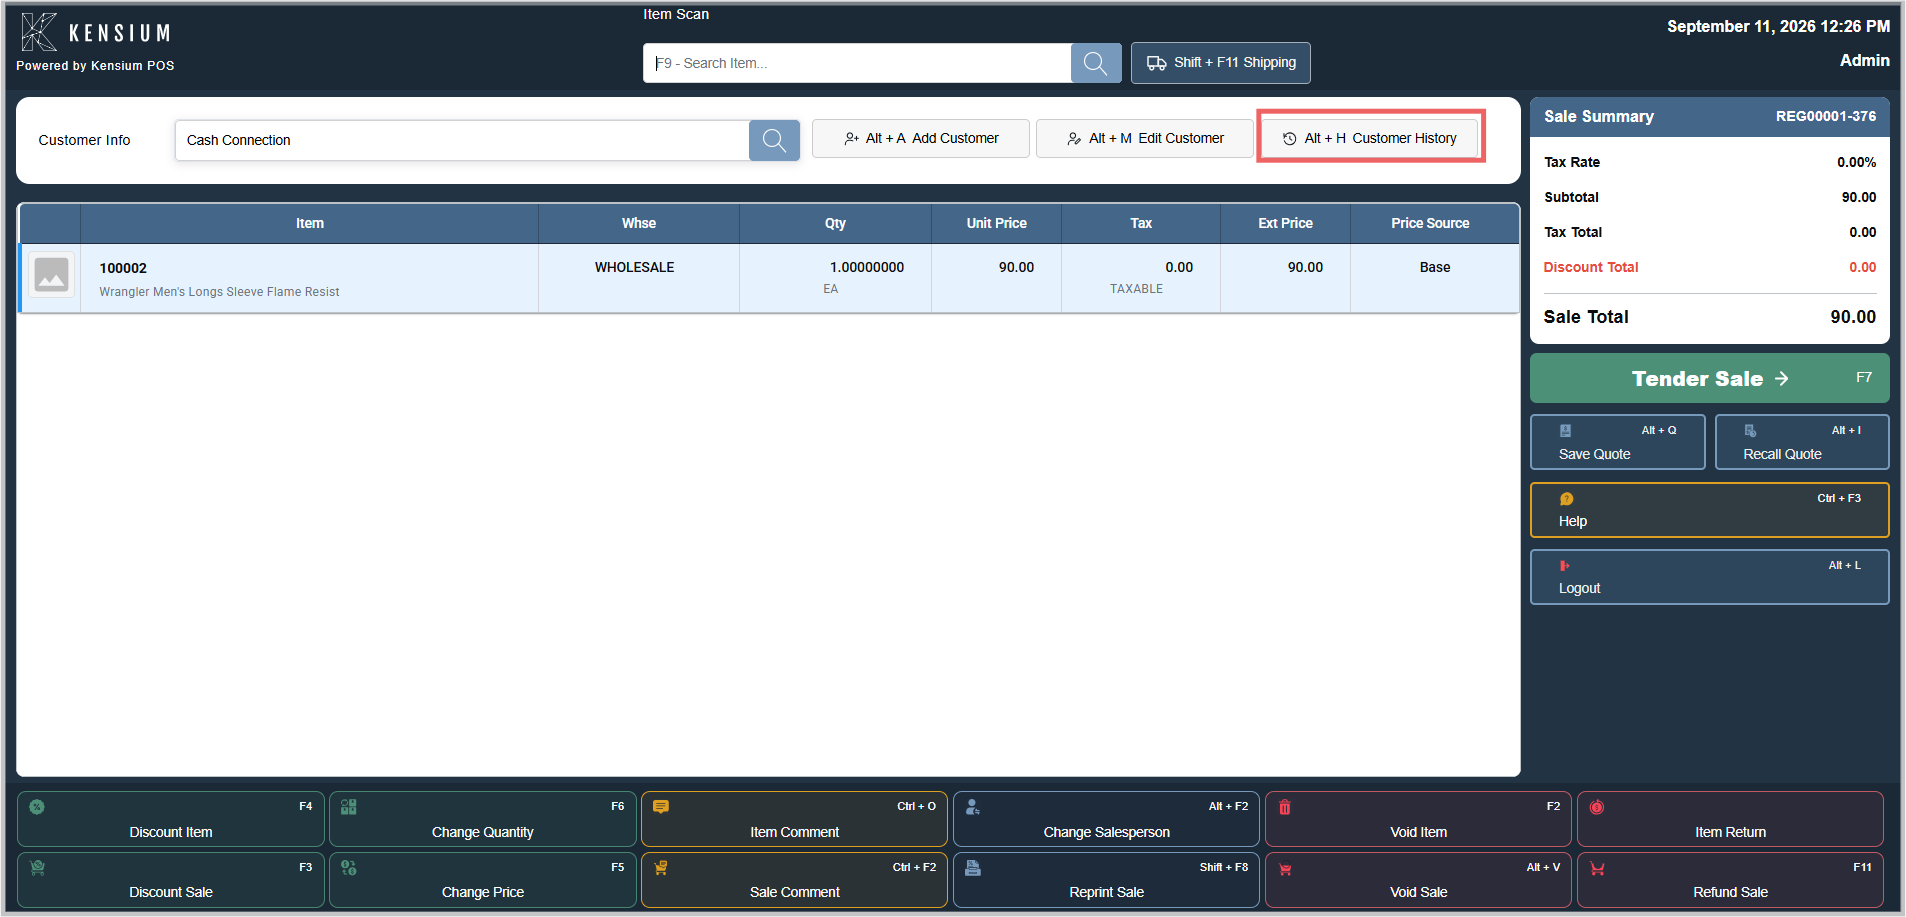
- The history dialog displays past transactions and details.
- Purchase patterns and order frequency should be reviewed.
- The information should be used for customer service and loyalty recognition.
Keyboard Shortcuts
| Shortcut | Action |
|---|---|
| Alt+A | Open Add Customer dialog. |
| F10 | Open Search Customer dialog. |
| Alt+H | View customer history. |
| Ctrl+L | Update loyalty program. |
Related Documentation
Remember
Existing customers should be searched for before creating a new account. Excellent service is provided to loyal customers by reviewing their purchase history. Customer information should be kept accurate and current for future transactions.
Available Screen Fields
Customer Creation Dialog - Personal Information:
| Field | Required | Description |
|---|---|---|
| First Name | Required or Last Name | Customer's given name |
| Last Name | Required or First Name | Customer's surname |
| Company/Full Name | Optional | Business or organization name |
| Contact Name | Optional | Contact person name |
| Loyalty ID | Optional | Customer loyalty program ID |
Customer Creation Dialog - Contact Information:
| Field | Required | Description |
|---|---|---|
| Phone | Optional | Primary contact phone number |
| Alternate Phone | Optional | Secondary phone number |
| Contact Phone | Optional | Alternative contact phone |
| Fax | Optional | Fax number |
Customer Creation Dialog - Address Information:
| Field | Required | Description |
|---|---|---|
| Address 1 | Optional | Primary street address |
| Address 2 | Optional | Secondary address line (apartment, suite, etc.) |
| Address 3 | Optional | Additional address information |
| City | Optional | City or municipality |
| County | Optional | County or district |
| State | Optional | State or province (searchable dropdown) |
| Country | Optional | Geographic nation (searchable dropdown) |
| ZIP | Optional | Postal code |
Customer Creation Dialog - Business Information:
| Field | Required | Description |
|---|---|---|
| Accounting ID | Optional | Internal accounting reference number |
| Resale Number | Optional | Resale or tax ID number |
| Price Group | Optional | Customer price group (searchable) |
| Default Location | Optional | Default warehouse/location for orders |
Customer Creation Dialog - Credit Information:
| Field | Required | Description |
|---|---|---|
| Credit Limit | Optional | Maximum credit allowed for customer |
| Credit Balance | Optional | Current credit balance |
| Credit Terms | Optional | Payment terms (searchable dropdown) |
| On Credit Hold | Optional | Checkbox to flag account on hold |
Customer Creation Dialog - Tax Information:
| Field | Required | Description |
|---|---|---|
| Tax Schedule | Optional | Tax rate schedule (searchable) |
| Tax Number | Optional | Tax identification number |
Customer Creation Dialog - Other:
| Field | Required | Description |
|---|---|---|
| Marketing Only? | Optional | Checkbox for marketing contact preferences |
Customer Search Results display: - First Name, Last Name, Company/Full Name, Phone, Loyalty ID
Editing Customer Information
Who can edit: Store managers and administrators only
To update customer information:
- Search for the customer.
- Click Edit Customer (or press Alt+M).
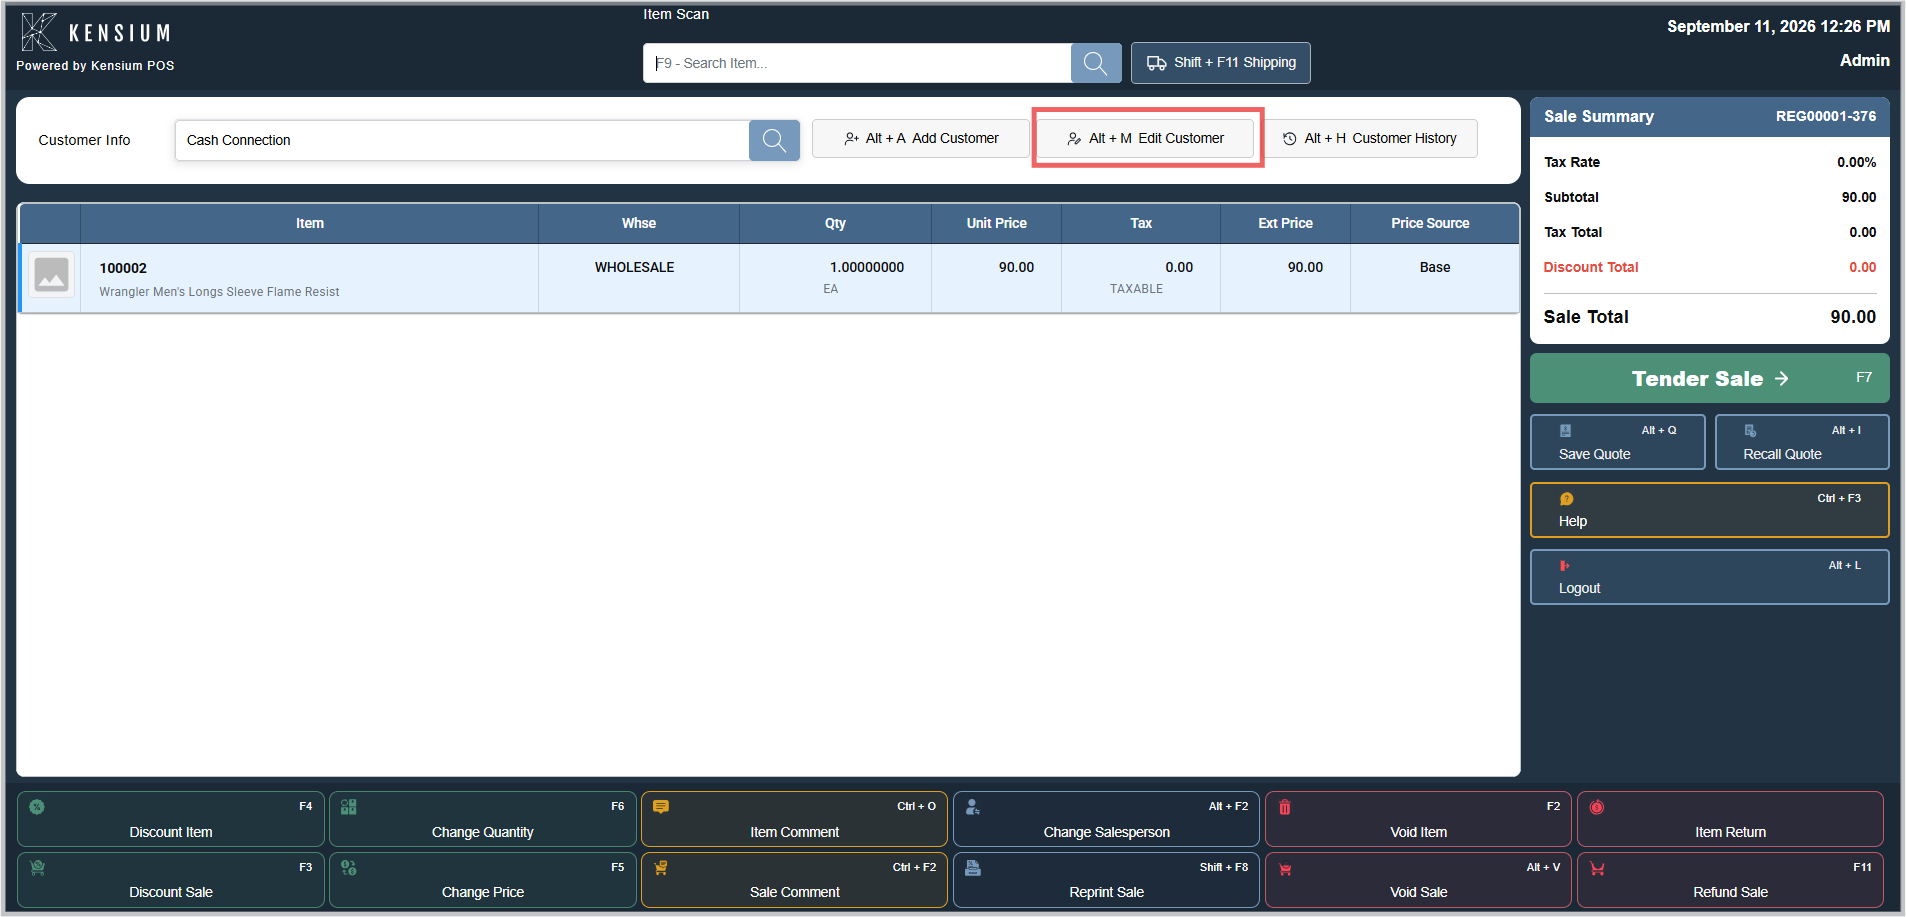
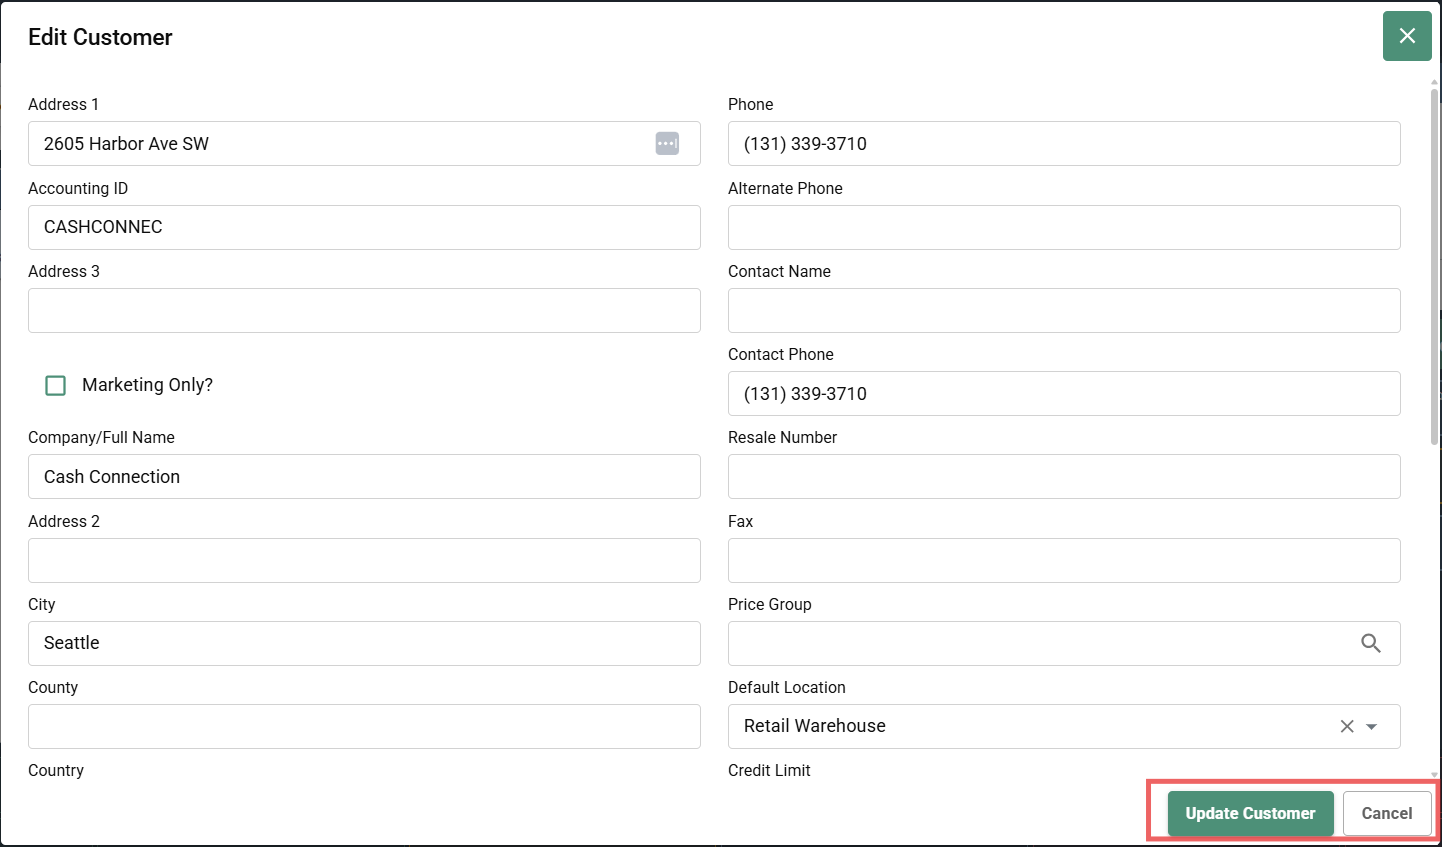
- The Edit Customer dialog opens with all current customer details.
- Update the fields as needed:
- Contact fields: Name, phone, email, address
- Business fields: Company name, accounting ID, resale number
- Location & pricing: Default location, price group
- Credit fields: Credit limit, credit terms, credit hold status
- Click Update Customer to save changes.
What can be edited anytime:
- Name, company, phone, email, address, contact information
- Accounting ID, resale number, default location
- Price group, tax information
- Marketing preference checkbox
What may require approval:
- Credit limit changes
- Credit terms modifications
- Credit hold status changes
Note
All fields visible in the Edit Customer form can be modified based on user permissions. Store managers have full access to editing customer information. Some credit-related changes may require manager or administrator approval depending on your store's policies.
User Permissions
| Role | Can Create | Can Search | Can Edit | Can View History |
|---|---|---|---|---|
| Cashier | During sales only | ✓ | ✗ | ✓ |
| Manager | Anytime | ✓ | ✓ | ✓ |
| Admin | Anytime | ✓ | ✓ | ✓ |
Having customer issues? See the FAQ for error messages and solutions.