Receipt Inserts
| Summary Information | |
|---|---|
| Menu Path: | Stores — Receipt Inserts |
| Required Feature(s): | Stores |
Navigation:
Stores → Receipt Inserts
The Receipt Inserts module allows administrators to configure additional content that appears on printed or digital receipts. These inserts can include promotional messages, store policies, disclaimers, or other informational text displayed to customers during the receipt generation process.
Receipt inserts support conditional display based on criteria such as customer class, inventory class, item selection, or store location. This enables businesses to present targeted messaging during transactions.
Purpose of Receipt Inserts
Receipt inserts are used to:
- Display additional messages on receipts
- Provide promotional or informational content
- Include store policies or disclaimers
- Support targeted messaging based on transaction context
- Enhance customer communication during checkout
Each receipt insert defines a specific message and the conditions under which it will appear on a receipt.
Creating or Editing a Receipt Insert
To create or modify a receipt insert:
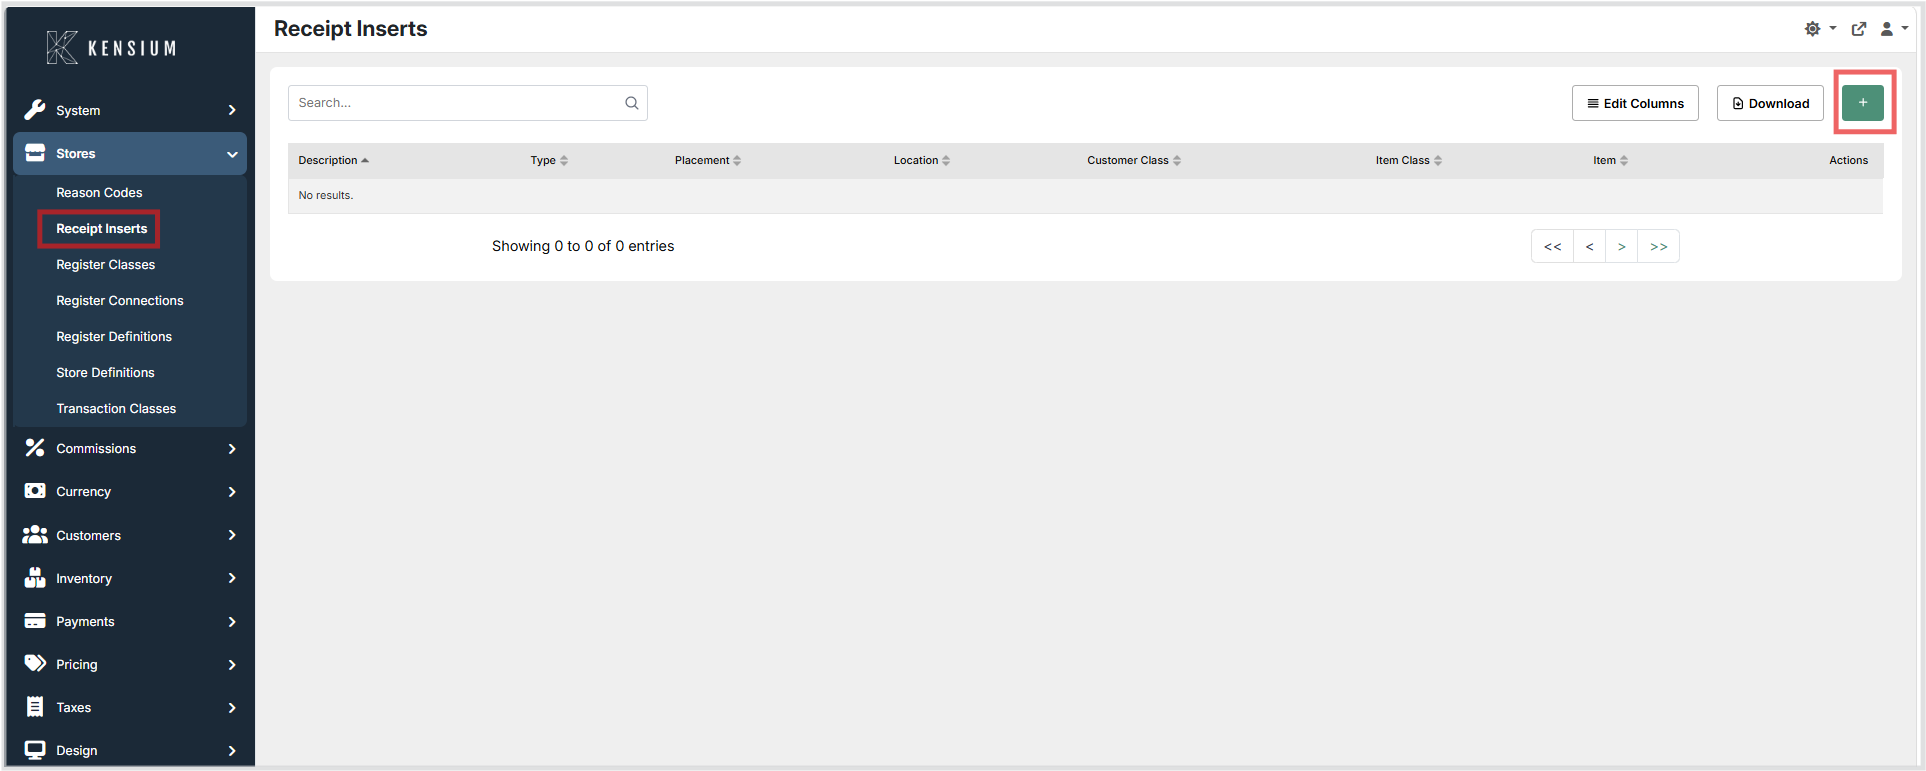
- Navigate to Stores → Receipt Inserts.
- Click the + button to create a new receipt insert, or choose an existing receipt insert to edit.
- Enter the relevant configuration details.
- Click Save to apply the changes.
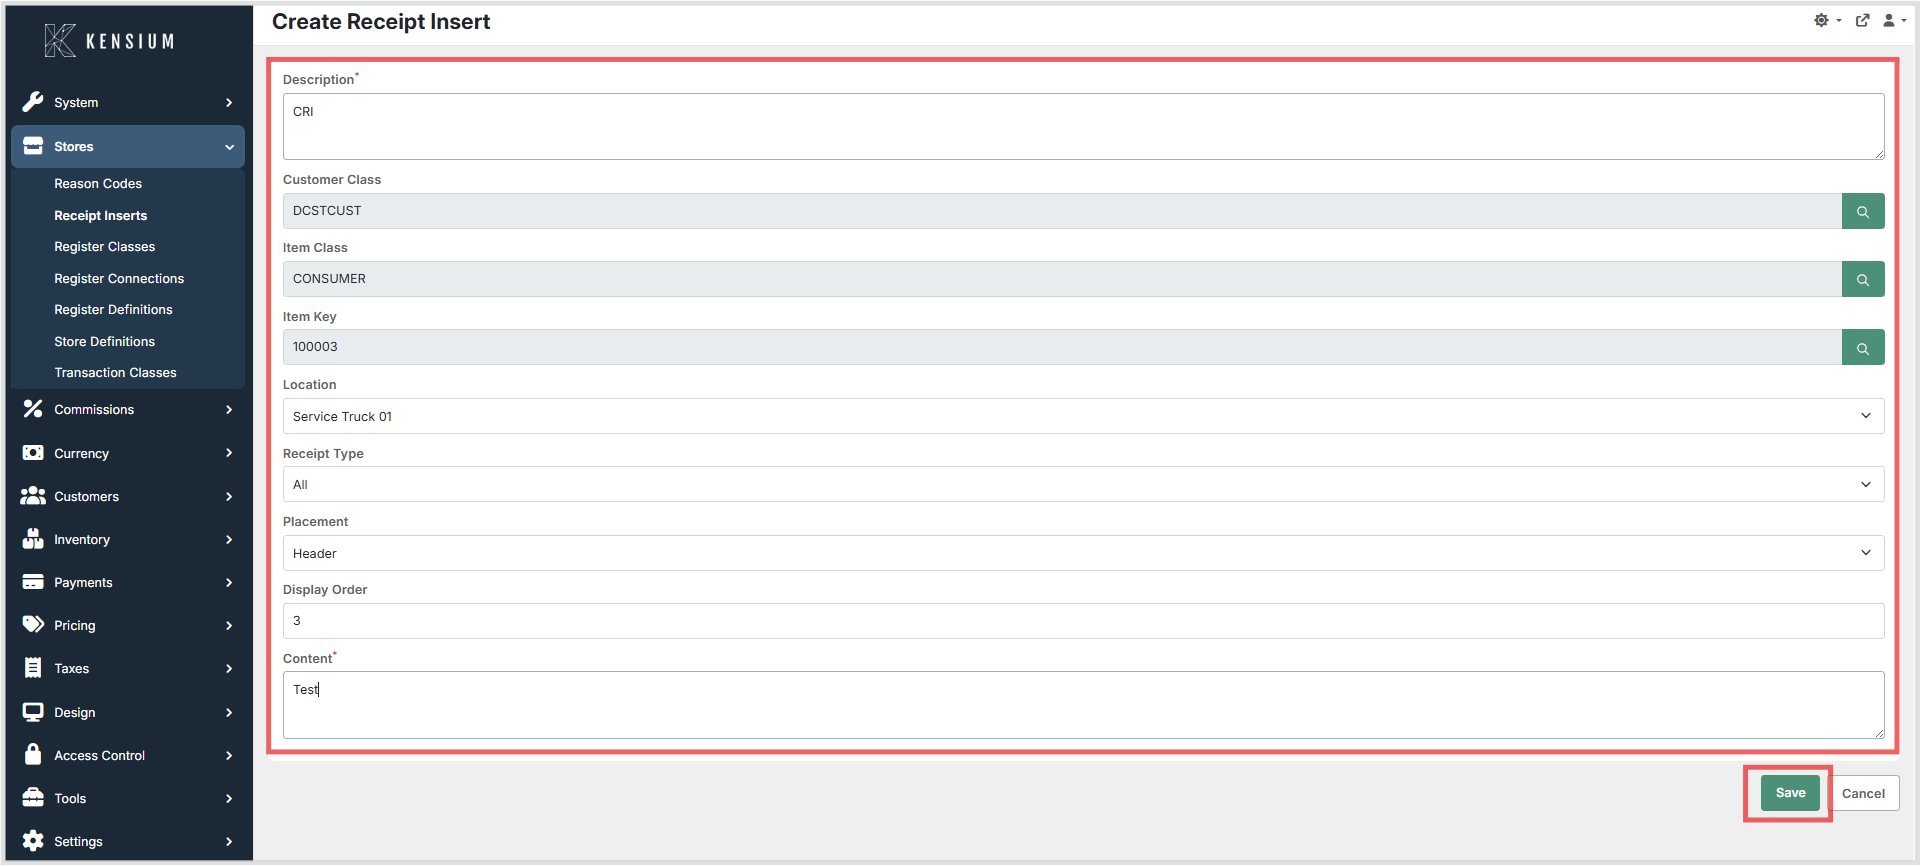
Once saved, the receipt insert becomes available for use during receipt generation based on the defined configuration.
Available Fields
| Field | Description | Field Behavior |
|---|---|---|
| Description | A descriptive name used to identify the receipt insert. | Used within the administrative interface to identify the insert configuration. |
| Customer Class | Specifies the customer classification associated with the receipt insert. | When defined, the receipt insert is displayed only for transactions involving customers within the selected class. |
| Inventory Class | Defines the inventory classification associated with the receipt insert. | The insert will appear only when items belonging to the specified inventory class are included in the transaction. |
| Item Key | Specifies an individual item associated with the receipt insert. | If configured, the receipt insert is displayed when the selected item appears in the transaction. |
| Location | Specifies the store or inventory location where the insert applies. | Limits the display of the insert to transactions processed at the specified location. |
| Receipt Type | Defines the type of receipt where the insert should appear. | Determines which receipt formats or transaction types will include the insert message. The available options are: Sales only - The insert is displayed only on normal sales/checkout receipts. Use this for promotional or post-purchase messages (example: "Join our loyalty program - 10% off your next purchase"). Refunds only - The insert appears only on refund or return receipts. Use this for return policies, warranty notes, or exchange instructions (example: "Returns accepted within 30 days with original receipt"). All - The insert is shown on both sales and refund receipts. Use this for general messages that apply to every transaction (example: "Thank you for shopping with us"). |
| Placement | Determines where the insert appears on the receipt. | Selects the visual placement for the insert. The available options are: Header - Printed at the top of the receipt. Use for store identification, promotional headlines, or important pre-transaction notes (example: "Holiday sale - up to 50% off selected items"). Header inserts appear above the itemized list and are good for bold, concise messages or branding elements. Footer - Printed at the end of the receipt. Use for closing messages, store contact details, legal disclaimers, or multi-line content (example: "Visit our website for coupons - www.example.com"). Footer inserts typically appear after totals and tax lines and are suitable for longer messages. Line item - Displayed in-line with individual item lines. Use this when the message relates to a specific product or item (example: "Buy 2 get 1 free on select items"). Line item inserts are repeated for each matching line and should be short to preserve receipt layout. |
| Display Order | Specifies the sequence in which inserts appear relative to other configured inserts. | Lower values appear earlier in the receipt layout when multiple inserts are applied. |
| Content | The message or text displayed on the receipt. | This content is rendered in the receipt at the configured placement location when conditions are satisfied. |
Operational Considerations
- Use clear descriptions to easily identify receipt inserts within the administration interface.
- Apply conditional fields such as Customer Class, Inventory Class, or Item Key to control when inserts appear.
- Use Display Order to maintain consistent receipt formatting when multiple inserts are configured.
- Ensure receipt messages are concise and suitable for receipt formatting.
- Review receipt layout configurations to confirm proper placement of inserts.