Kensium POS
Welcome
Comprehensive technical documentation for point-of-sale operations, system administration, and enterprise integration.
Documentation Overview
| Module | Purpose | Technical Focus | Audience |
|---|---|---|---|
| Usage | Point-of-sale operations and transaction management | Sales processing, payment handling, inventory transactions | Cashiers, Managers, Operators |
| Admin | System administration and configuration | Settings management, user access control, business rules | System Administrators, IT Staff |
| Integration | Third-party system connectivity and data exchange | API integration, ERP connectivity, data synchronization | IT Teams, Integration Engineers |
| Release Notes | Version history and feature documentation | Technical changes, breaking changes, upgrade path | All Users |
| Installation | Deployment and infrastructure setup | System requirements, deployment procedures, configuration | Kensium Support, IT Operations |
| Knowledge Base | Technical reference and troubleshooting | Error codes, system behavior, advanced topics | Support Teams, Advanced Users |
User Workflows
Documentation Standards
✓ Completeness
All procedures include prerequisites, step-by-step instructions, screenshots, and expected results.
✓ Technical Accuracy
Documentation reflects Kensium Point-of-Sale 7.0 functionality. Version-specific variations noted where applicable.
✓ Error Handling
Common errors, error codes, and resolution procedures included in relevant topics.
✓ Security & Permissions
Required permissions and security considerations documented for each procedure.
✓ Navigation References
Menu paths use format: `Menu Name → Submenu → Item`. Keyboard shortcuts provided.
✓ Searchability
Full-text search across all documentation topics for quick reference location.
Module Dependencies
Documentation Architecture & Workflow
Optional
Support
Each module builds on previous layers. Installation is foundation. Admin Configuration establishes organizational structure. Usage covers daily operations. Integration and Knowledge Base extend capabilities.
Technical Information
Kensium Point-of-Sale 7.0 - All documentation current for this release
Check Release Notes for latest changes and new topics
Modern browsers with JavaScript enabled. Responsive design for desktop and mobile
Full-text search available across all documentation sections and topics
Support & Troubleshooting
Error codes, solutions, and advanced troubleshooting
Setup procedures and administrative settings
ERP, APIs, and third-party connectivity
Deployment procedures and system setup
Usage
Usage
The Usage section is for end-users and contains complete guides for daily point-of-sale operations.
Quick Navigation
🚀 Getting Started? Start Here
System and deployment requirements
Initial device setup and connection
User authentication procedures
Process your first transaction
Daily Operations Workflow
Typical POS Operation Flow
Documentation Sections
📚 Getting Started
Essential information for new users setting up and understanding the POS system:
🔑 Accessing POS
Guide to getting into the system and navigating the register interface:
🛒 Processing Sales
Complete guide to processing customer sales with keyboard shortcuts and UI commands:
💳 Tender
Payment collection and processing methods:
💵 Cash Handling
Cash management procedures for opening, closing, and during-shift operations:
📖 Other
Additional references and tools for daily operations:
Getting Started
Getting Started
Welcome to Kensium Point-of-Sale. This section will help you understand what you need and what to expect when you get started.
Your Getting Started Path
Follow these topics in order to get up to speed:
Important terms and how Kensium Point-of-Sale works
What happens when you engage Kensium
What equipment you'll need
Topics in This Section
🔑 Key Concepts
Learn the important terms and concepts you should know about Kensium Point-of-Sale - what a POS is, how Kensium works, and fundamental ideas like sessions, transactions, and payment methods.
Read: Key Concepts →🚀 Deployment Overview
Understand what to expect when you choose Kensium Point-of-Sale - how the implementation works, what the process looks like, and how our team helps you get set up.
Read: Deployment Overview →📋 System Requirements
See what equipment and software you'll need. We provide recommended specifications and information about compatible servers, browsers, printers, and payment systems.
Read: System Requirements →Next Steps
Once you understand the basics:
- Login to Kensium Point-of-Sale: Access the system with your credentials
- Explore the admin panel: Configure users and settings
- Start processing sales: Begin using the system
Questions? Our Implementation team is ready to help guide you through getting started with Kensium Point-of-Sale.
Key Concepts
A Point of Sale system helps you run your store by tracking sales, payments, inventory, and staff. Kensium Point-of-Sale keeps everything organized and up-to-date automatically.
How Kensium Point-of-Sale Works
- Connects with Acumatica: Products flow from Acumatica to Kensium, sales flow back automatically
- Offline capability: Store operates even without internet; syncs when connection returns
- Fulfillment options: In-store pickup, ship from Acumatica, BOPIS, BORIS
Key Terms You Should Know
| Term | Definition |
|---|---|
| Register | The computer or device where you process sales. Each register is assigned a number (Register #1, Register #2, etc.). |
| Cash Drawer | The physical cash box connected to your register. It holds the money from sales. You count it at the start and end of your shift. |
| Transaction (or Sale) | A complete purchase from a customer. It includes what they bought, how much they paid, and what payment method they used. |
| Tender (Payment Method) | How the customer pays: cash, credit card, debit card, gift card, etc. Some customers pay with more than one method (split payment). |
Sales & Transactions
Current Sale: Being assembled, temporary, can be cancelled
Completed Sale: Finalized, paid, locked, counted in drawer
Payment Methods (Tender): Accepted methods are cash, credit/debit card, check, gift certificate, store credit, account payment. One sale can use multiple payment methods (split payment).
Customer Types
Kensium Point-of-Sale handles three types of customers:
Acumatica Customer
Individual transactions are automatically posted to Acumatica. Useful for wholesale or business customers.
Marketing Customer
Kensium keeps individual customer transaction data, but treats them as a default customer for posting to Acumatica. Useful for tracking customer behavior while simplifying accounting.
Default Customer
No customer recognition on the transaction - just a generic customer. Used for quick sales where you don't track who bought what.
Special Feature
Kensium can consolidate multiple transactions for Marketing and Default Customers when posting to Acumatica. This dramatically reduces the number of transactions in your accounting system while keeping all necessary data in Kensium.
Fulfillment Options – All the bases covered:
| Fulfillment Option | Key Features |
|---|---|
| Cash & Carry | Multiple payment types, single-step transactions |
| Acumatica Fulfillment | Create Sales Orders for future fulfillment (special orders, out of stock) |
| Mixed Mode | Combined carry-out + fulfillment with single payment record |
| BOPIS / BORIS | In-store pick up and online return processing |
Point of Sale Features
- Offline: Store operates without internet; syncs when connection returns
- Multiple Drawers: Configure multiple cash drawers as needed
- Mobile Order Pad: Create, save, and recall orders on mobile device. Useful for line busters and field sales
ERP Integration
Kensium Point-of-Sale integrates seamlessly with ERP systems through bi-directional data synchronization. Customers, inventory, and pricing are controlled by the ERP and automatically synchronized with Kensium Point-of-Sale. Key capabilities include:
- Automatic data exchange: Items and pricing flow from ERP to Kensium Point-of-Sale; sales transactions flow back to ERP
- Accounting customers: Create and maintain ERP customers directly from the register with credit checks
- Consistent pricing: Customer-specific pricing from ERP is applied at the point of sale
- Complete inventory control: Managed entirely from the ERP with real-time visibility
- Transaction posting: Accounting customer transactions post directly to ERP invoices; other customers can be consolidated for batch posting
No manual updates needed - synchronization happens automatically on a scheduled basis.
Tax Handling
- External Tax (AvaTax): Real-time calculation from Avalara, considers location and exemptions
- Basic/Local Tax: Pre-configured rates, fixed percentage, works offline
Both calculate and apply tax automatically.
Deployment Overview
When you decide to implement Kensium Point-of-Sale for your retail business, here's what the process looks like.
The Implementation Journey
Step 1: Engagement with Implementation Team
You'll work with our Kensium Implementation team. They're your partners in getting POS up and running for your business.
Step 2: Planning & Configuration Discussion
Together with your Implementation team, you'll discuss:
- Your store layout and structure
- How many registers you need
- Your payment processing methods
- Which products and pricing you want to manage
- Your staffing and user access needs
- Integration with your existing systems (like Acumatica)
- Timeline and any special requirements
This conversation results in an Implementation Plan - a clear roadmap for your POS deployment.
Step 3: Kensium Handles Installation & Setup
Your Implementation team takes care of:
- Installing Kensium Point-of-Sale on your servers and registers
- Setting up your database
- Configuring payment processing
- Integrating with your ERP system
- Creating user accounts and permissions
- Initial system testing
You don't need to worry about technical details - we handle that.
Step 4: Training & Go-Live
Before you start selling:
- Your staff gets trained on how to use Kensium Point-of-Sale
- You test the system in your store
- We make any adjustments you need
- You're ready to start processing sales
What You Need to Provide
- Access to your store and network
- Information about your existing systems
- Your staff for training
- Feedback during setup
After Go-Live
What's next:
- Monitor system performance and usage
- Add new registers or users as needed
- Adjust configurations based on your operations
- Use reporting and analytics to optimize workflows
Ready to get started? Contact our sales team to discuss your retail needs and begin the implementation planning process.
System Requirements
What You Need to Get Started
Before implementing Kensium Point-of-Sale, here's what you should have in place.
Note
These are our recommended specifications. If your environment is different, contact our Implementation team to discuss what configurations might work for your store.
Server
Kensium Point-of-Sale works best with:
- Docker containerized deployment - Makes setup and updates easier
- Or a dedicated server with modern specifications
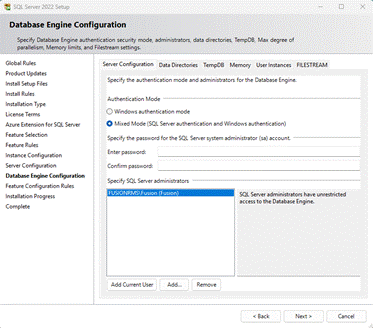
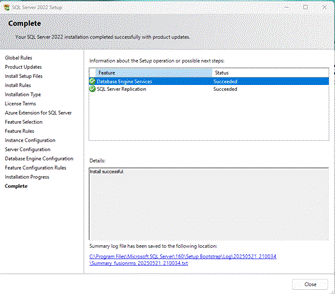
- Database: SQL Server 2022 or higher
Other configurations?
If you don't have Docker or would prefer a different setup, our Implementation team can discuss alternative deployment options during your planning phase.
Web Browsers
Kensium Point-of-Sale works on modern web browsers:
- Chrome
- Edge
- Firefox
- Safari
Browser hardware: Any computer or tablet with at least 4GB of RAM and a modern processor
Tip
Touchscreen devices work great for register terminals.
Printers
Kensium Point-of-Sale supports:
- Epson TM-m30III Wi-Fi
- Epson TM-m30III Bluetooth
- Star Micronics mCP3
- Zebra ZD888
These printers connect via USB, network, or wireless.
Scanners
Barcode scanners that work with standard USB or keyboard input are supported. Most common retail barcode scanners work fine with Kensium Point-of-Sale.
Payment Terminals
Kensium Point-of-Sale supports various payment processors. The specific payment terminals you can use depend on which processor you choose:
- Fortis: Specific terminal models supported
- Ebiz: Specific terminal models supported
- Stripe: Compatible with Stripe-approved terminals
Your Implementation team will help you select the right payment terminal for your processor during planning.
Internet Connection
- Kensium Point-of-Sale works offline, so internet isn't required for sales
- Internet is needed for syncing data and processing certain transactions
- A stable connection helps everything work smoothly
What About My Current Equipment?
If you already have servers, computers, or printers you'd like to use, tell your Implementation team during the planning phase. They can evaluate whether your equipment will work with Kensium Point-of-Sale.
Next Steps
- Review these requirements
- Gather information about your current setup
- Contact our sales team to connect with an Implementation specialist
- They'll discuss your specific situation and create a plan that works for you
Accessing POS
Accessing POS
Guide to getting into the Kensium Point-of-Sale system and navigating the register interface.
Before you can process sales, you need to access the system, select your register, and log in. This section covers the complete authentication and initialization workflow.
What You'll Learn
Initial device setup and connection
Choosing your register and operating mode
Logging in with your credentials
Understanding the home page and main functions
Documents in This Section
🔌 Connect Register
Step-by-step guide to connecting your POS register device to the system. Includes obtaining connection keys, device registration, and confirmation of successful connection.
Read: Connect Register →📋 Register / Admin Selector
Step-by-step guide to selecting your register terminal and choosing your operating mode (Operator, Manager, or Admin). Includes drawer assignment workflow and pre-login procedures.
Read: Register / Admin Selector →🔐 Login
Complete guide to user authentication including login screen overview, entering credentials, troubleshooting login issues, and security best practices for managing user sessions.
Read: Login →🏠 Home Page
Complete reference for the main register screen showing all available functions, keyboard shortcuts, and main navigation options for starting your shift and accessing POS operations.
Read: Home Page →Quick Start Path
- Connect your register: Connect Register - Initial device setup
- Select your register: Register / Admin Selector - Choose register and role
- Log in: Login - Authenticate yourself
- Start working: Home Page - Understand the main screen
Register/Admin Selector
When you open Kensium Point-of-Sale, you'll see two options. Select the path that matches what you need to do.
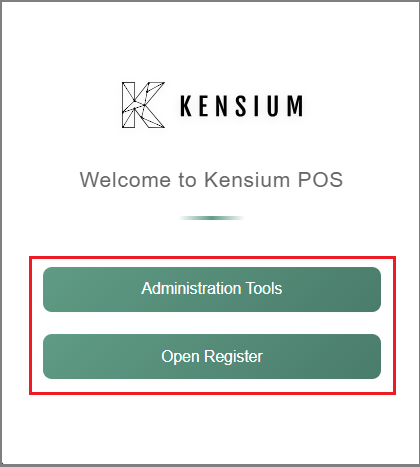
Choose Your Path
Administration Tools
Access system configuration and management features. Set up users, stores, registers, inventory, pricing, and business rules. For administrators and managers only.
Open Register
Process customer sales and manage daily operations. Select your register terminal, log in, and start handling transactions, payments, and cash management.
Related Documentation
Remember
Select your register carefully before logging in. Once you open the drawer, you're committed to that register for the shift. Your transactions are tied to this specific register for audit purposes.
Register Log In
Authenticate your credentials to access the Fusion Register and begin your shift.
Screen Layout
The login screen contains:
- Kensium Logo: Company branding at the top
- Username field: Text input for your username
- Password field: Secure input with visibility toggle (eye icon)
- Log In button: Green button to submit credentials
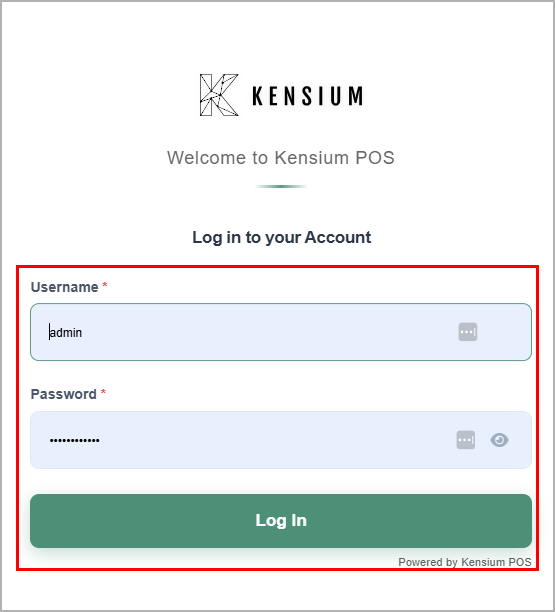
How to Log In
Enter Username
Type your assigned username (case-sensitive)
Enter Password
Type your password (characters masked)
Click Log In
Or press Enter to submit
Home Page Opens
Ready to start your shift
Tips Before Logging In
- Username: Check with your manager if you don't know it
- Caps Lock: Ensure it's OFF if your password has lowercase letters
- Password visibility: Click the eye icon to verify you typed it correctly
- Security: Never share your login credentials with others
Common Issues & Solutions
❌ Invalid Username or Password
Problem: Login failed with incorrect credentials error
Solutions:
- Verify Caps Lock is OFF
- Check username spelling (usernames are case-sensitive)
- Confirm password is correct
- Contact your manager if you forgot your credentials
🌐 Connection Error
Problem: Network or server connection issues
Solutions:
- Verify register is connected to network
- Check network cable or WiFi connection
- Wait a few moments and try again
- Restart the browser
Security Best Practices
DO:
- ✓ Keep your password confidential
- ✓ Always log out when leaving the register
- ✓ Use your own assigned credentials
- ✓ Report suspicious activity to your manager
DON'T:
- ✗ Share your credentials with anyone
- ✗ Write passwords on sticky notes
- ✗ Leave the register logged in unattended
- ✗ Use someone else's login
Logging Out
When you finish your shift or need to step away:
- Press F10 or click Log Out from the home screen
- Confirm logout when prompted
- Register returns to login screen
Important: Always log out to prevent unauthorized access.
Related Documentation
Connect Register
Connect your register device to begin processing transactions. This guide walks you through the registration and connection process in 4 simple steps.
Overview
Before you can process sales, your POS register must be connected to the system at your Corporate location. This one-time setup ensures your device is linked and ready to process transactions.
Prerequisites
Before starting the connection process, ensure you have:
✓ Store and register information ready for registration ✓ Administrator access or Register Connection Key from your Corporate location ✓ Network connectivity on your register device
Connection Process
Step 1: Begin Setup
Navigate to the Connect Your POS Register page and select Begin setup.
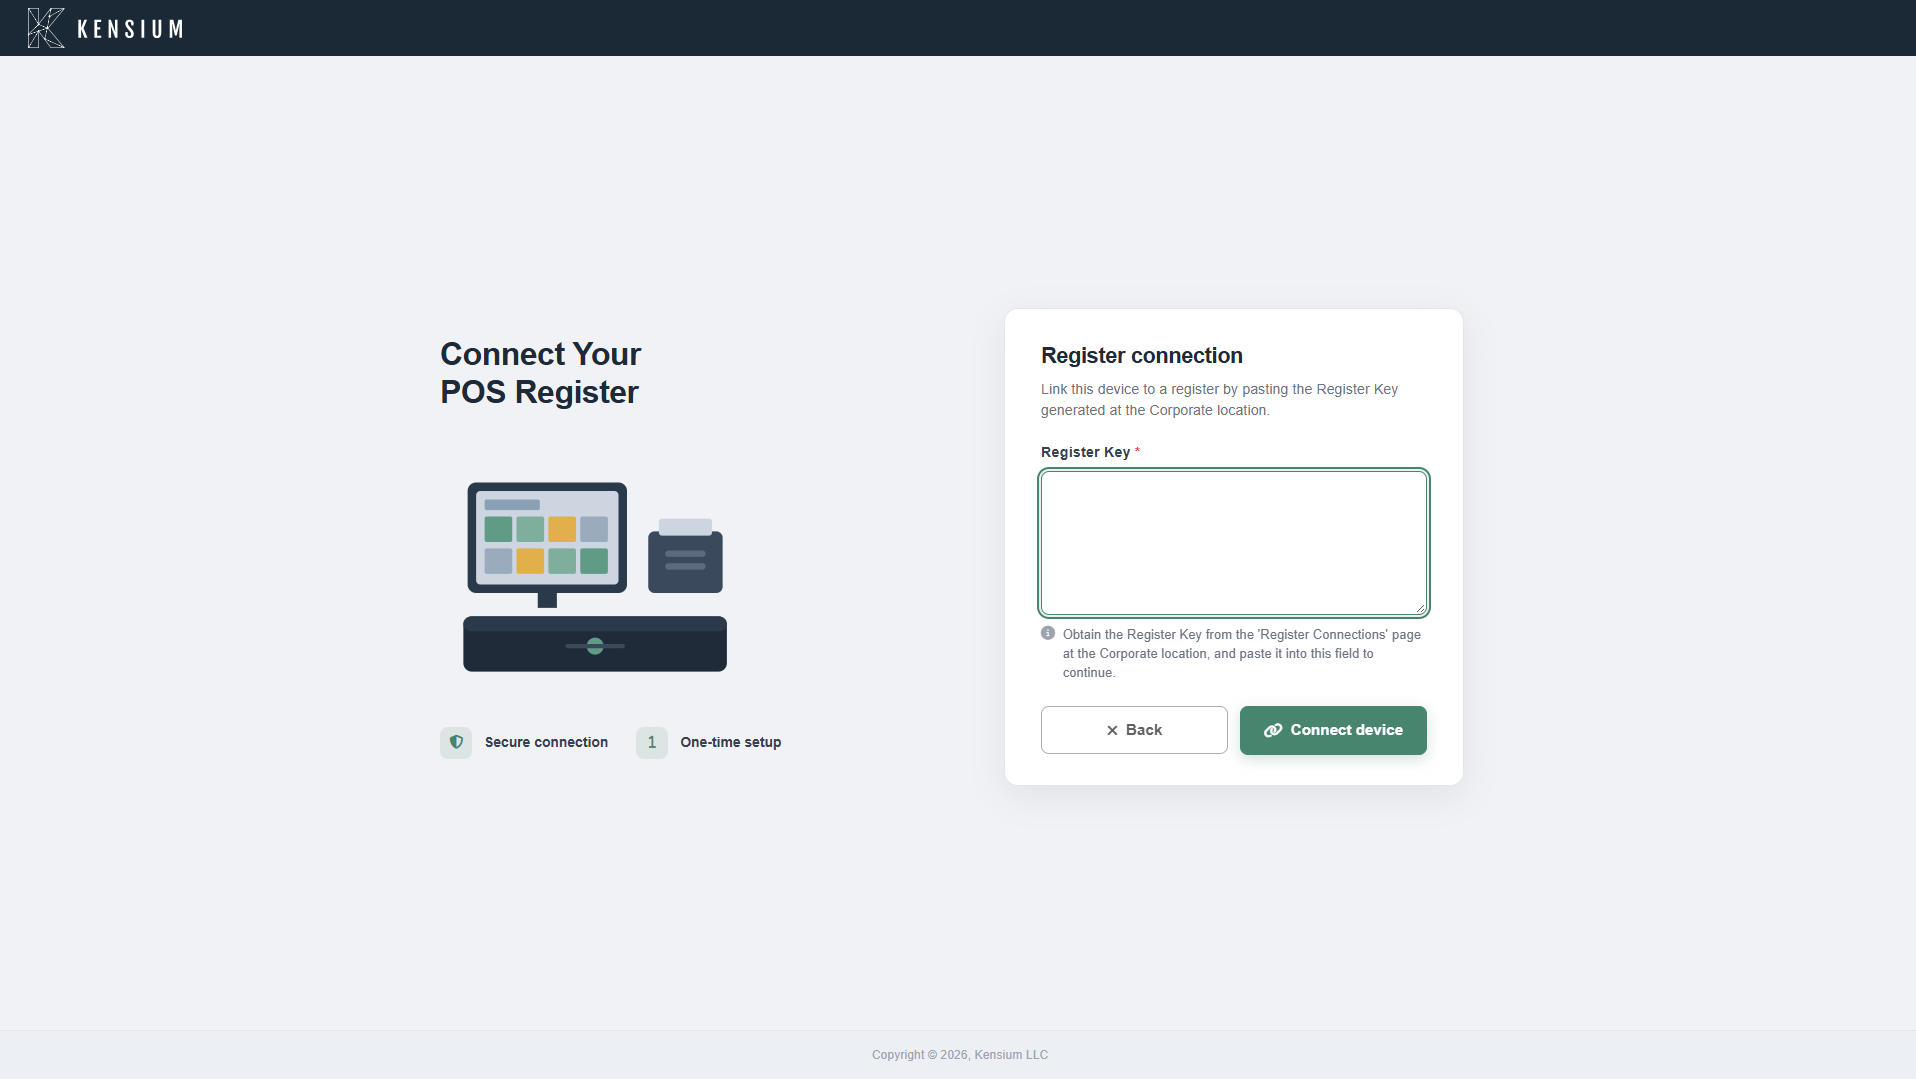
Step 2: Register Requirements
Review the checklist to ensure you have all necessary information:
- Store and register information ready
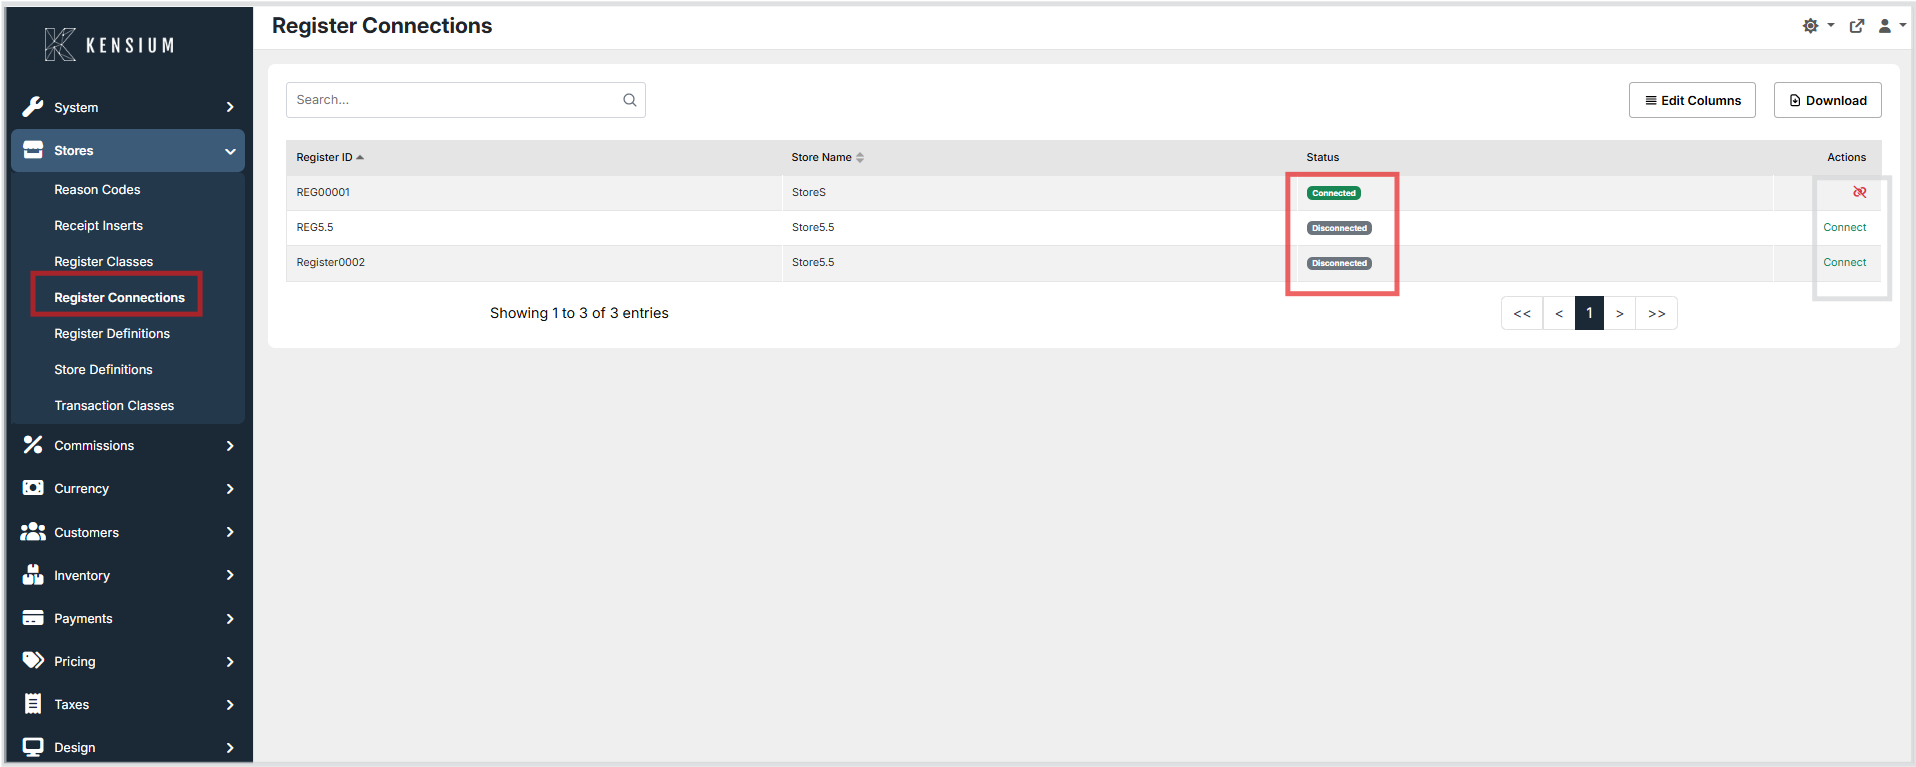
- Register Connection Key from your Corporate location (found under Stores > Register Connections in POS Administration)
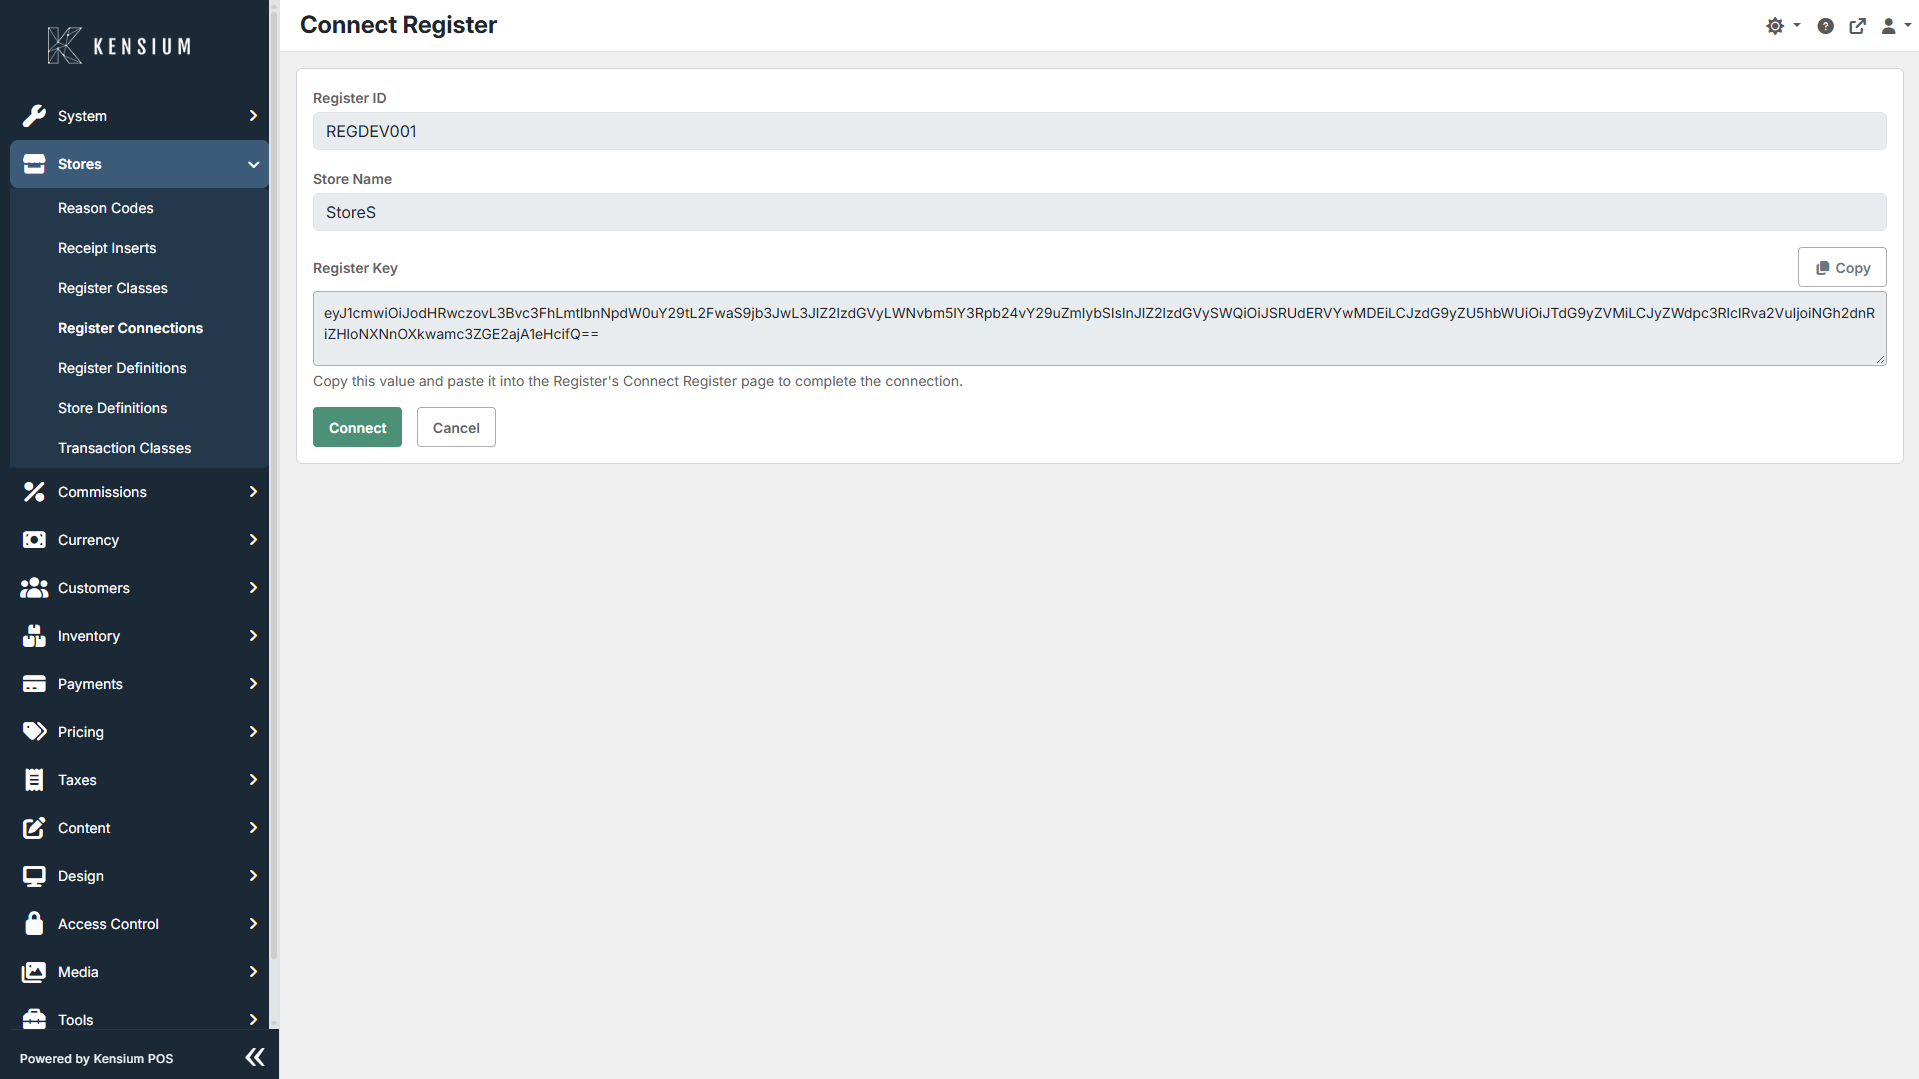
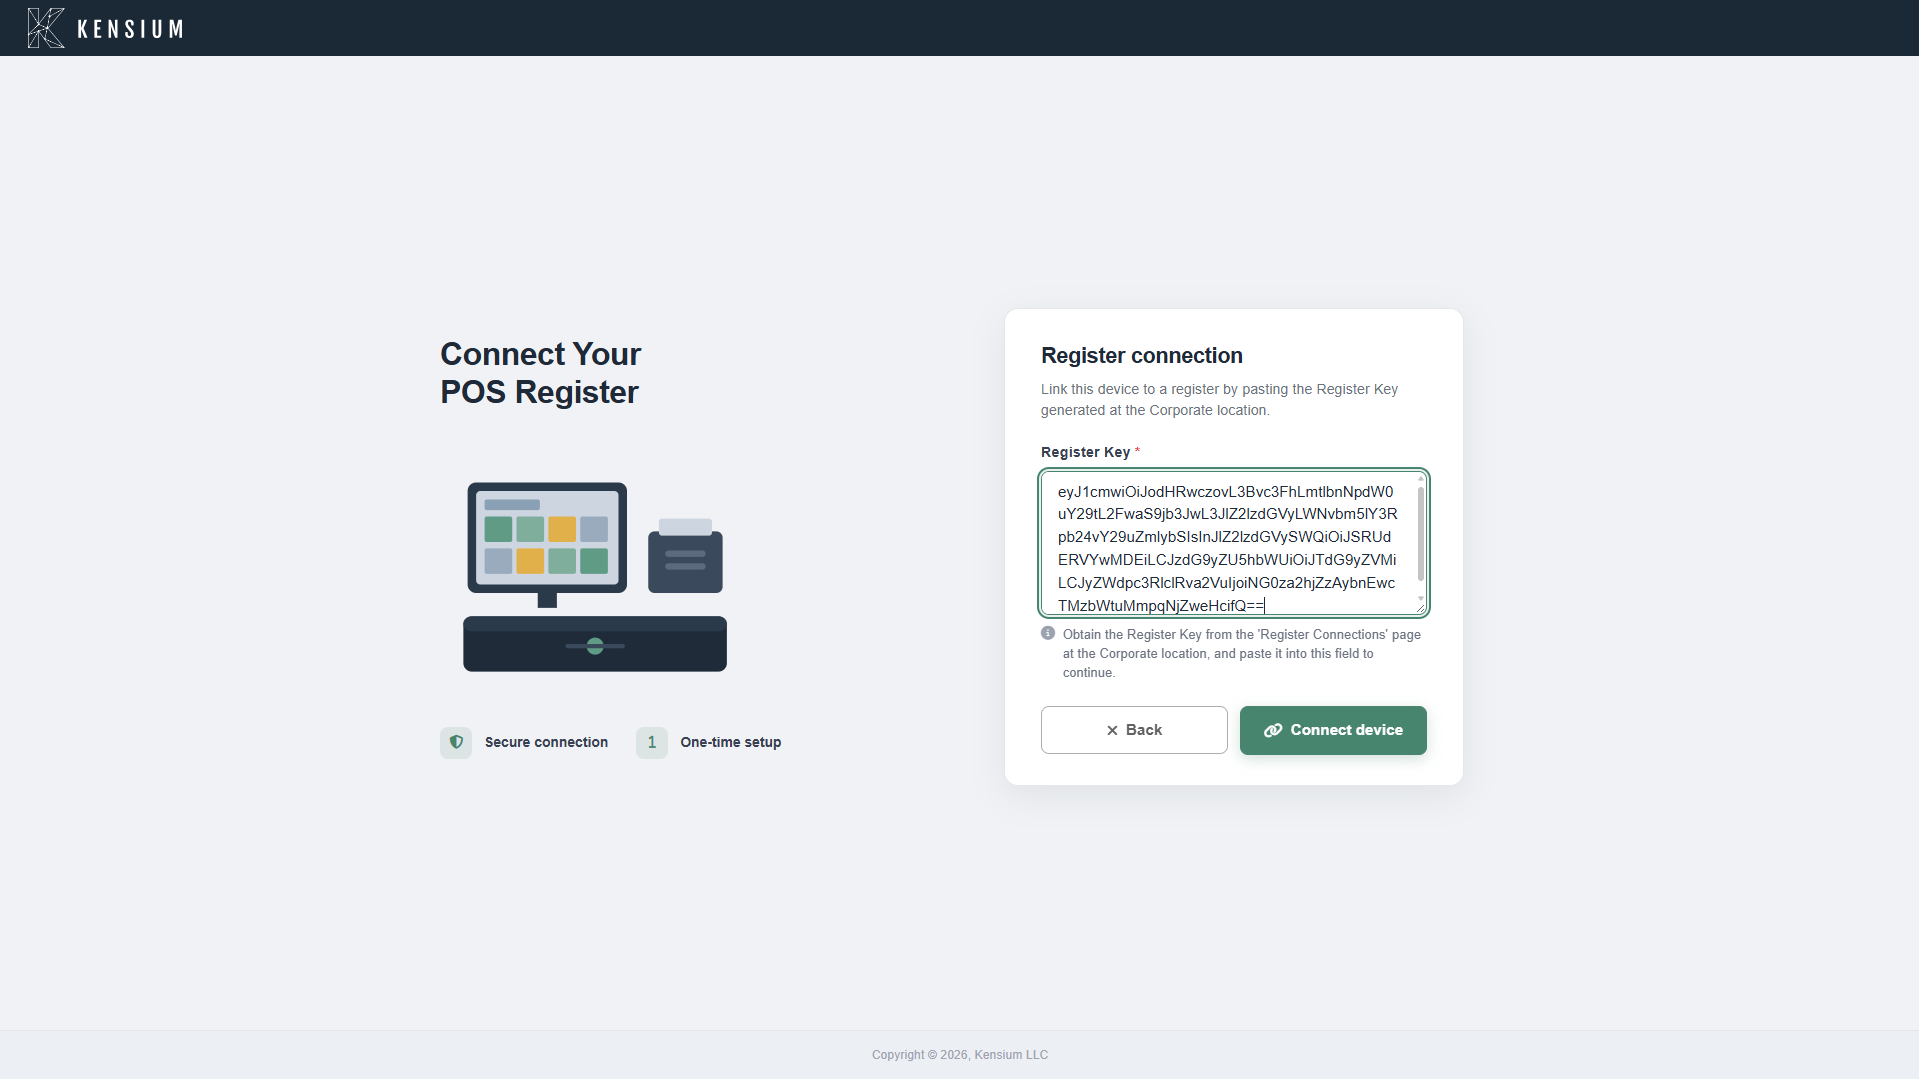
Step 3: Enter Registration Details
Obtain the Register Connection Key from your Corporate location and paste it into the registration field:
- Go to POS Administration → Stores → Register Connections
- Copy the Register Connection Key generated for your register
- Paste the key into the Register connection dialog
- Select Connect device to proceed
Step 4: Confirm Connection Success
Once the connection is established, you'll see the confirmation screen showing:
- "Register connected successfully!" message
- Connected Register ID
- Store Name
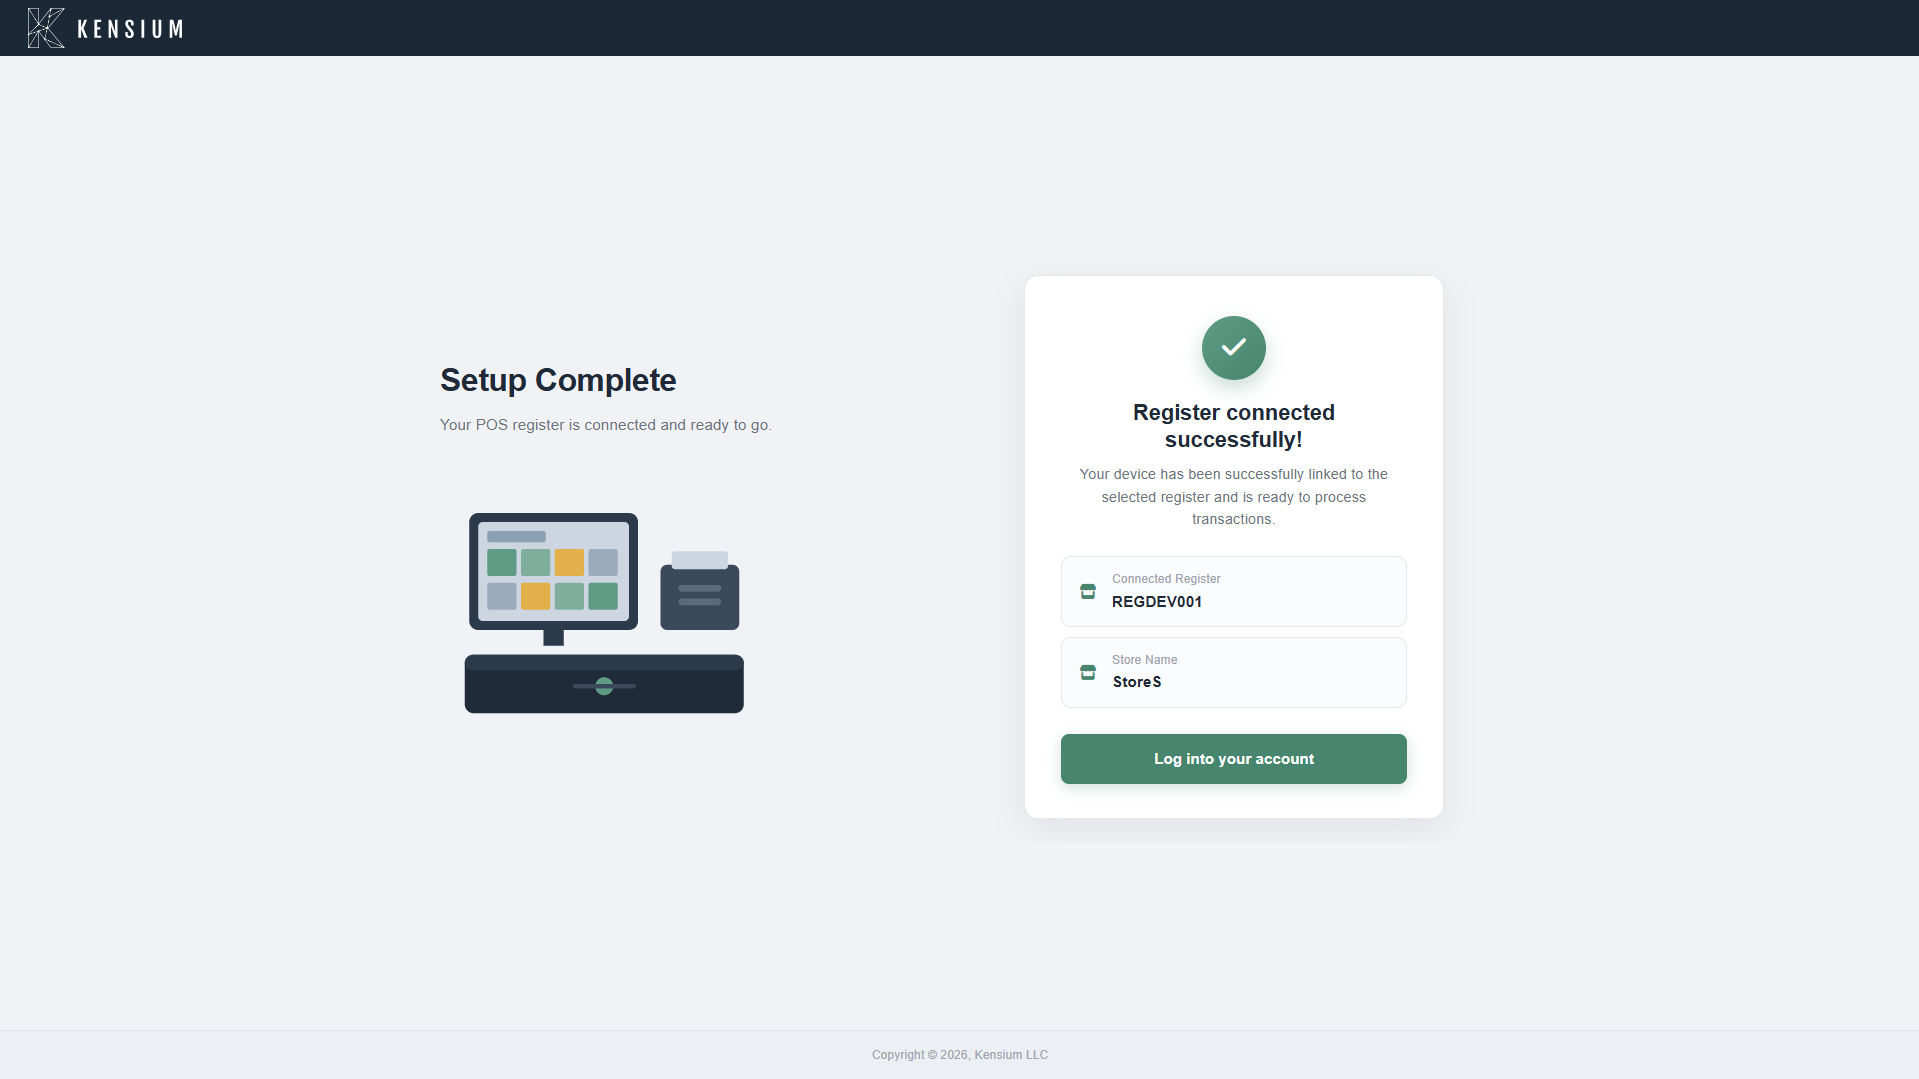
Select Log into your account to proceed to authentication.
End Notes
Connection Complete? Your register is now connected and ready to use. Each device only needs to complete this setup once.
Next Steps: Proceed to Login to authenticate and begin processing sales.
Home Page
The Home Page is the main command center after login. From here, you can process sales, manage your cash drawer, print reports, and access settings. All register functions branch from this single screen.
Navigation:
Login → Home Page (displayed after login)
Available Functions
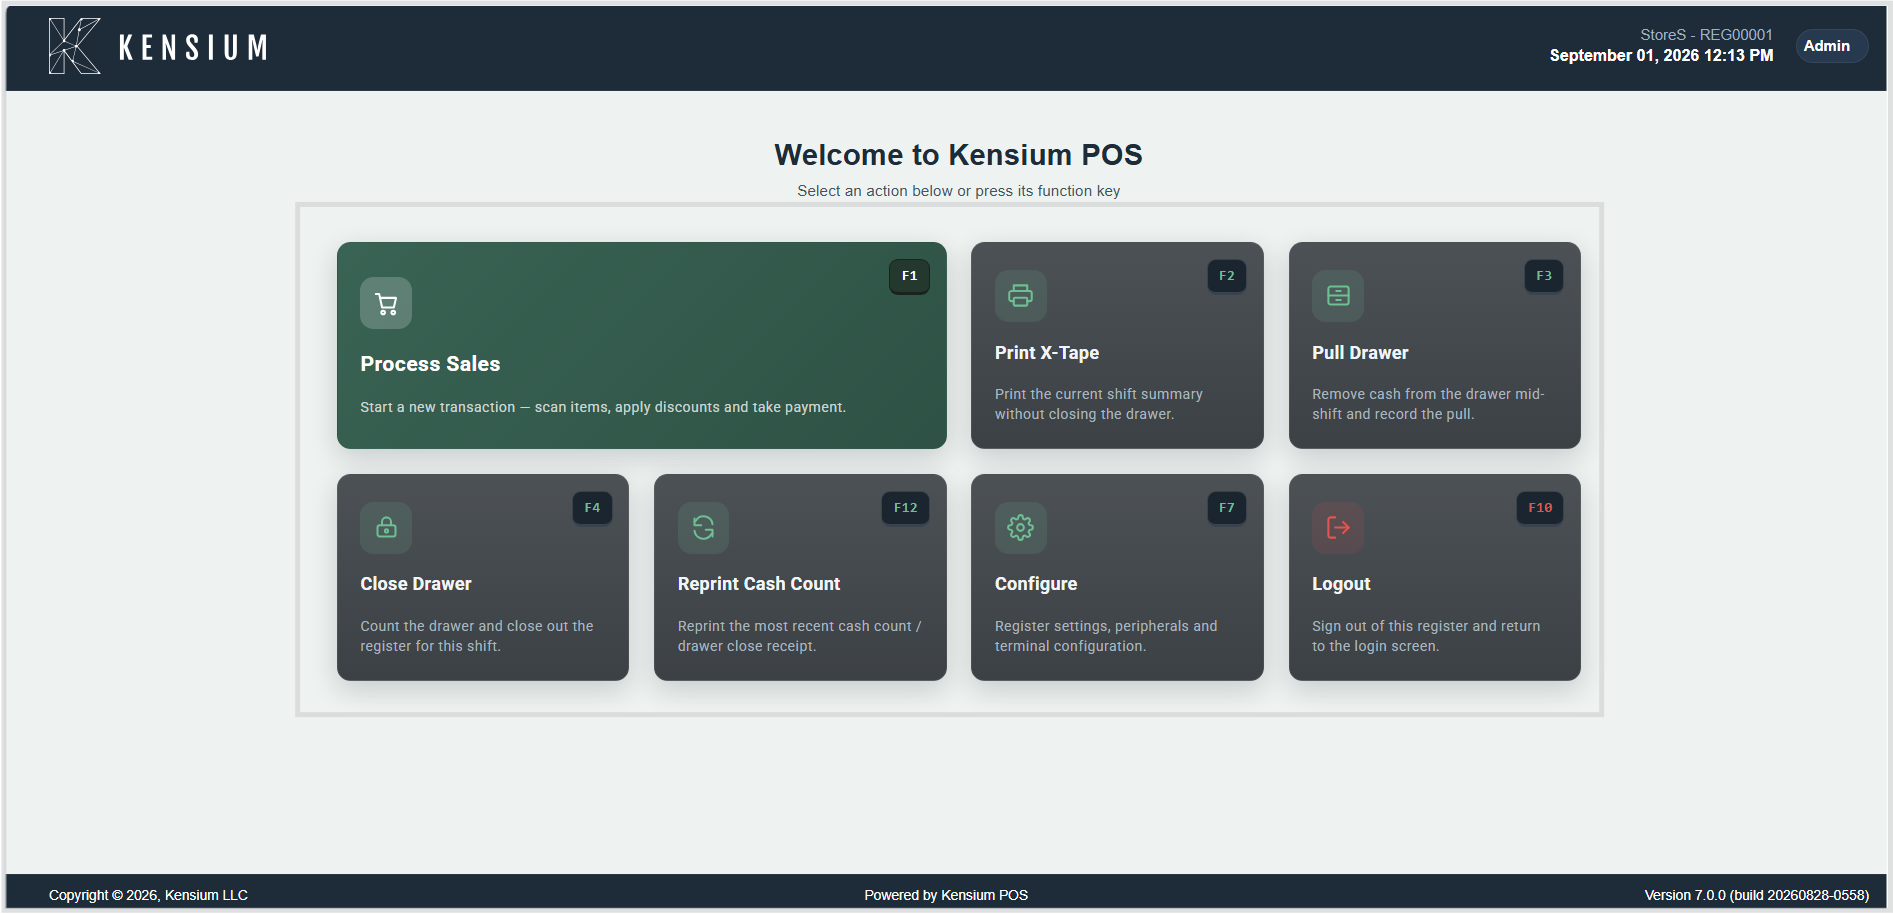
Process Sales (F1)
Start a new customer transaction and open the main point-of-sale interface.
Purpose: This is the primary function for conducting customer sales. It opens the sales screen where all transaction activities occur -adding items, applying discounts, collecting payment, and printing receipts. This function also triggers the drawer opening procedure if not already opened for the shift.
To use:
- Press F1 or click Process Sales
- If the drawer is not yet open, the Cash Count dialog appears (count and verify the starting cash)
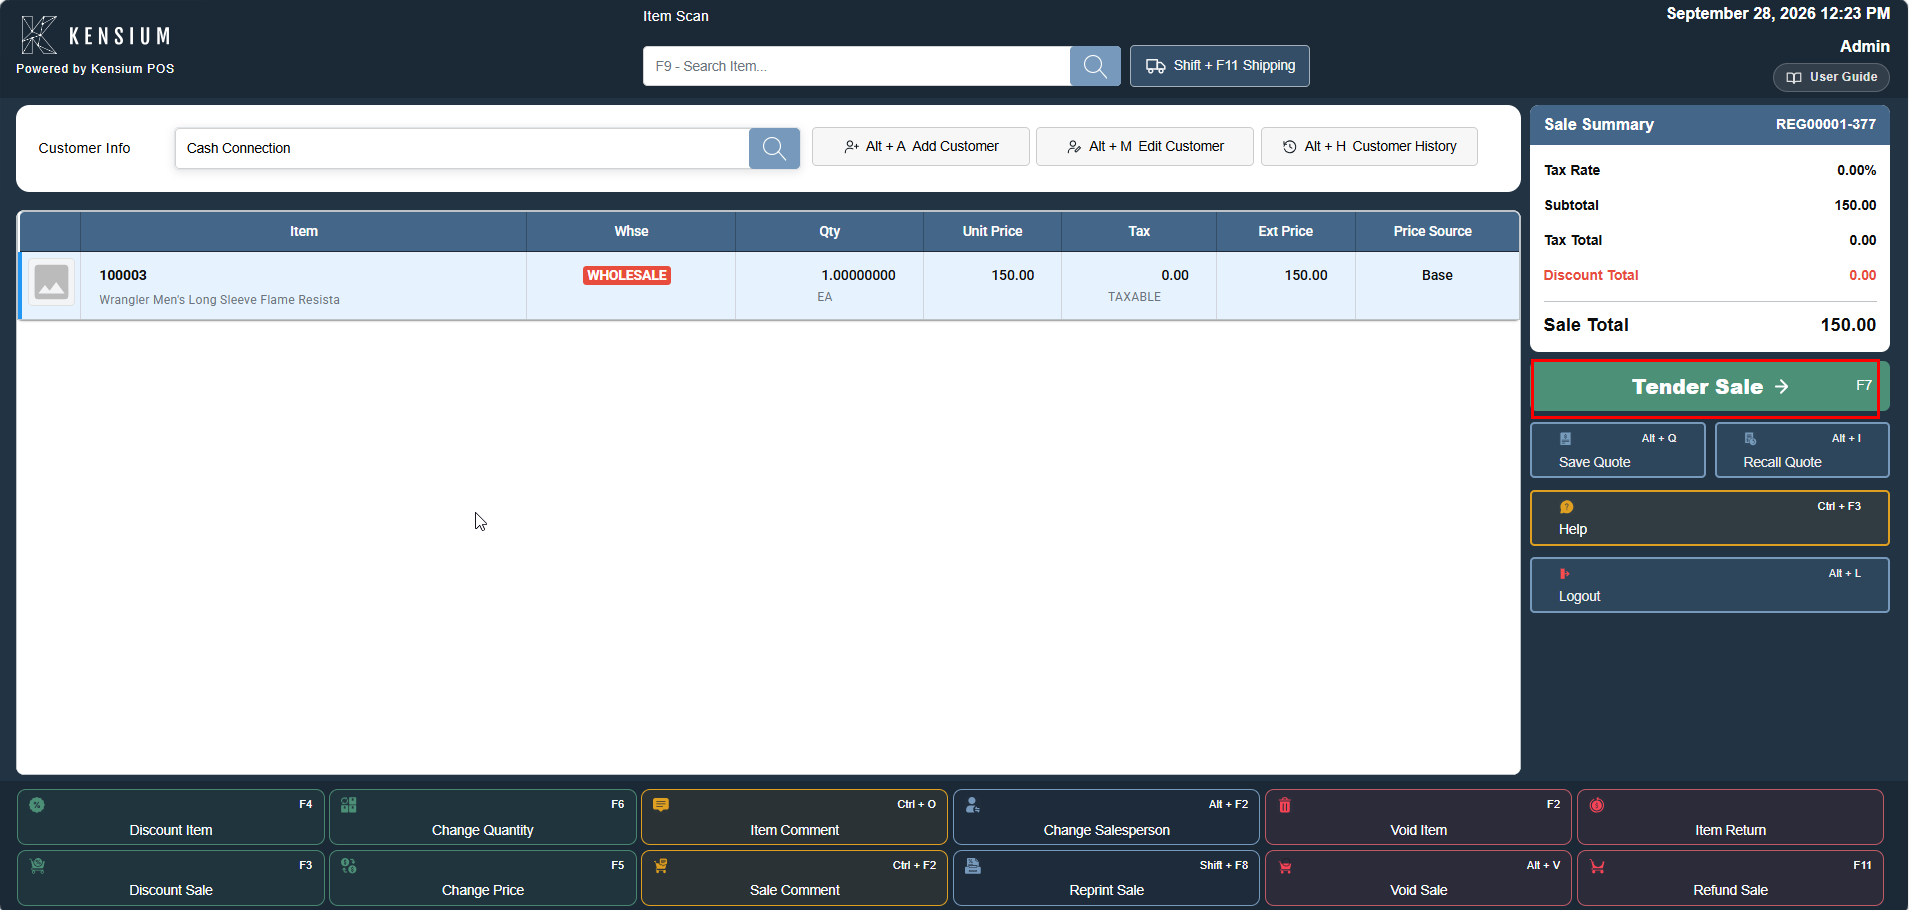
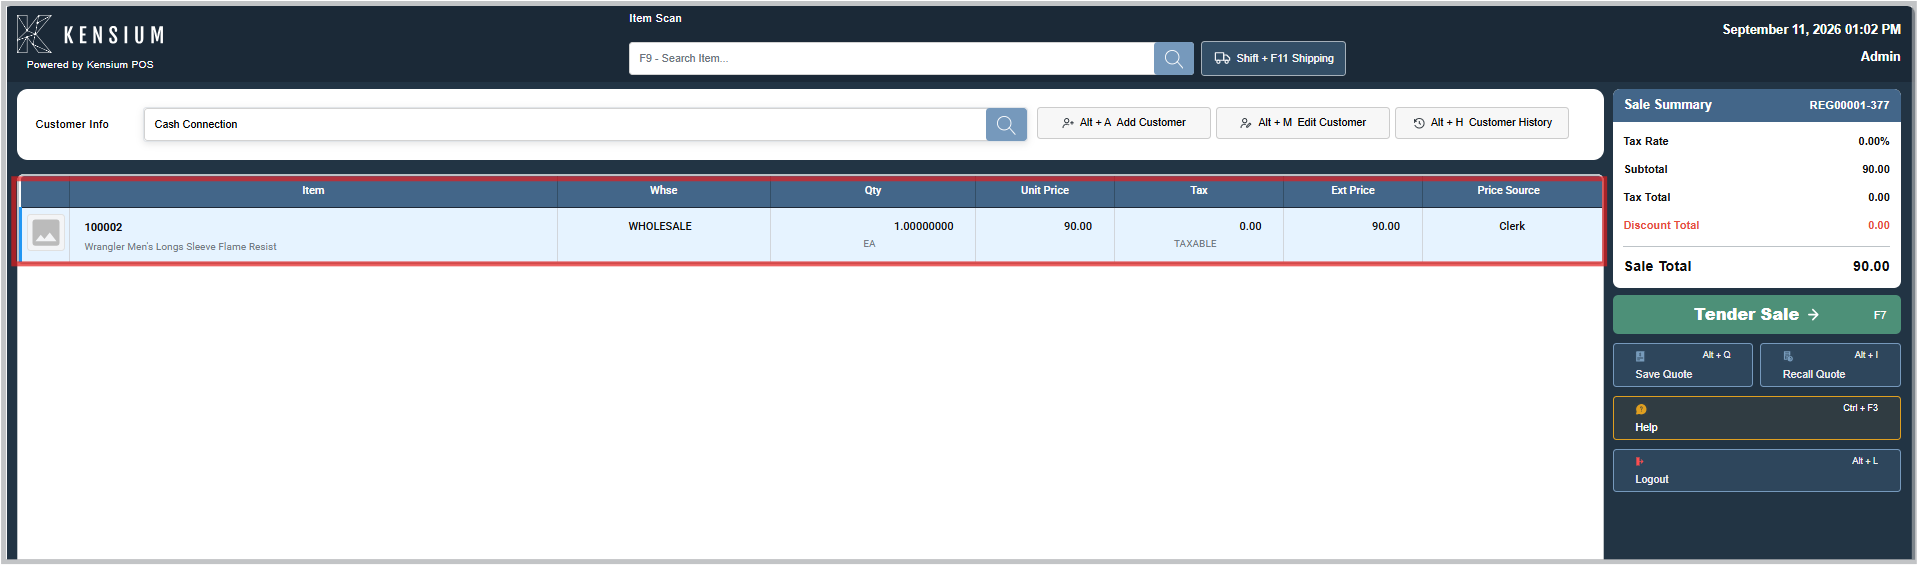
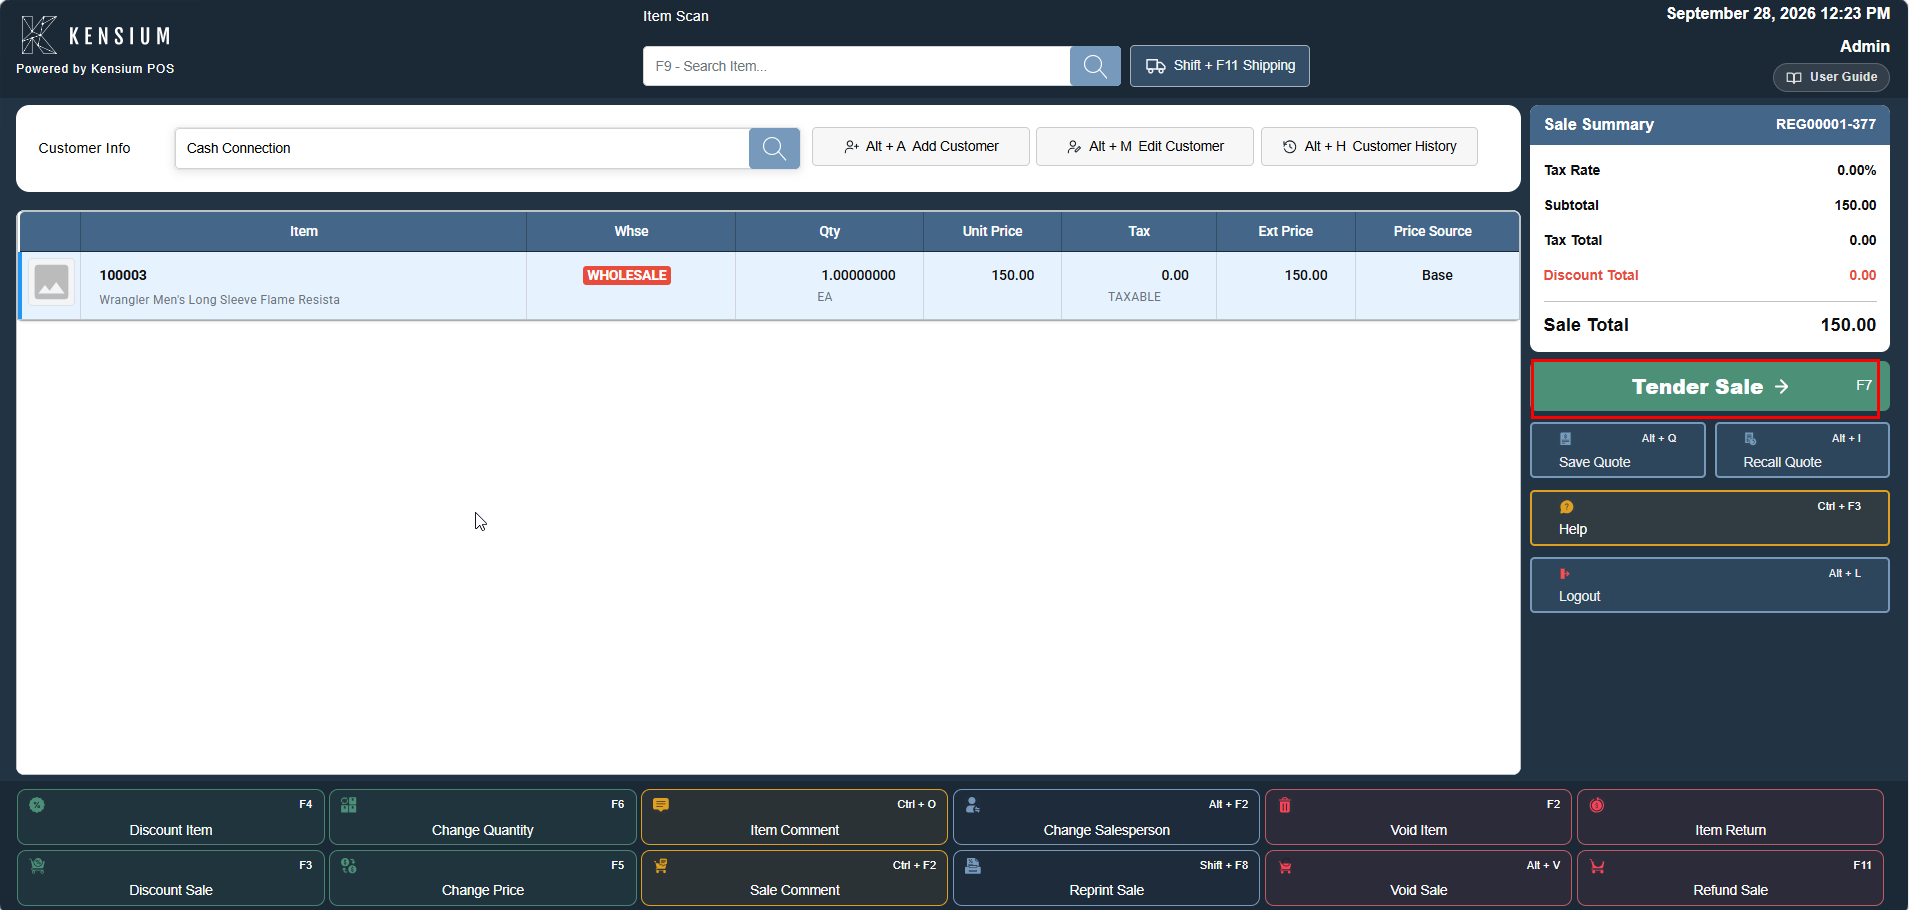
- The Item Scan screen opens, displaying the five working regions
- Items are added by barcode scan, name search, or direct entry
- Discounts are applied at the item or sale level if needed
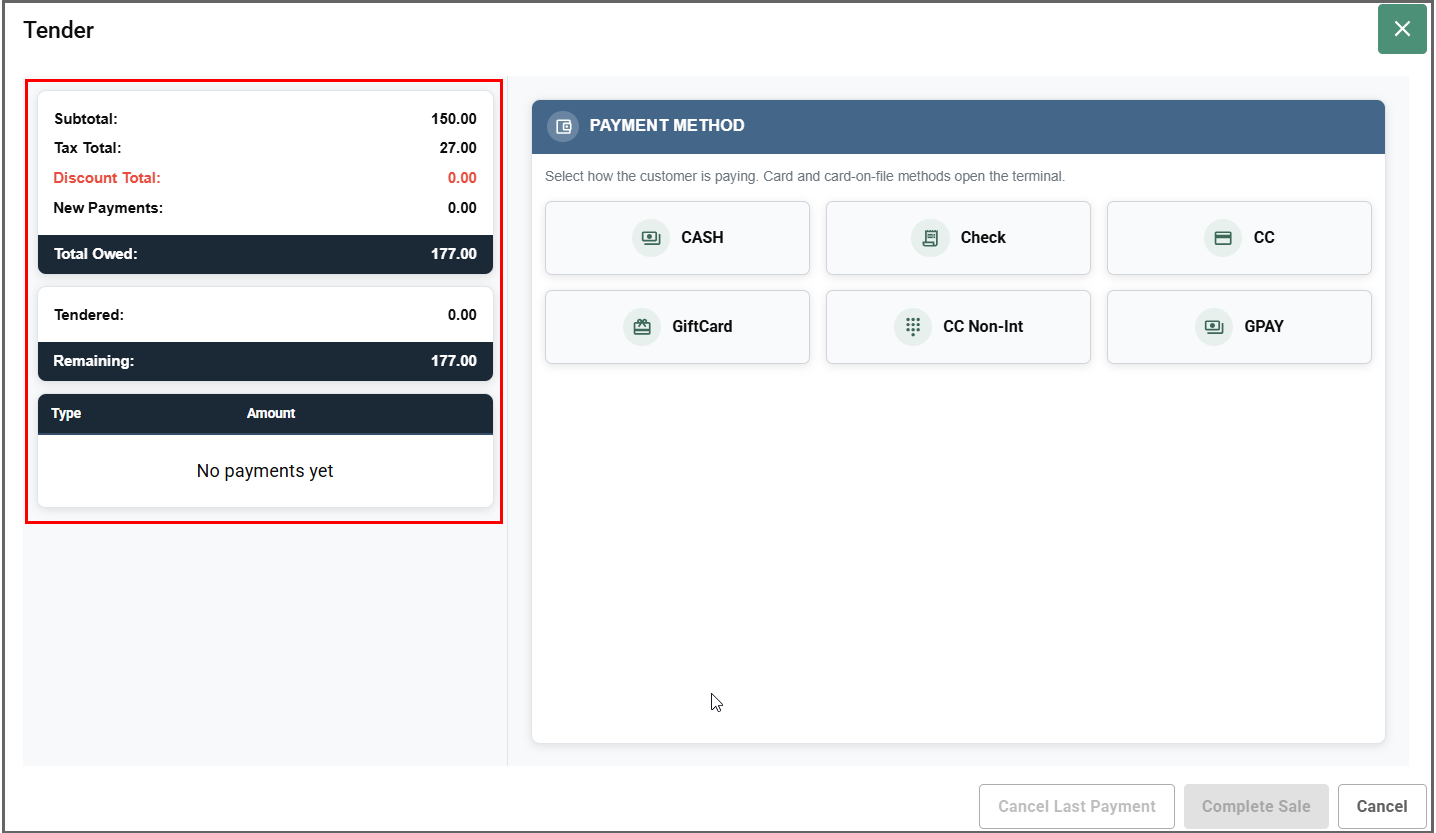
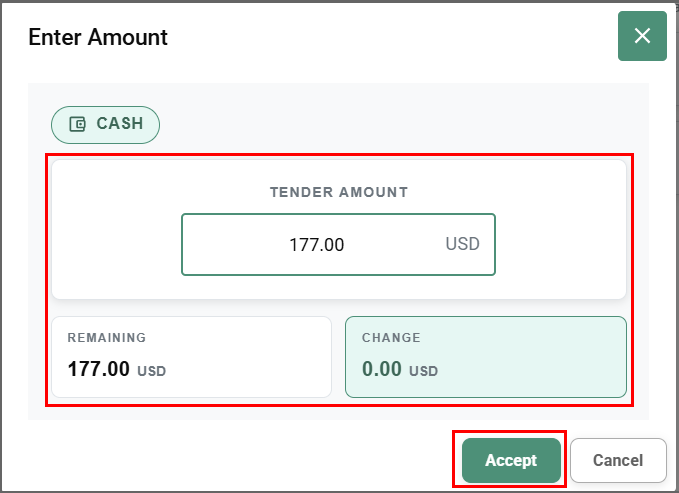
- Payment is collected via the Tender dialog
- Receipt prints automatically
- The sale is complete, and the screen returns to add the next customer
When to use: This is the core workflow for every customer sale. Access it for each new transaction, whether the customer is buying one item or a full basket. The drawer will automatically open on first use of the day.
Important:
This function opens the cash drawer (if not already open) and commits you to that drawer for the remainder of your shift. Coordinate with other cashiers before opening if multiple drawers are available.
For complete step-by-step details: Process Sales
Print X-Tape (F2)
Print a mid-shift summary report without closing the drawer or ending the shift. This is an optional but recommended report.
What is an X-Tape? An "X" report is an interim (mid-point) report that shows all transaction activity from when you opened the drawer up to the moment you print it. The "X" stands for "without closing" -it's purely informational and doesn't lock anything.
Purpose: The X-Tape is a transaction summary report that shows all activity to a specific point in time, without affecting the drawer or closing transactions. It's useful for verification, reconciliation, and providing management with real-time activity snapshots during the shift.
What information the X-Tape shows:
- Transaction count: How many sales/transactions processed
- Sales total: Total dollar amount of all sales (before discounts/refunds)
- Discounts given: Total amount of all discounts applied
- Refunds processed: Total amount of all returns/refunds
- Tax collected: Tax amount on all sales
- Payment breakdown: How much paid in cash, cards, checks, etc.
- Subtotal and totals: Net sale amount after all adjustments
- Running cash position: Expected cash in drawer based on transactions
- Transaction listings: Detail of each transaction (optional, depending on print settings)
Use X-Tape to:
- Verify accuracy: Check that all transactions you remember processing appear on the report
- Check shift totals: Monitor how much you've sold during the day without formally closing
- Reconcile during shift: Confirm expected drawer balance if pulling cash mid-shift
- Provide manager reports: Managers often want real-time activity snapshots, especially during busy periods or for decision-making
- Troubleshoot discrepancies: If something seems off, print X-Tape to identify which transaction is problematic
- Audit high-volume periods: During busy times, print X-Tape periodically to ensure system is recording correctly
- Document before refunds: If processing a large return, X-Tape before and after shows the transaction was recorded
Important characteristics (what X-Tape does NOT do):
- Does NOT close drawer or end your shift -drawer remains open for sales
- Does NOT prevent additional sales after printing -you can continue processing transactions immediately
- Does NOT lock any records -transactions printed on X-Tape can still be modified, voided, or adjusted
- Does NOT require manager approval -you can print X-Tape anytime without escalation
- Creates an audit checkpoint -the printed report shows the exact time and state at that moment, useful for later reference
- Multiple copies allowed -you can print X-Tape multiple times during shift (different tapes showing different points in time)
Timing and frequency:
| Situation | Recommendation |
|---|---|
| Start of shift | Optional -establishes baseline |
| Every hour during busy shifts | Recommended -verifies system stability |
| Before a large return | Recommended -documents status before return |
| After giving large discount | Recommended -confirms discount was recorded |
| Mid-shift cash pull | Recommended -verifies expected balance matches reality |
| End of shift (before close) | Recommended -final verification before formal close |
| During slow periods | Optional -only if you suspect issues |
Example use case: It's 2:00 PM. You've been working 3 hours and sold approximately $2,000 worth of merchandise. Before taking your break, print X-Tape to verify: (1) the $2,000 shows on the report, (2) all major transactions are there, (3) expected drawer balance ($150 open + $2,000 sales = $2,150 expected) seems correct. If all checks out, take break with confidence. If something seems off, investigate before break.
When to use: Use liberally throughout the shift -before breaks, after processing refunds, periodically during busy times (especially if you haven't checked totals in 1-2 hours), or anytime you want to verify balances without formally closing.
Pull Drawer (F3)
Remove excess cash from the drawer mid-shift while maintaining transaction recording. This is a security and cash management function.
What is a drawer pull? A "pull" is the act of removing excess cash from your drawer during your shift for security purposes. Unlike closing the drawer, pulling allows you to remove cash while continuing to process sales.
Purpose: This function enables security and cash management by allowing operators to remove cash from the drawer during the shift without closing it. Each cash pull is recorded in the system audit log, creating a documented trail of when cash left the drawer and by which operator. This is essential for:
- Security -reducing the amount of cash in an open drawer during peak periods (less attractive theft target if drawer only has $500 instead of $3,000)
- Risk management -preventing drawer overflow that could cause cash to fall out or make drawer unsecure
- Compliance -maintaining a complete audit trail of all cash movements (who pulled, when, by system calculation)
- Reconciliation -tracking cash pulls so closing balances are accurate (system knows you pulled $1,500, so it adjusts expected balance)
- Manager oversight -managers can see pull history and know where excess cash went
When to pull cash:
| Situation | Action |
|---|---|
| Drawer getting full ($2,000+ during slow day) | Pull $1,000-1,500 to manager |
| Before high-risk period (opening time, bank break, shift change) | Pull excess to safe |
| After large sale (received $500 cash payment) | May want to pull to make room |
| Security concern (drawer in public area) | Pull to reduce visible cash |
| Manager request | Always comply -manager may need cash for change banks or other registers |
Step-by-step pull process:
- Press F3 or click Pull Drawer from Home Page
- Confirmation dialog appears: "Are you sure you want to pull cash from the drawer?"
- Click Confirm (or Cancel to skip)
- System initiates pull:
- Drawer physically opens (receipt printer controls this)
- System records timestamp, operator ID, and registers the pull event
- Note: System does NOT require you to enter amount -it calculates automatically
- Remove cash physically:
- Take cash out of drawer (you decide how much -typically $500-2,000 depending on drawer fullness)
- Hand to manager or place in secure location as directed
- Close the drawer manually:
- Push drawer closed until you hear it click/lock
- Drawer should be fully closed and secure
- System finalizes the pull:
- Records the action in audit trail
- Calculates how much cash is missing from drawer (the pulled amount)
- Adjusts expected closing balance to account for this pull
- Your shift continues normally -you can immediately process more sales
Important details about pulls:
- Amount is calculated automatically: You don't manually enter how much you pulled. The system figures it out by comparing expected (Opening + Sales - Refunds - Previous Pulls) to actual (what's left in drawer)
- Drawer remains open: Unlike closing, the drawer stays open for your shift -sales can continue immediately
- Each pull is tracked: Every pull appears on your Z-Tape at end of day, showing timestamp and manager who received it (if logged)
- Closing reconciliation accounts for pulls: Your closing count includes all pulls. Example: Expected $3,000, you pulled $1,500, so expected at close is $1,500. When you count $1,498, you're only $2 short (not $1,502 short)
- No reversal: Once pulled, cash is gone -you cannot "restore" a pull (you can ADD cash later with Add Cash function, but not restore a pull)
Multiple pulls in one shift:
- Allowed: You can pull multiple times during a shift
- Each pull recorded separately: System tracks Pull #1 at 10:00 AM, Pull #2 at 1:00 PM, etc.
- Cumulative effect: All pulls add up in reconciliation. If you pull $1,000, then $500, expected closing reflects $1,500 total pulled
After you pull:
- Who receives the cash? Typically the manager or a designated cashier
- Should be documented: Many stores require the manager to sign or initial acknowledgment of cash pulled
- Where does it go? To store safe, manager lockbox, or preparation for end-of-day deposits (varies by store)
- You maintain responsibility: Until formally handed off to manager, the cash is still part of your drawer accountability
Troubleshooting drawer pulls:
| Problem | Cause | Solution |
|---|---|---|
| Can't pull -error appears | System issue or drawer already open | Try again; if persists, contact manager |
| Drawer won't open for pull | Receipt printer offline/not connected | Check printer power and cable; try again |
| Need to pull but no manager | Manager is busy or unavailable | Pull the cash and place in manager's office/safe temporarily; inform manager later |
| Pulled wrong amount | Misjudged how much to take out | Next pull or Add Cash function can balance it out at closing |
Close Drawer (F4)
End the shift and formally close the drawer, finalizing all transactions and reconciling cash.
Purpose: This is the critical end-of-shift procedure that:
- Locks all transactions so no additional sales can be processed
- Requires physical cash counting and reconciliation
- Produces the Z-Tape (formal closing report) for audit and management review
- Creates a complete transaction audit trail for the shift
- Records over/short amounts for accountability
- Releases the drawer for the next operator
Important:
Cannot process new sales after closing. Do not close until all sales for your shift are complete.
To use:
- Press F4 or click Close Drawer
- Confirmation dialog appears requesting verification
- Confirm the close action (this action is irreversible)
- Physically count all cash in the drawer carefully and accurately
- Count all payment methods if using the currency close procedure
- Enter the counted amounts when prompted by the system
- Review the totals and any over/short amounts
- Closing receipts print (including the Z-Tape formal closing report)
- Verify that the Z-Tape printed correctly and is legible
- Secure the cash per store procedures
Critical details:
- The Z-Tape is the official closing report -it must print and be retained for audit
- The closing procedure shows calculated vs. counted balances -discrepancies must be reviewed
- If significant discrepancies appear, alert a manager before finalizing the close
- The process follows either Simple Close (basic count) or Currency Close (detailed denomination count)
- After close, the drawer is locked and cannot be reopened until the next shift
Reprint Cash Count (F12)
Reprint a previous shift's drawer closing count record after the drawer has been closed.
Purpose: This function allows retrieval and reprinting of formal cash count documentation from any prior shift. This is essential for:
- Creating duplicate copies if the original was damaged or lost
- Obtaining a copy for records or manager review
- Verifying closing balances from a specific shift
- Maintaining backup documentation for audit purposes
Use when:
- The close receipt was damaged or didn't print clearly
- You need a copy for your records or the manager
- A previous shift's closing count needs to be reprinted for verification
- Documenting over/short amounts from a specific date
To use:
- Press F12 or click Reprint Cash Count from the Home screen
- The system prompts for a count date (shows today's date by default)
- Enter or select the date you want to search
- Press F3 or click Search
- Results display by time, register ID, and clerk ID
- Select the specific count record you want
- Click Reprint to print the record again
Important:
- Only available after drawer has been closed for that shift
- You cannot reprint a count from an open drawer (the drawer must be formally closed first)
- Multiple counts from the same day are listed separately (if you closed and reopened)
- If no counts exist for the date: "No cash counts found for this date" appears
Configure (F7)
Access register settings, device configuration, and system preferences.
Purpose: The Configure function provides access to hardware and software settings that control how the register operates. These settings typically affect:
- Printer setup and output (receipt printer, report printer, etc.)
- Scanner configuration and barcode settings
- Display preferences and screen layout
- Accessibility options for different user needs
- Language and regional settings (currency, date format, etc.)
- Register defaults and business rules
Most configuration changes should be made by managers or administrators, not during normal operation.
Available configuration options:
- Printer settings (receipt printer, label printer, pick ticket printer assignments)
- Scanner settings (barcode formats, scan speed, beep behavior)
- Display preferences (font size, color scheme, button layout)
- Accessibility options (high contrast, text-to-speech, larger touch targets)
- Language and regional settings (language, currency symbol, date/time format)
- Register class defaults (payment methods, discount limits, tax rules)
Important:
Usually requires manager or admin authorization. Most settings affect all users on the register, so changes should be coordinated with management. Incorrect configuration can disrupt sales processing for all operators.
When to access: Only when specifically instructed by a manager or administrator to make configuration changes. Do not modify settings without authorization.
Log Out (F10)
Sign out from the register and return to the login screen, ending your session.
Purpose: Logging out performs several critical functions:
- Ends your register session and user access
- Releases your drawer assignment so another operator can use it
- Locks all your transactions so they cannot be modified
- Creates a final audit record of your session
- Clears any user-specific settings or pending actions
- Prepares the register for the next operator
Important
The drawer must be closed before logging out. Leaving the drawer open interferes with the next operator. The drawer lock prevents sales processing by other users until it is formally closed.
To use:
- Press F10 or click Log Out
- System confirms: "Are you sure you want to logout?"
- Click Confirm to proceed (or Cancel to return to Home)
- System returns to the login screen
- Your session is ended
Important
- Logging out does NOT automatically close the drawer -you must run Close Drawer (F4) first
- If you log out without closing, the next operator will see an error and cannot open the drawer
- Always coordinate with the next operator before closing and logging out
- Leaving the register unattended without logging out is a security risk
Keyboard Shortcuts
| Key | Action |
|---|---|
| F1 | Process Sales |
| F2 | Print X-Tape |
| F3 | Pull Drawer |
| F4 | Close Drawer |
| F7 | Configure |
| F10 | Log Out |
| F12 | Reprint Cash Count |
Related Documentation
Remember
The drawer must be closed before logging out. Keyboard shortcuts (F1-F10, F12) enable faster work. The drawer must be closed at the end of a shift before handing off to the next operator.
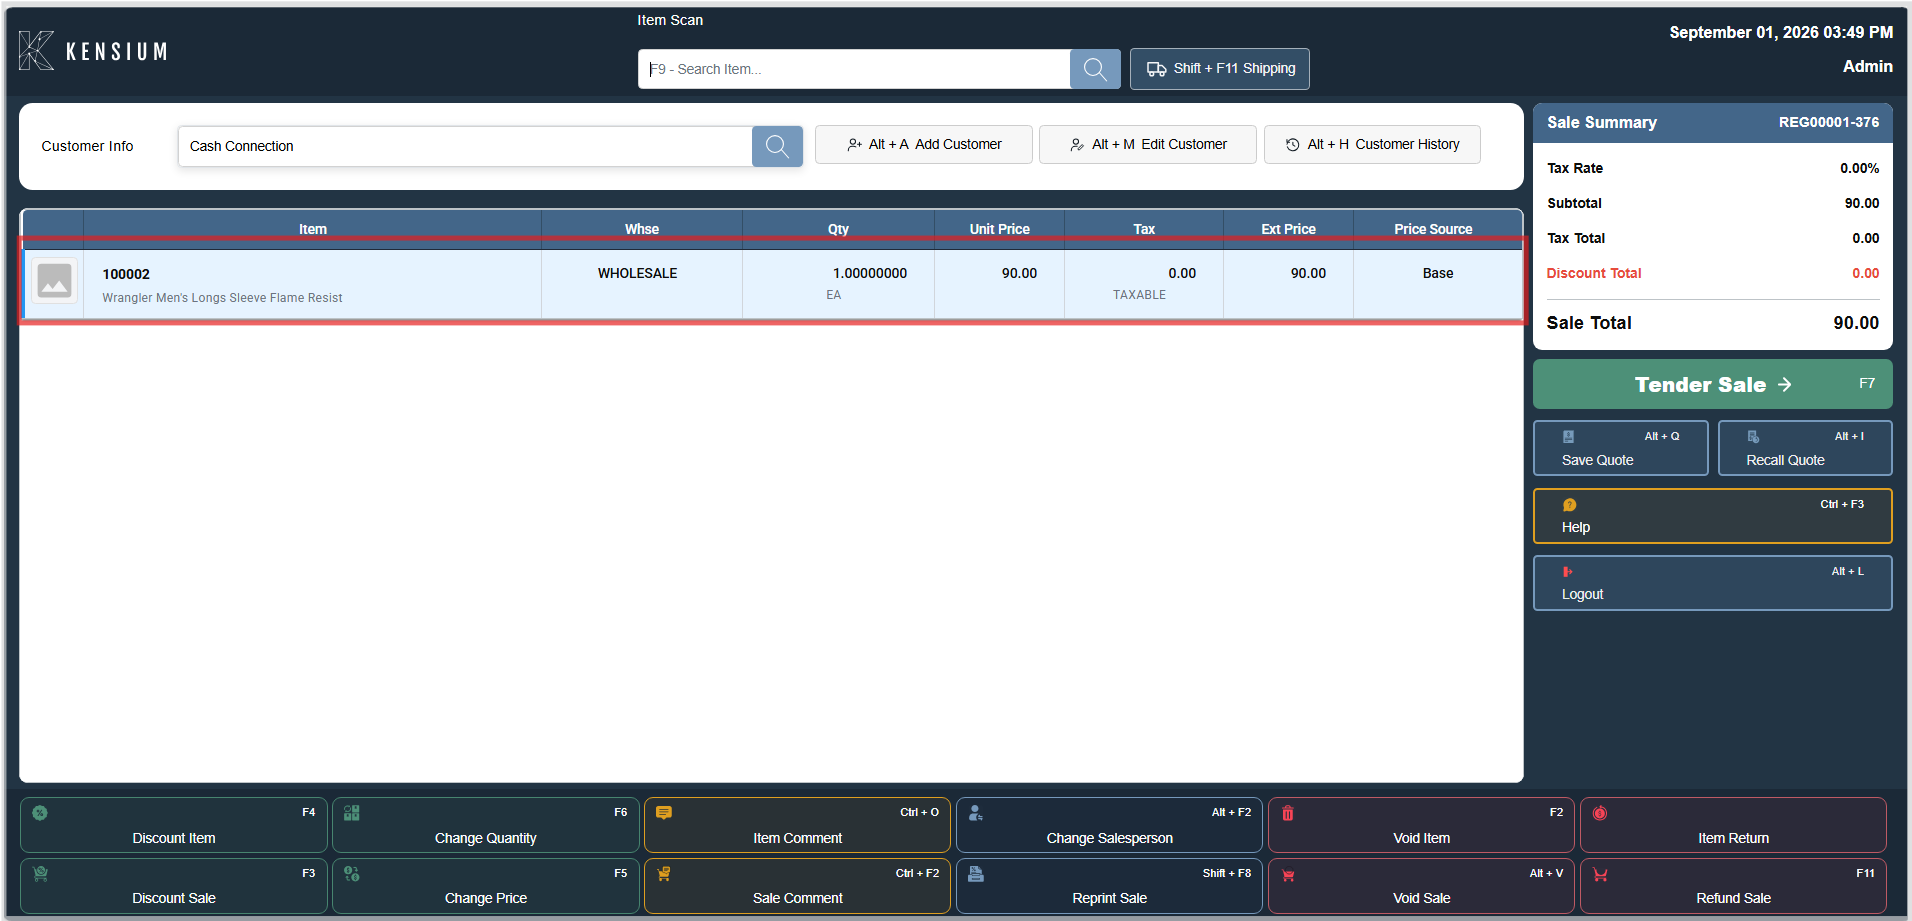
 Sign In
 Process Sales
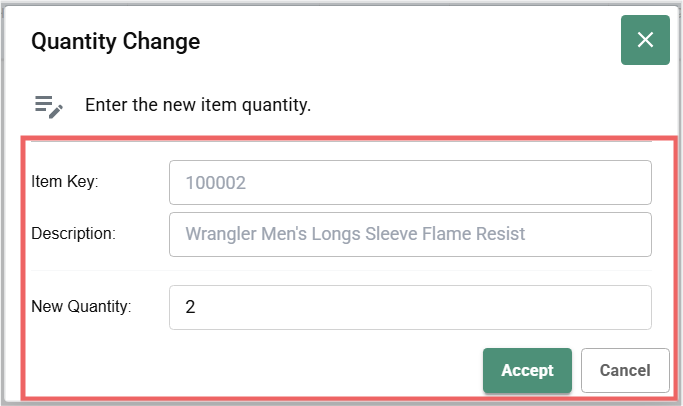
 Changing Item Quantities
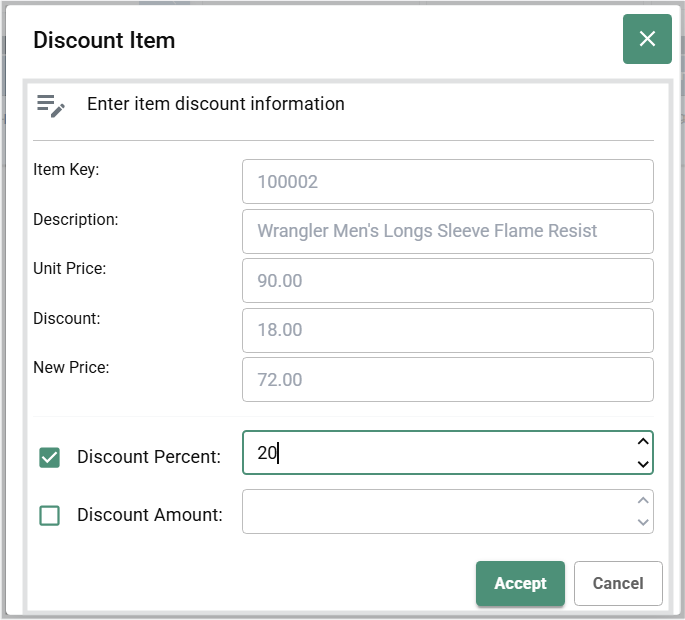
 Applying Item Discounts
 The Sale Screen
 FAQ
FAQ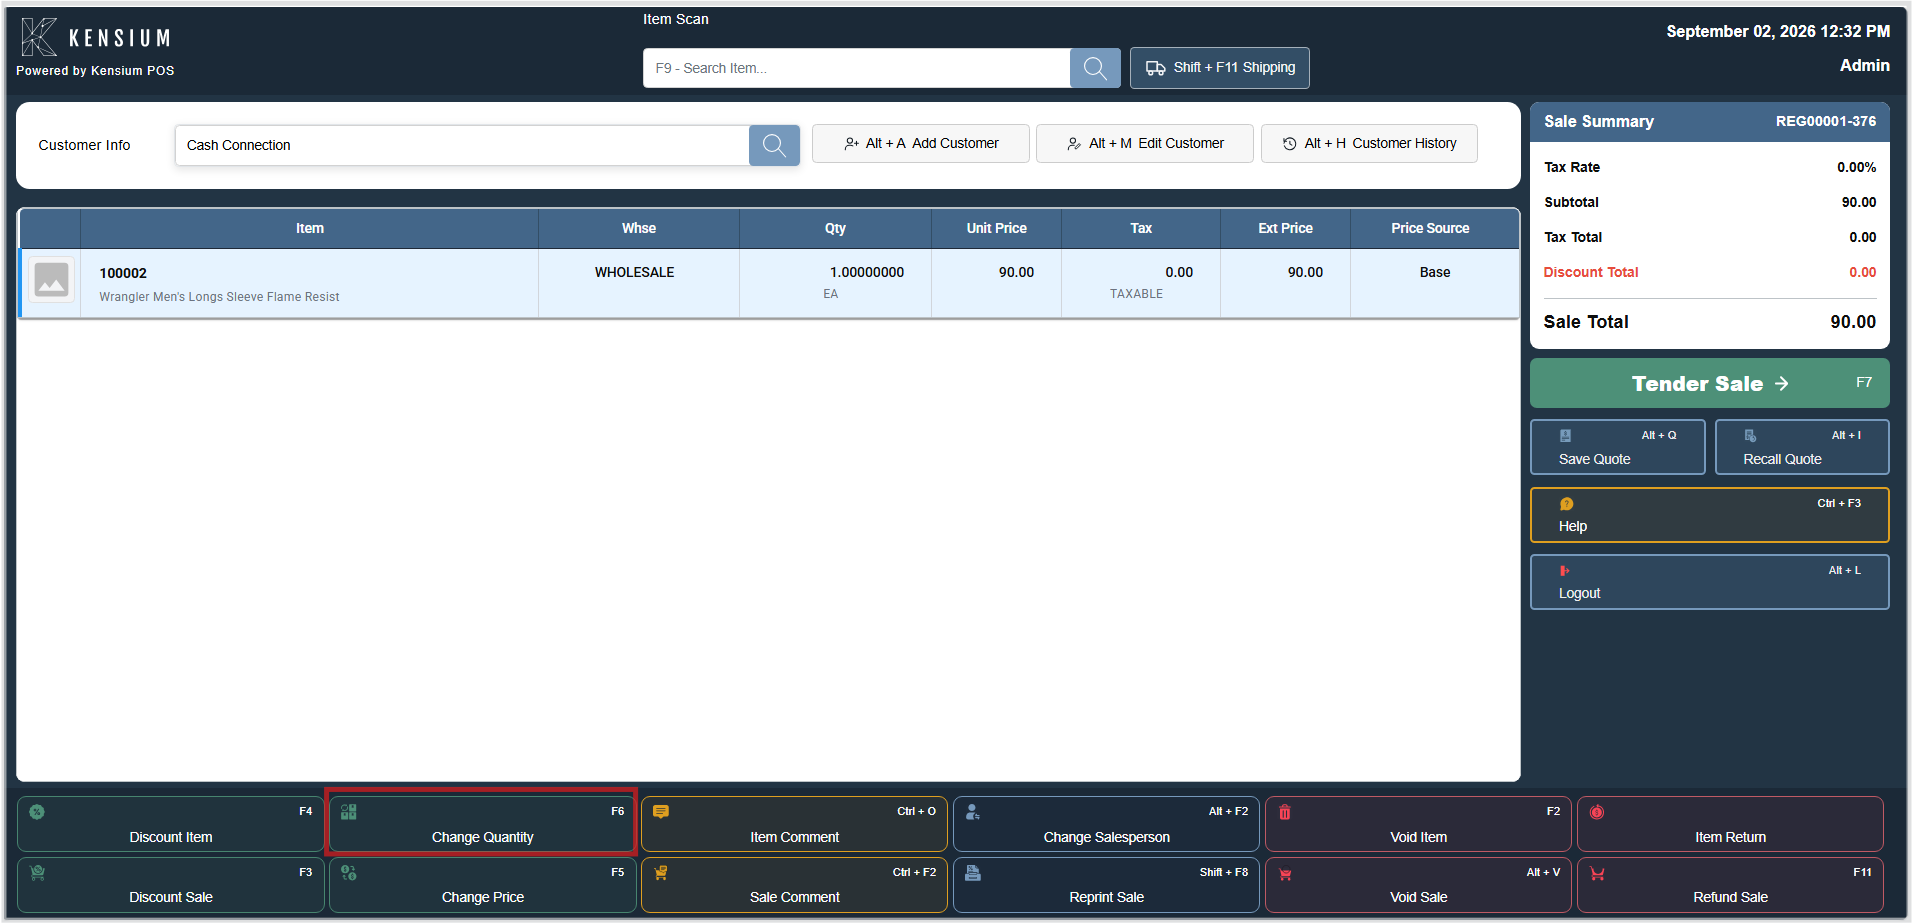
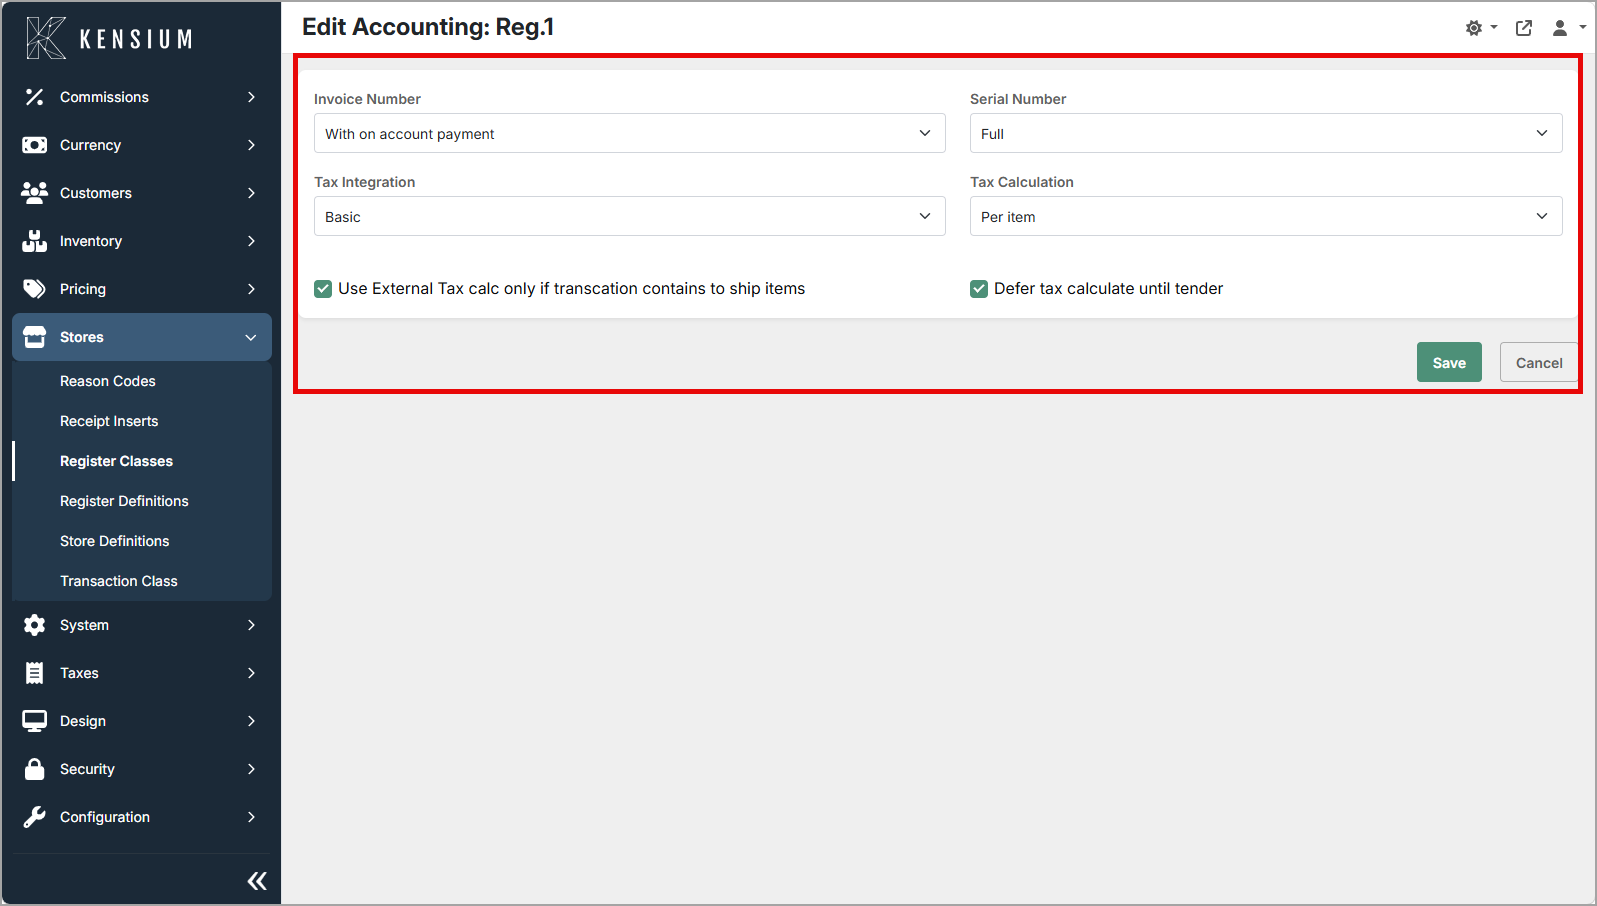
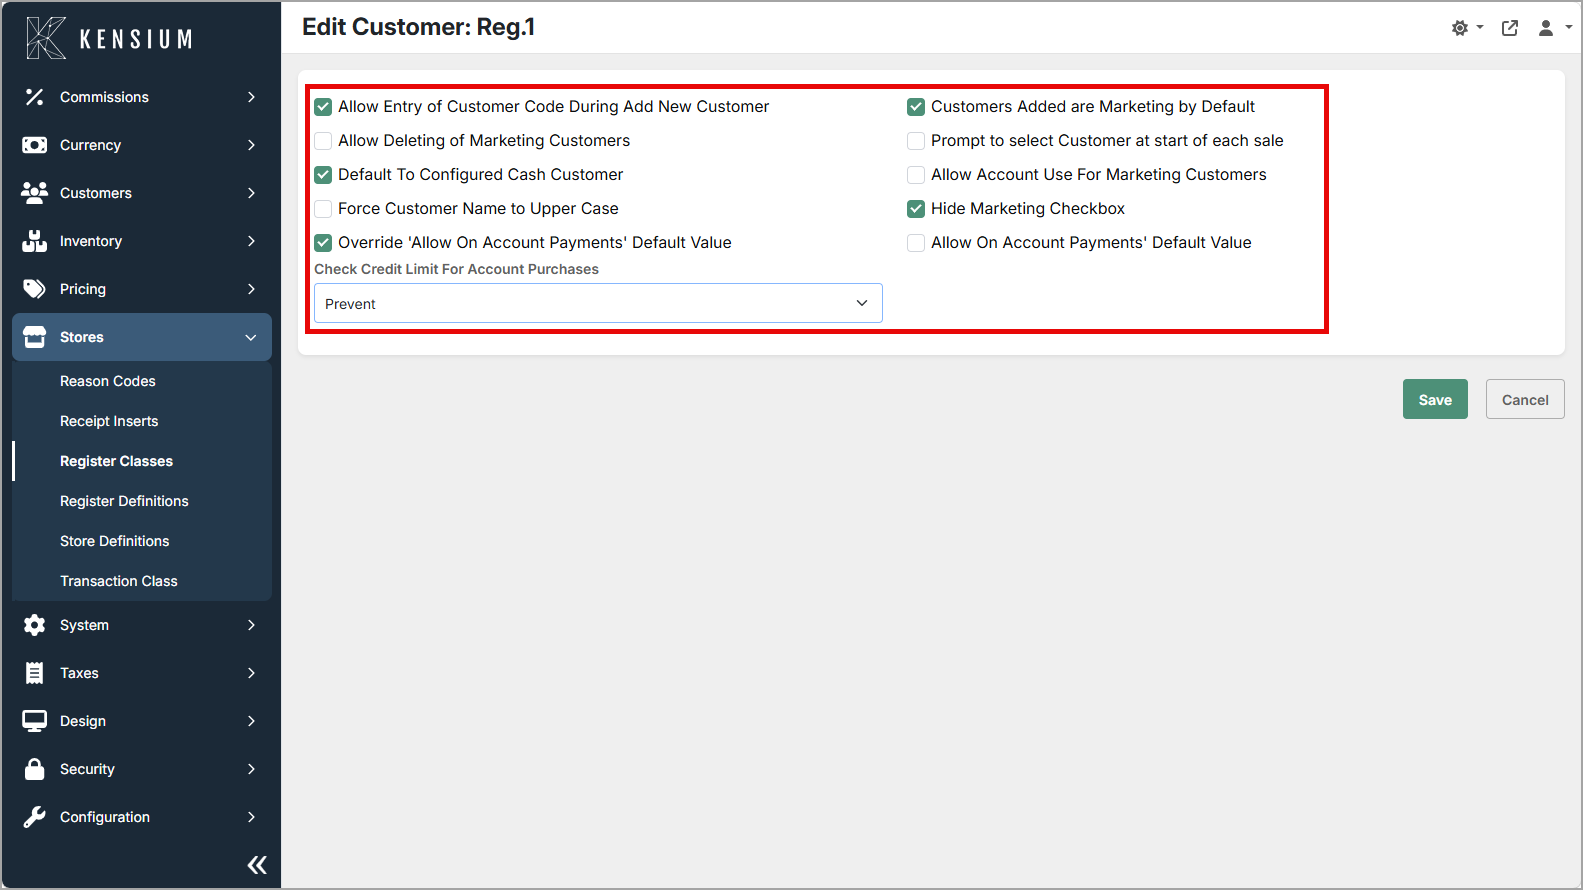
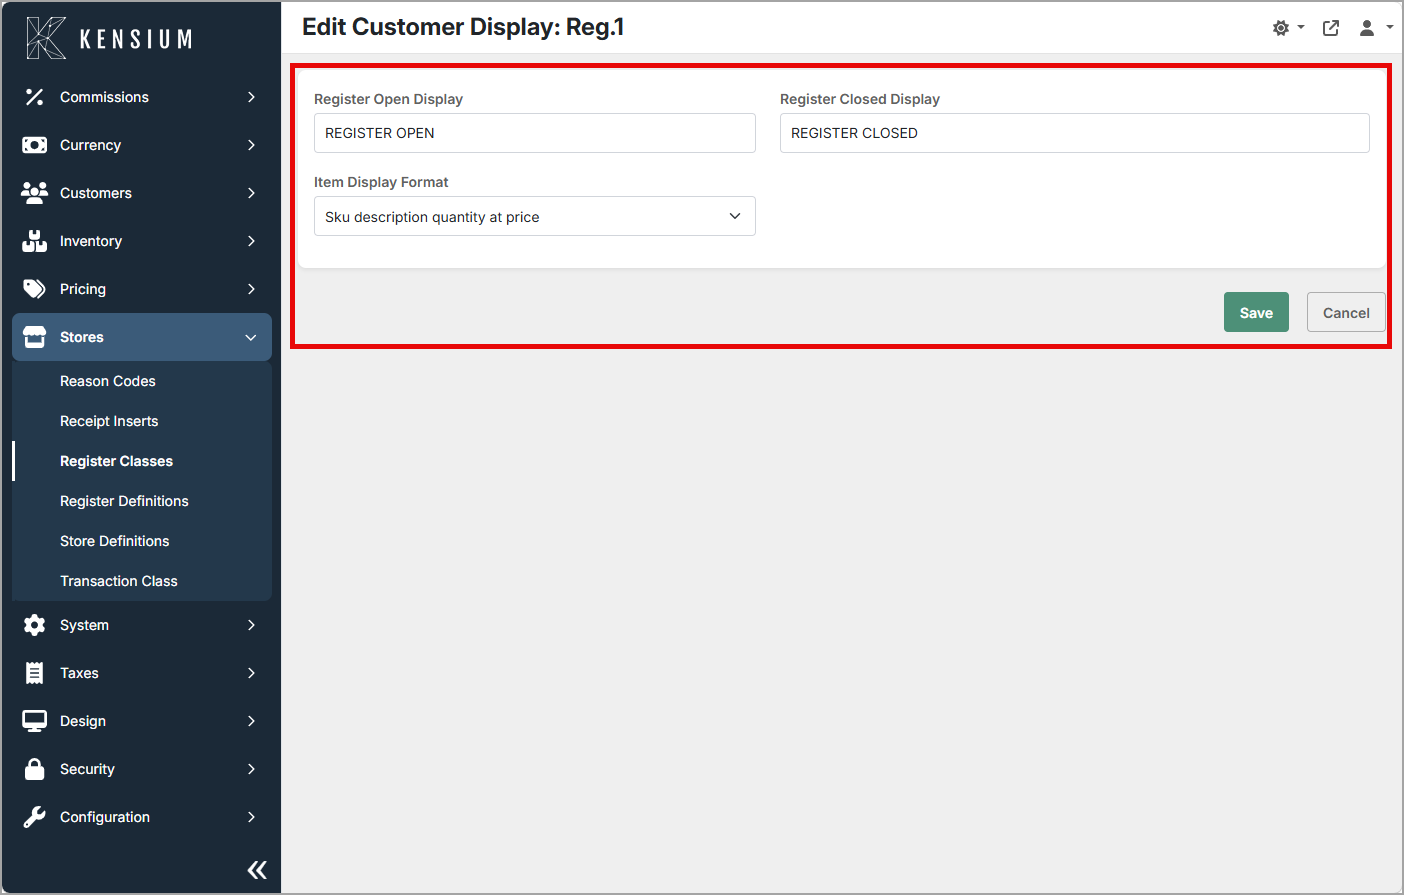
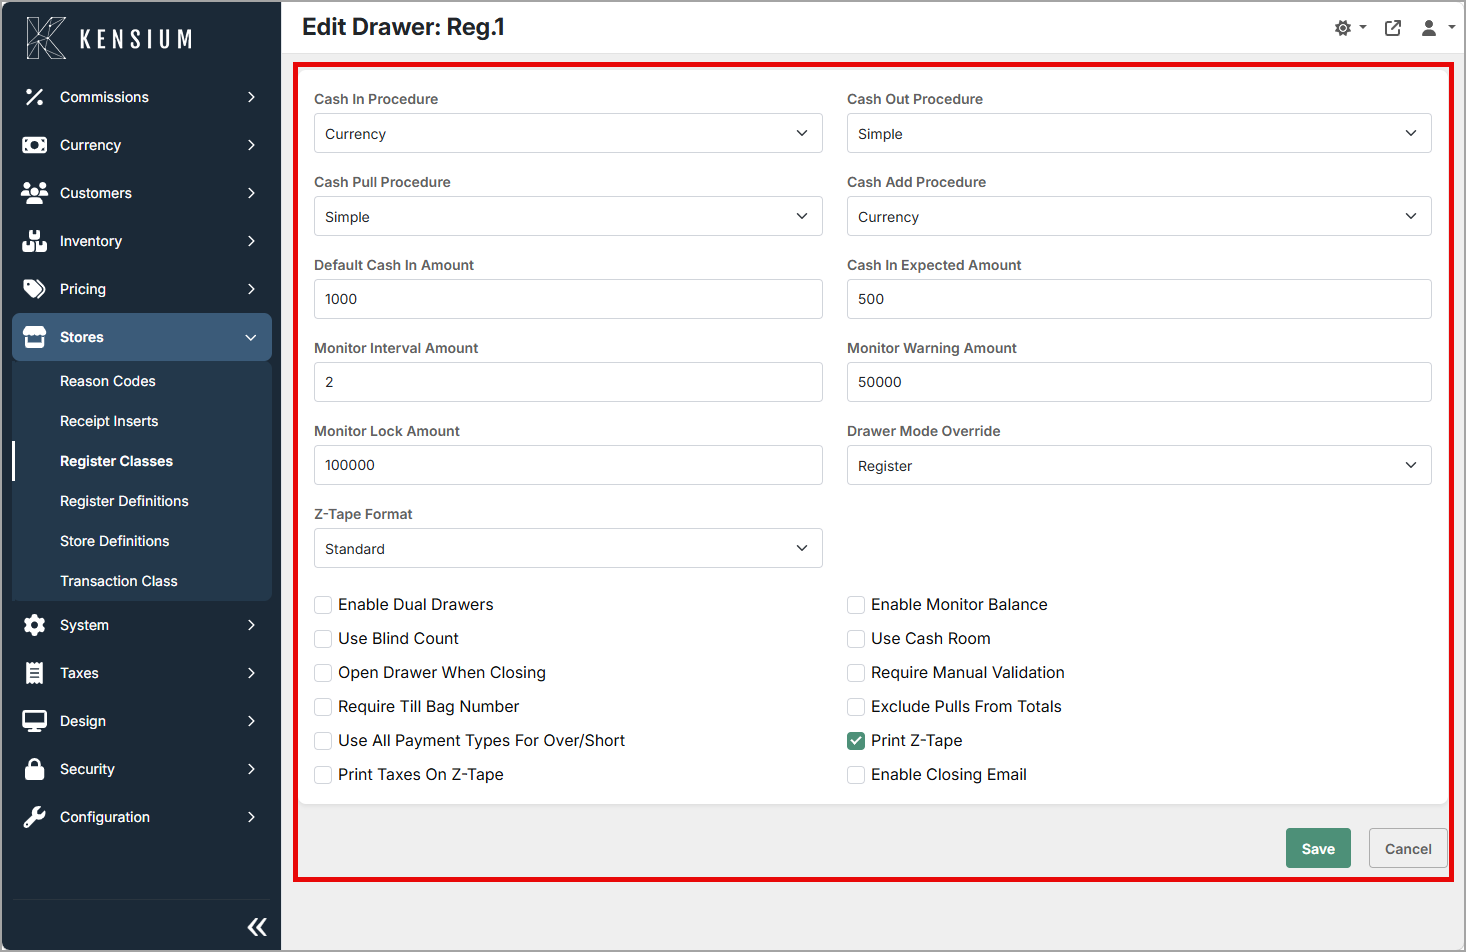
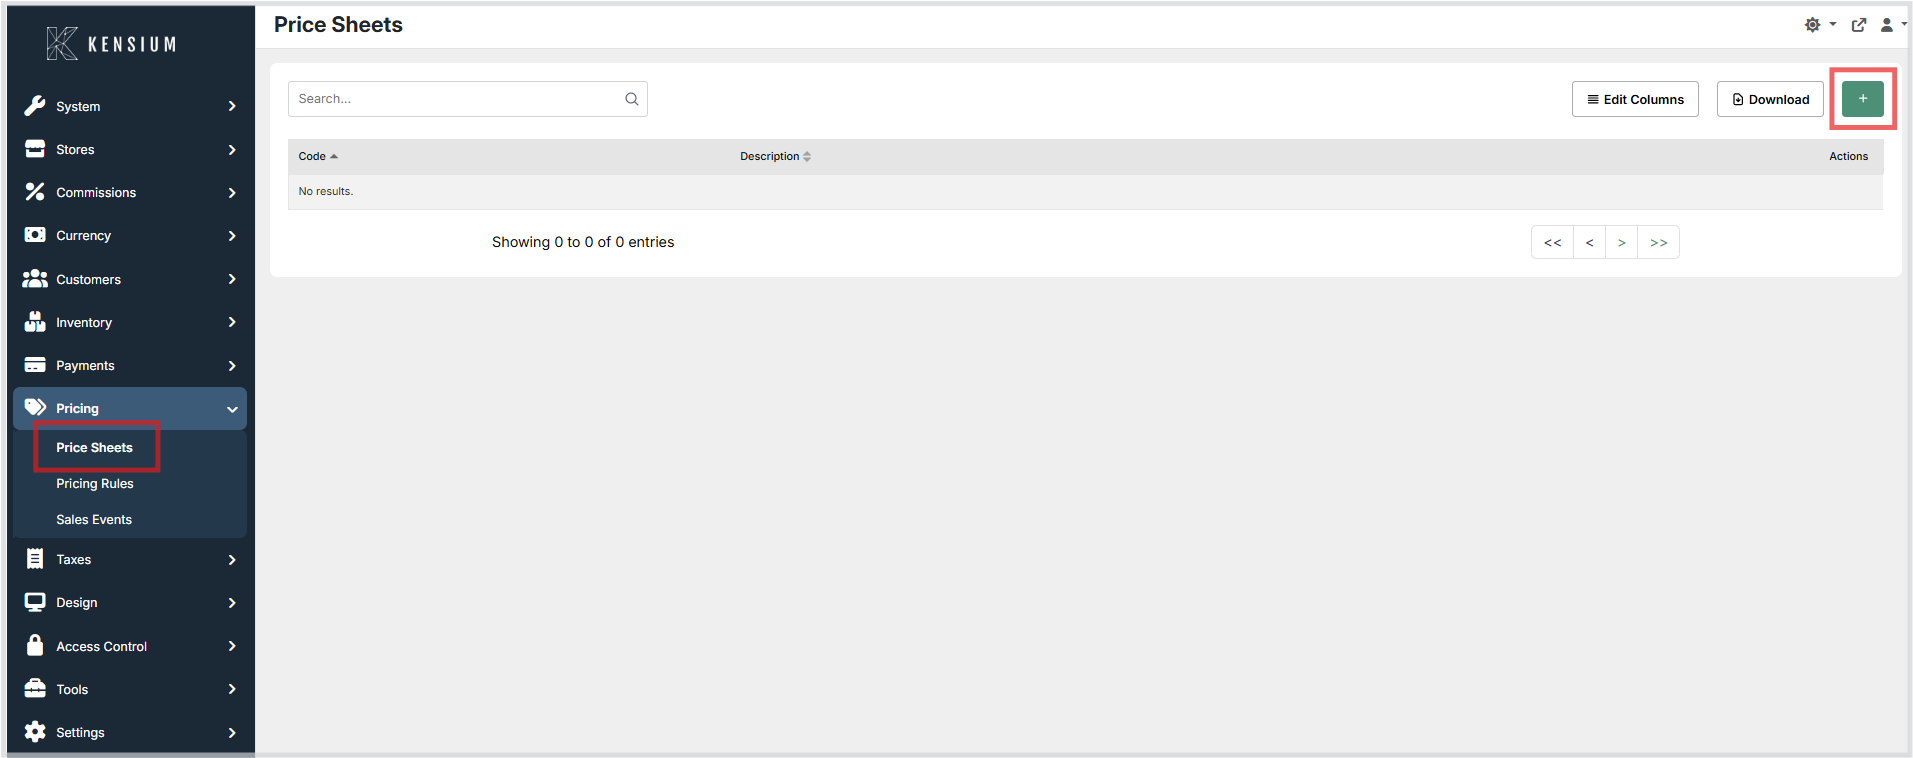
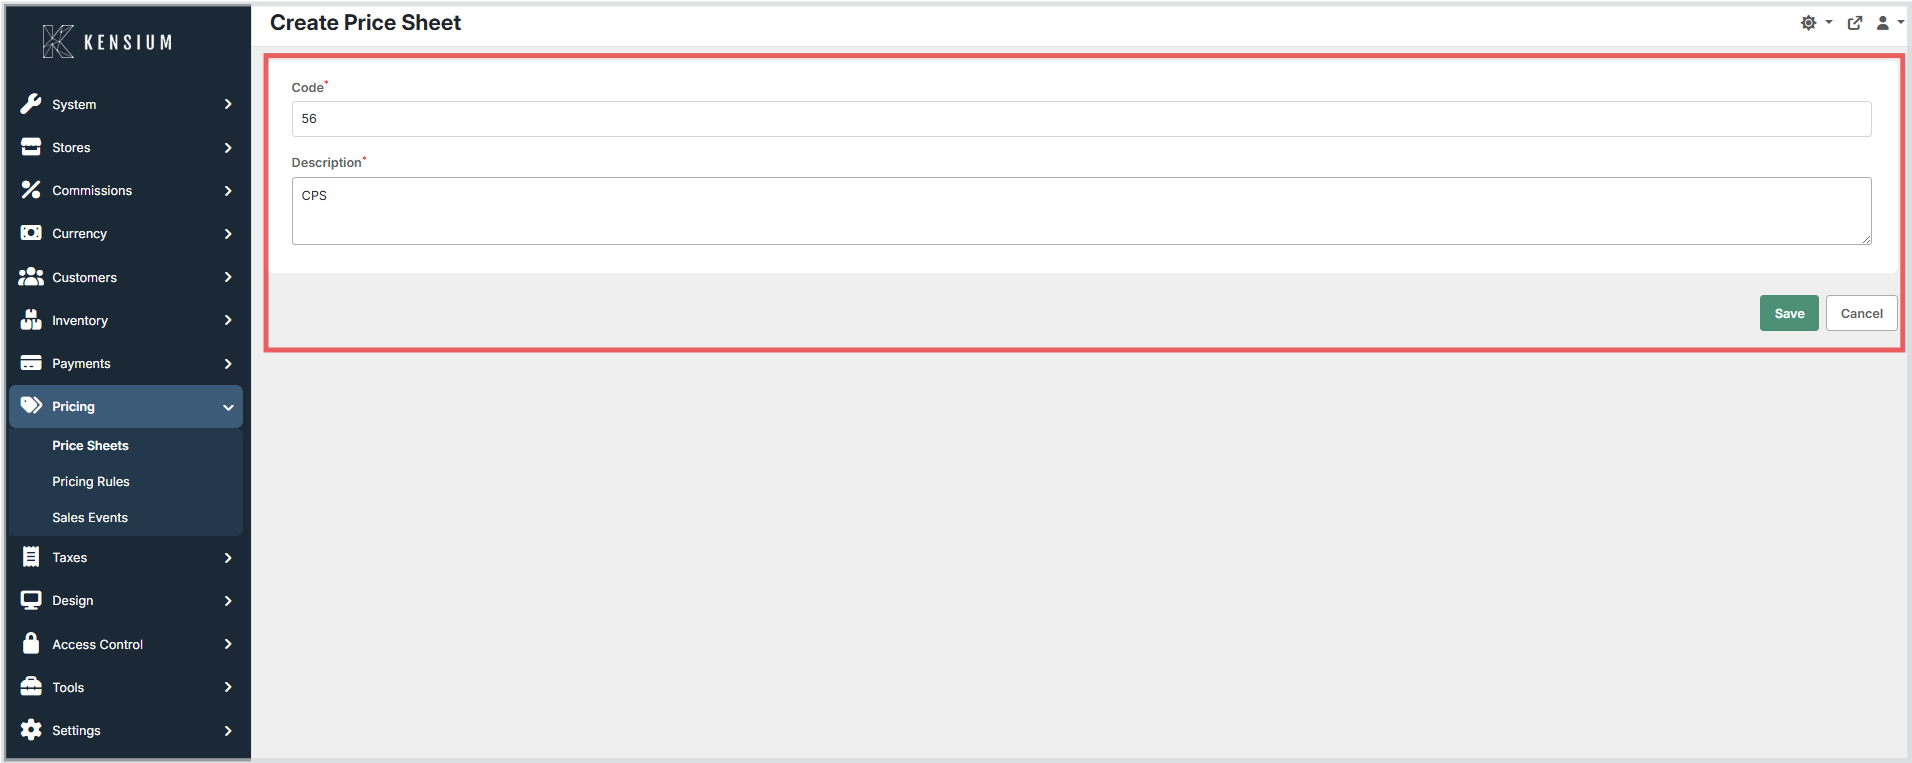
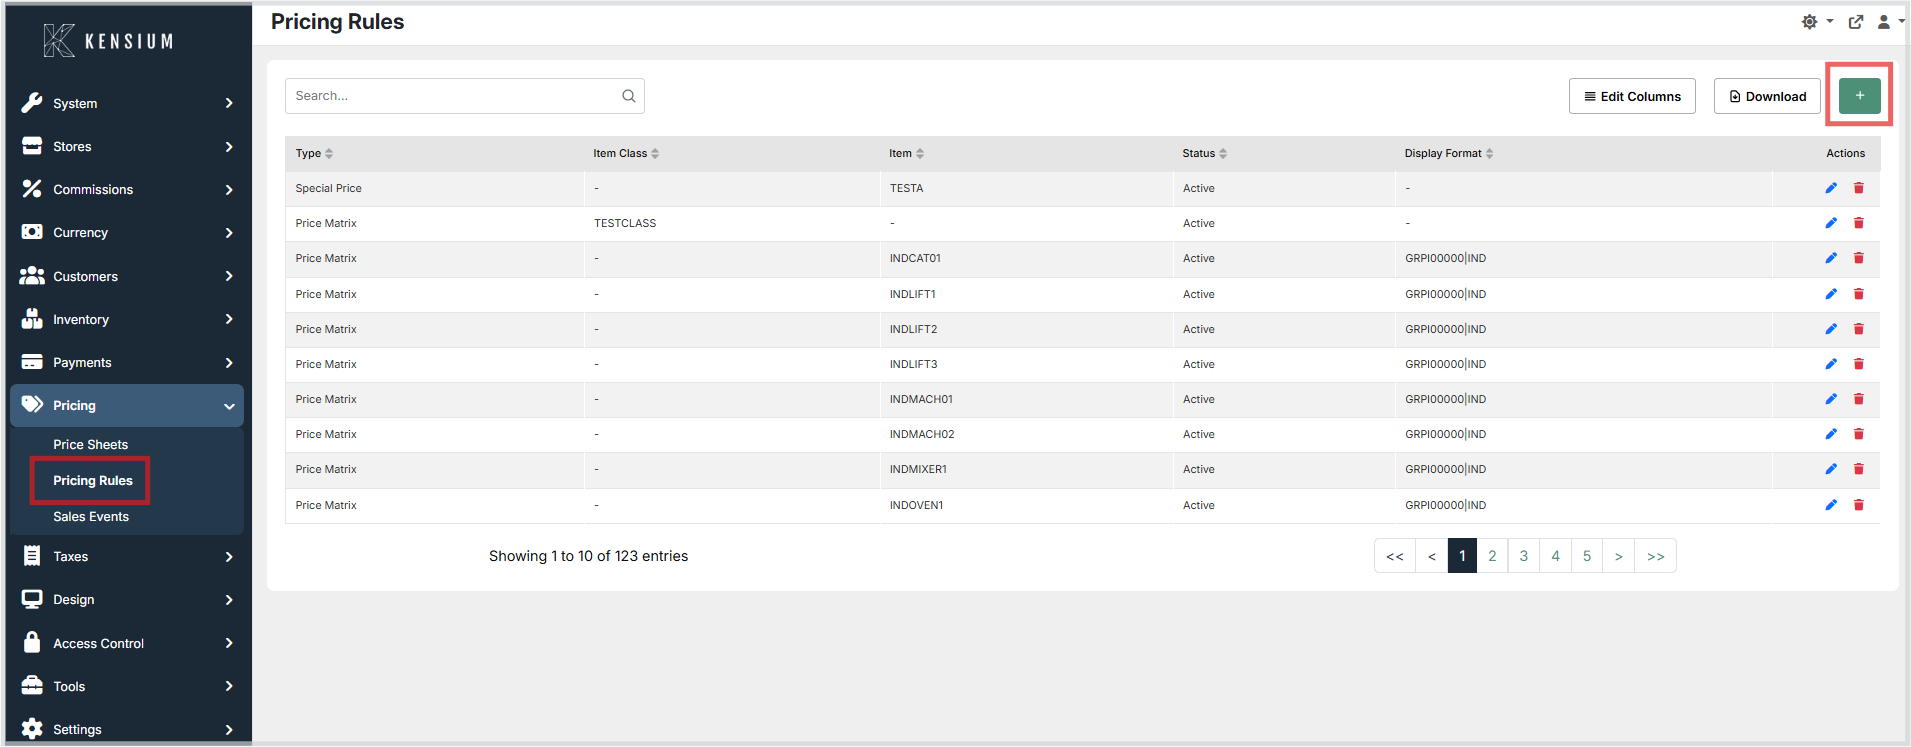
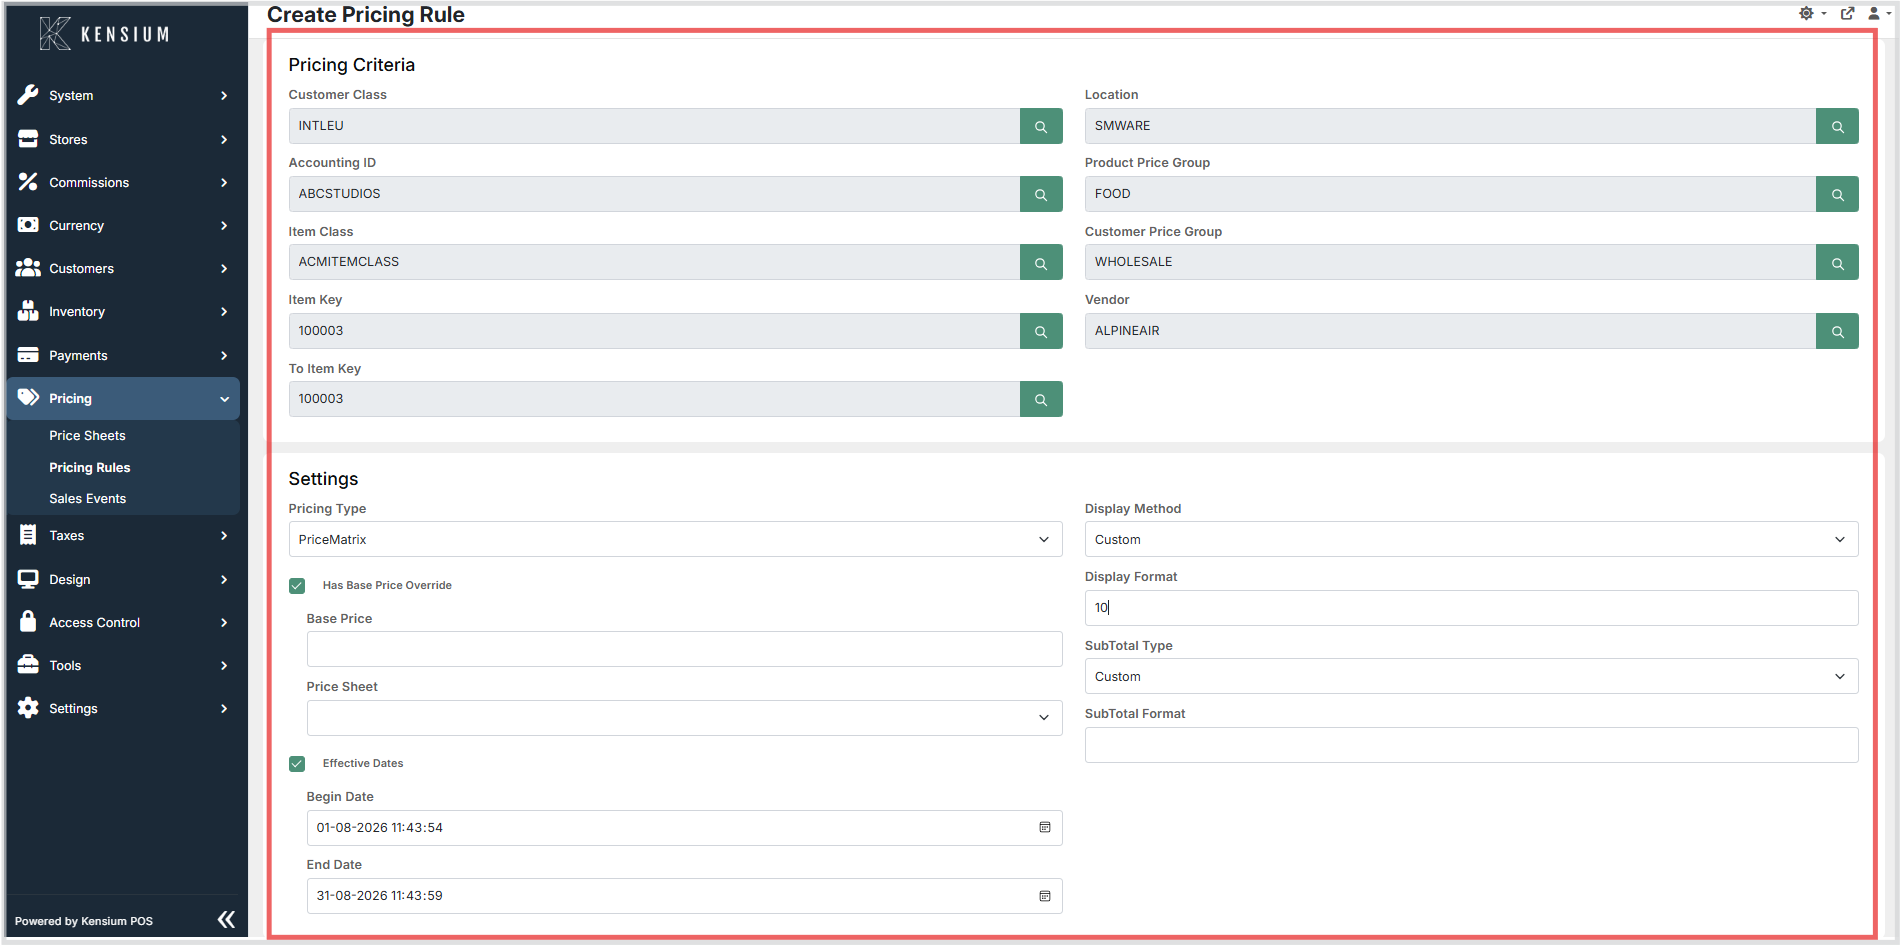


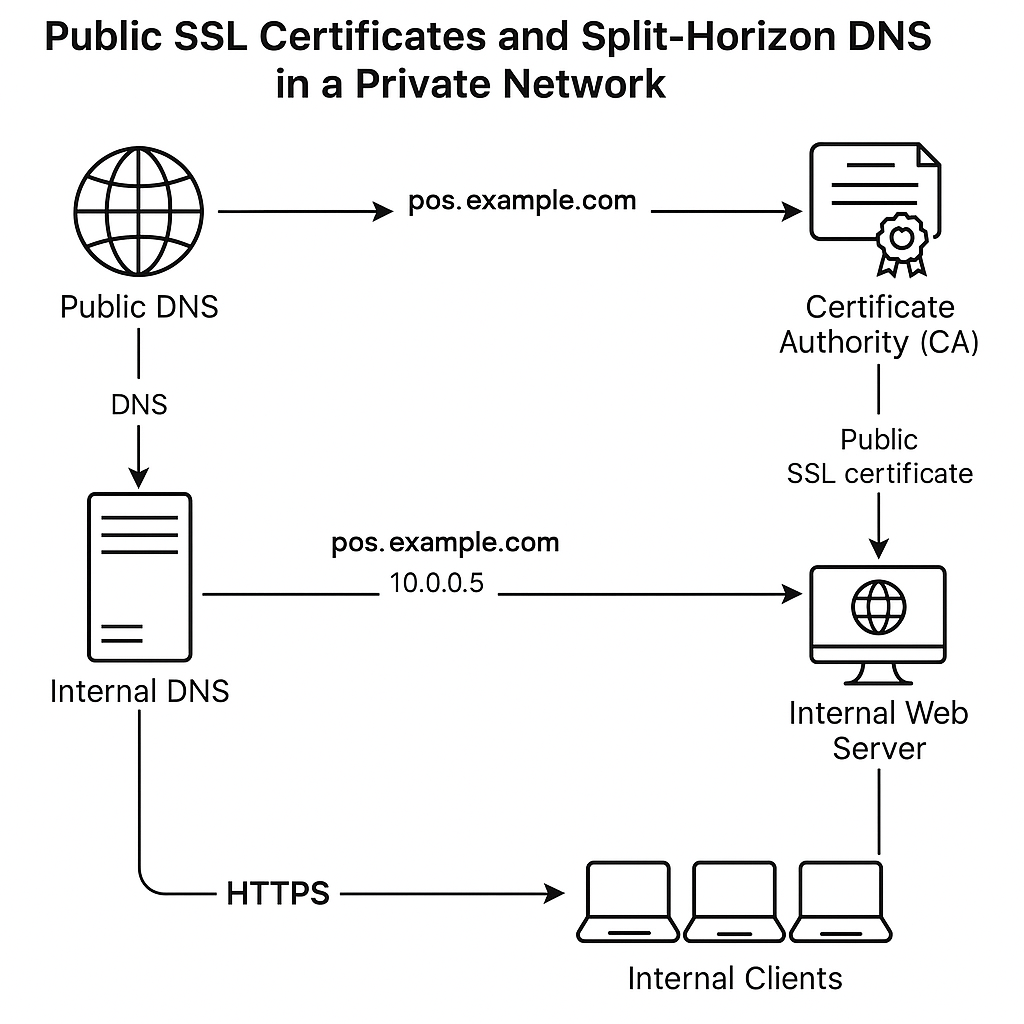 In this diagram: