ZPL Printer Emulator
| Summary Information | |
|---|---|
| Menu Path: | ZPL Printer Emulator |
| Required Feature(s): | Printer Emulator |
| Required Permission(s): | Read Installation Guides |
This guide describes how to install and configure the ZPL Printer Emulator and the Zebra Setup Utilities to create a local virtual printer that listens on 127.0.0.1:9100 for use with POS testing.
Info
Previous versions of the Register included a built-in "virtual printer" that could be used to demonstrate and test receipt printing services. It was limited to plain-text format. In POS 7 and later, the ZPL Printer Emulator can be installed to perform the same function. This emulator is able to print rich content, including barcodes and font styles.
Overview
Setting up local ZPL printing involves three steps:
- Install the ZPL Printer Emulator and configure it to host a virtual printer on
127.0.0.1:9100. - Install the Zebra Setup Utilities to create a Windows TCP/IP printer that points to the same address and port.
- Configure the POS register to use the new local printer and verify that print jobs are received by the emulator.
Step 1: Install the ZPL Printer Emulator
-
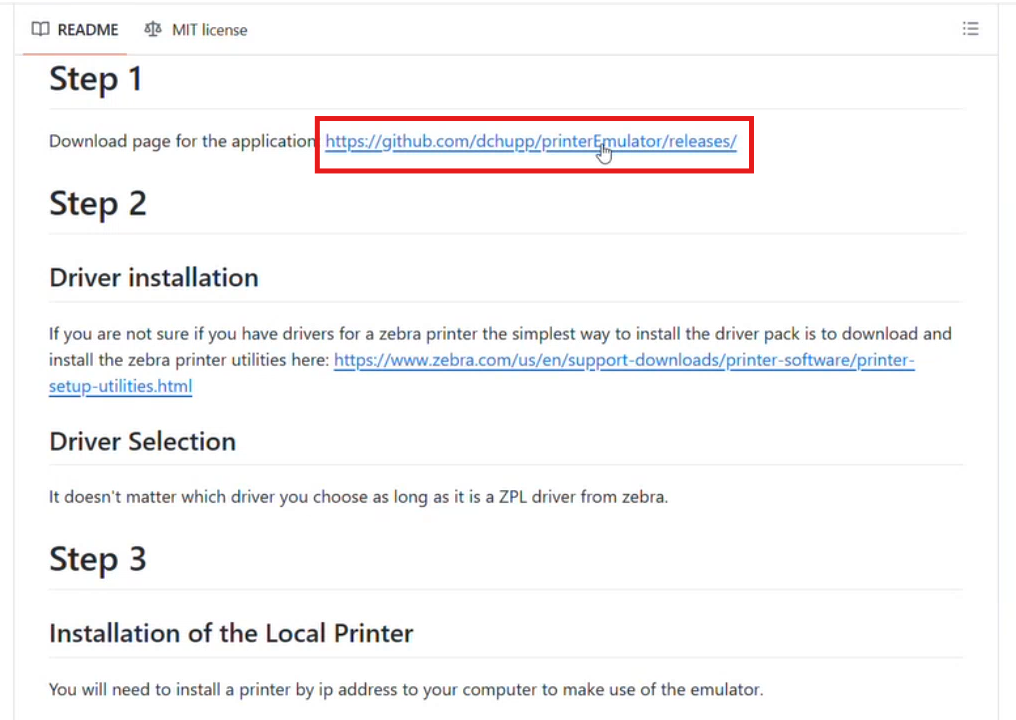
Download the ZPL Printer Emulator release from the project's GitHub releases page.
-
Example release page: https://github.com/dchupp/printerEmulator/releases/
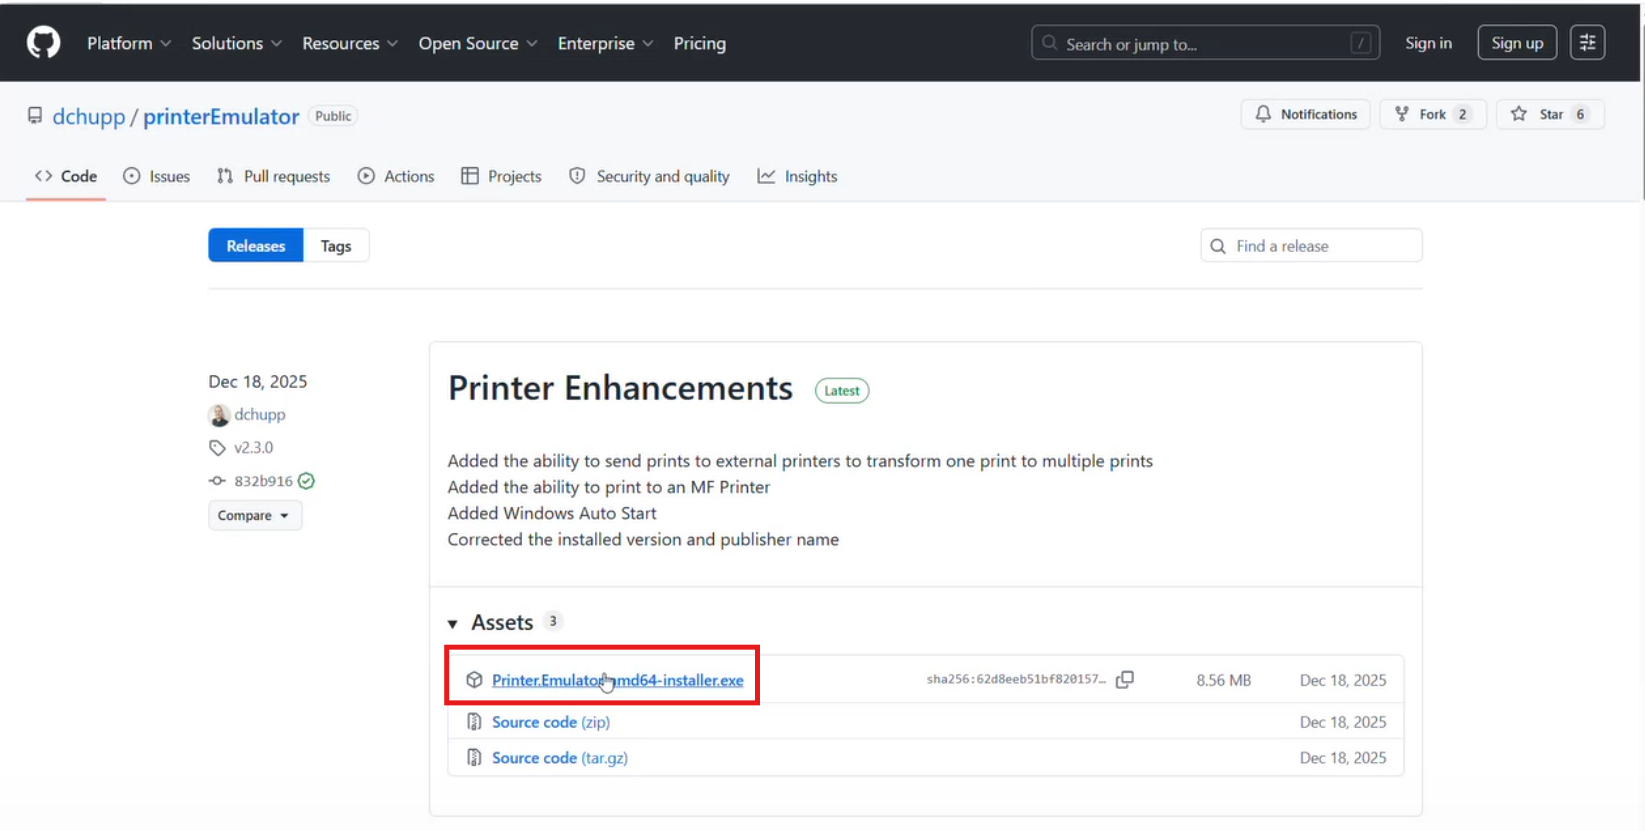
- Choose the latest release and download the Windows executable (for example,
Printer.Emulator...exe).
- Open your Downloads folder and run the downloaded executable.
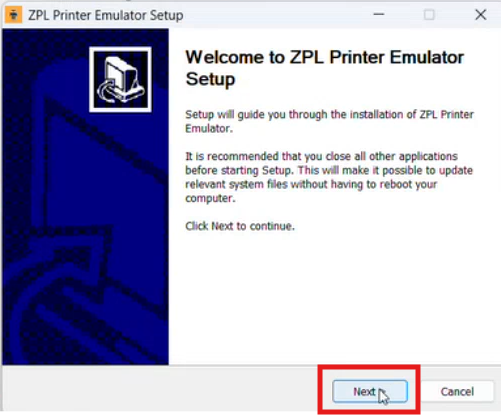
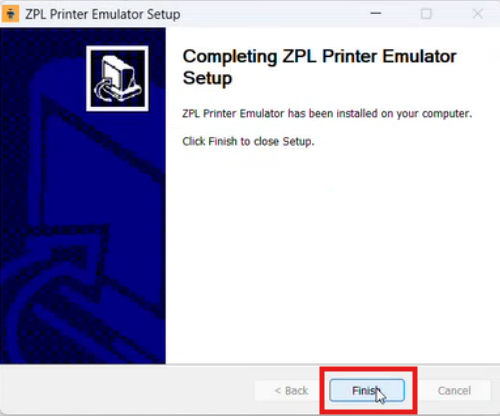
- Proceed through the installer by clicking Next until the installer completes, then click Finish.
-
Launch the emulator application. On the emulator home screen, add a network printer using the following values:
-
Printer name: any friendly name (for example,
ZPL_Printer) - IP address:
127.0.0.1 - Port:
9100 - Type:
Zebra
Click Add Printer, then click Back to Home.
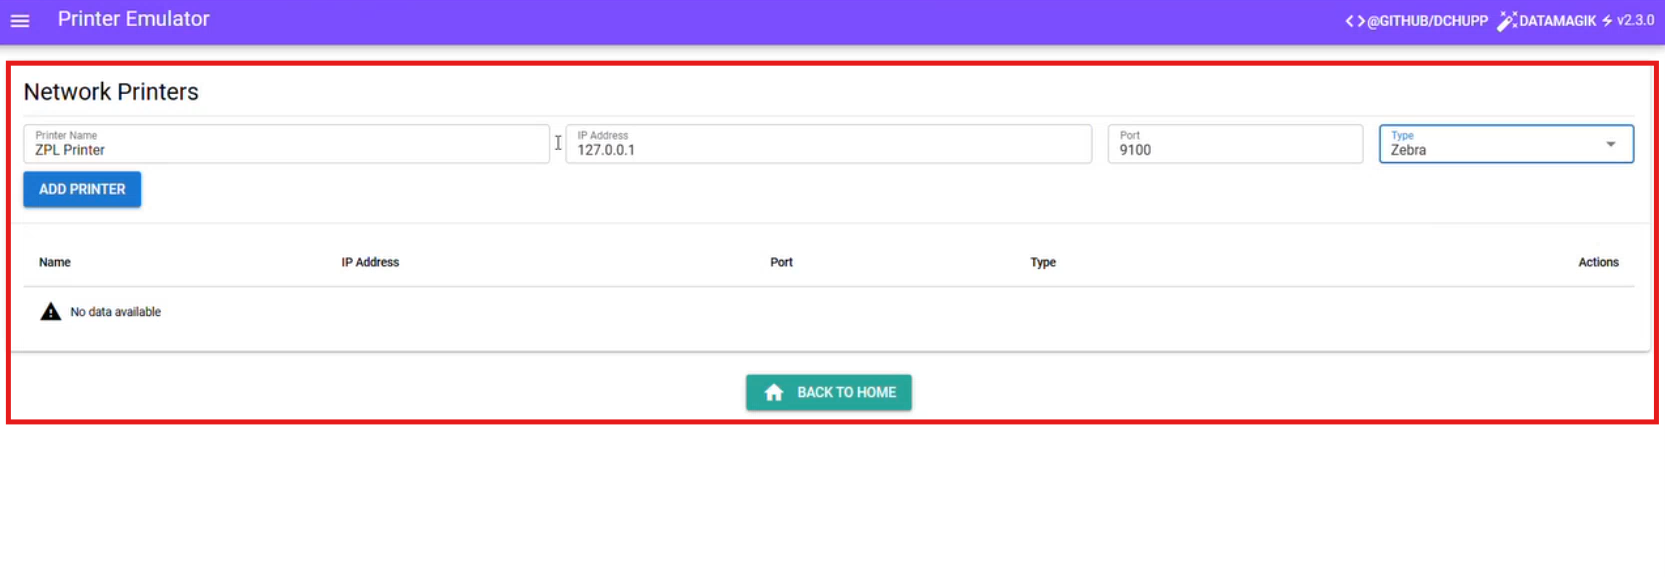
- Start the printer from the emulator UI so it begins listening on the configured address and port.
Step 2: Install the Zebra Setup Utilities
- From the emulator GitHub page, follow the link to the Zebra Printer Setup Utilities (or visit Zebra's support site directly) and download the Windows package.
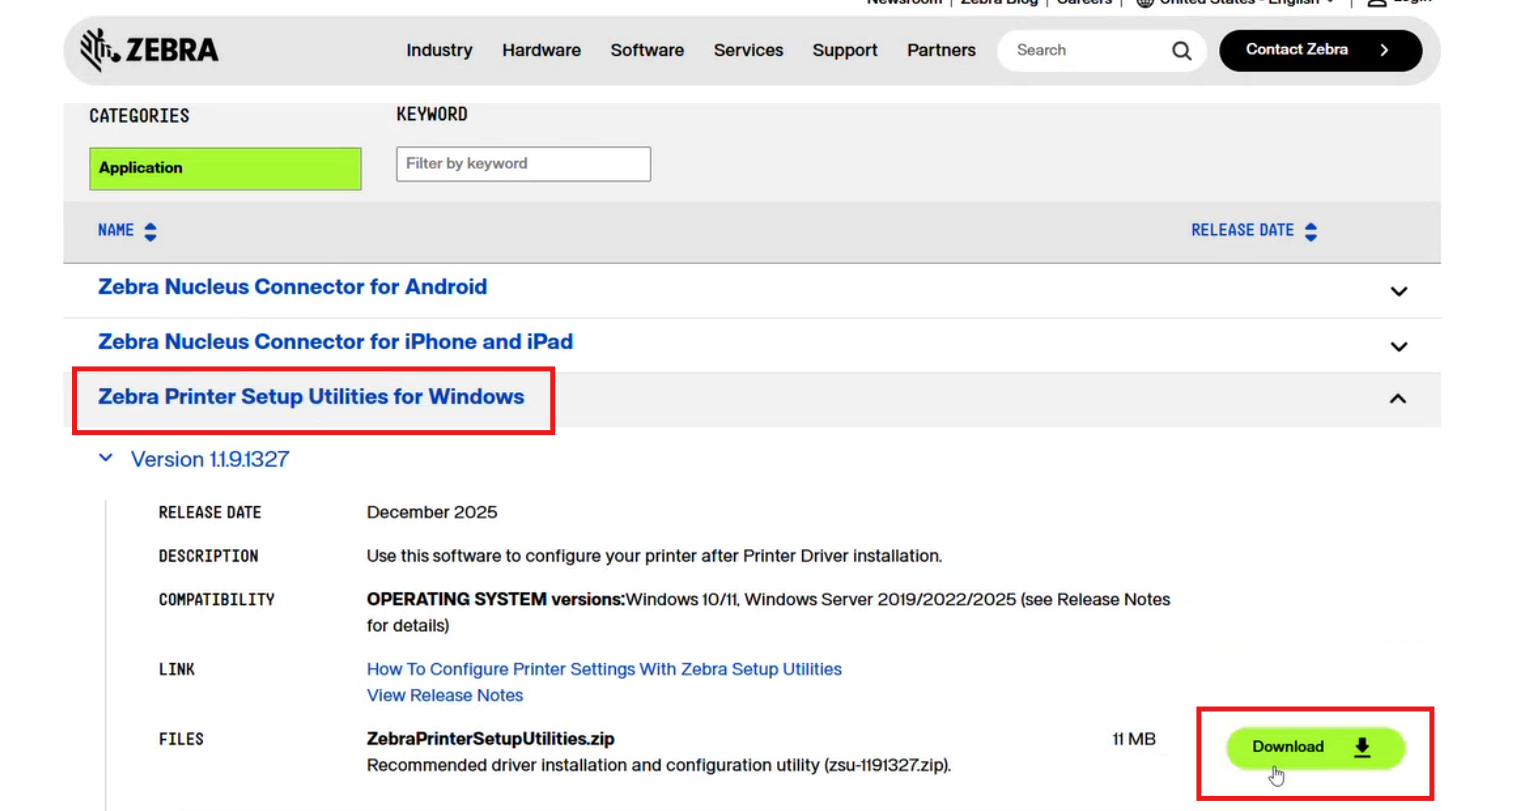
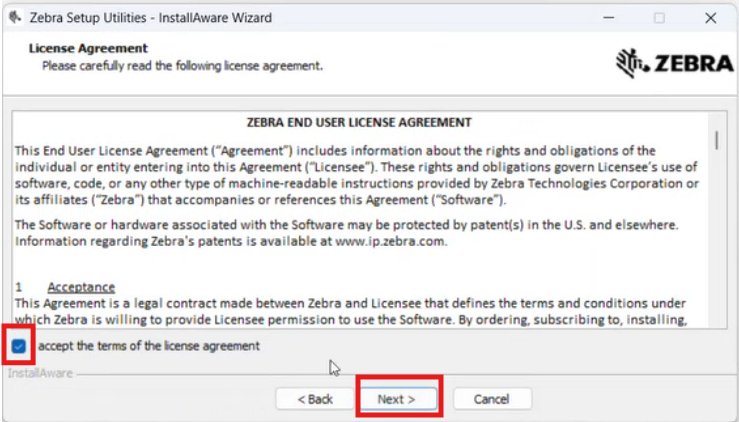
- Extract and run the Zebra Setup Utilities installer. Accept the license agreement and proceed through the wizard by clicking Next.
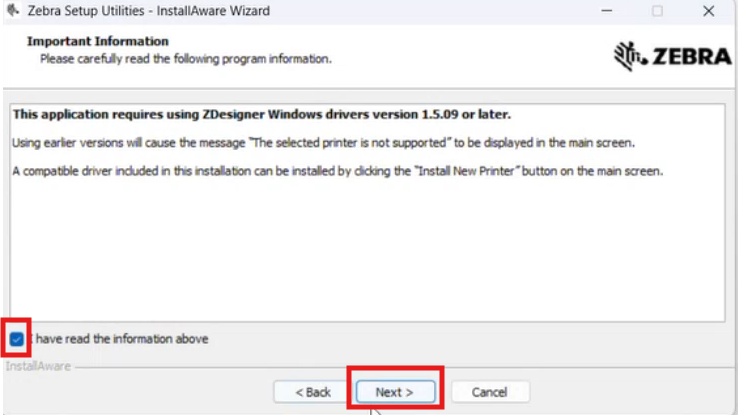
- Select the acknowledgment checkbox (I have read the information above) and click Finish to complete the installation.
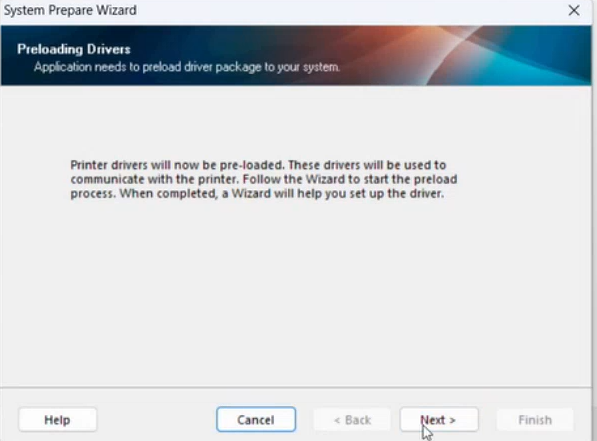
- When prompted by the System Prepare/Preloading Drivers steps, click Next and accept any prompts to preload drivers.
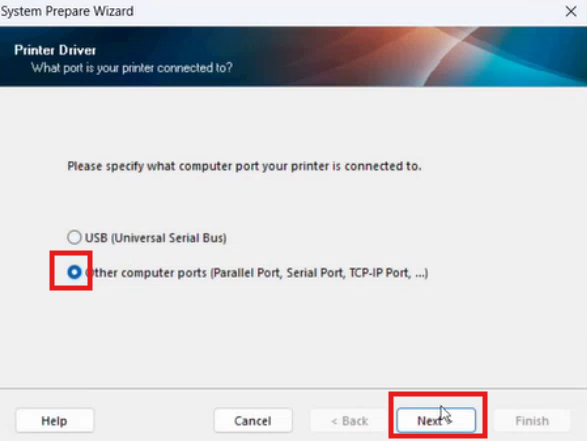
- When asked which port type to use, select Other computer ports (for TCP/IP).
-
Choose Install Printer from the installation options and follow the wizard to create a new printer using a TCP/IP port.
-
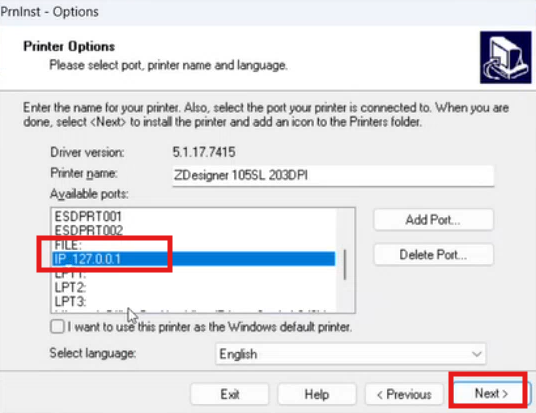
When prompted to choose or create a port, select
IP 127.0.0.1, or create a new TCP/IP port with IP127.0.0.1and port9100.
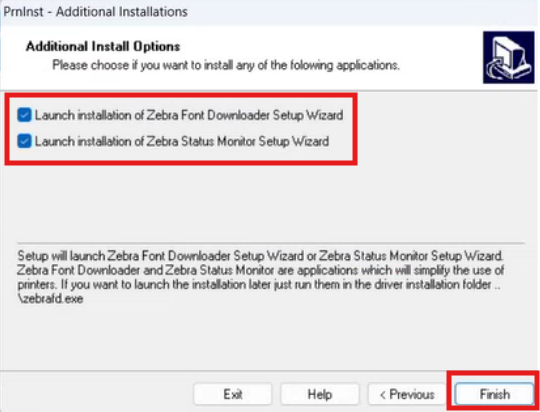
- Complete the wizard. If prompted, enable the additional utility installers (Zebra Font Downloader, Status Monitor), then click Finish.
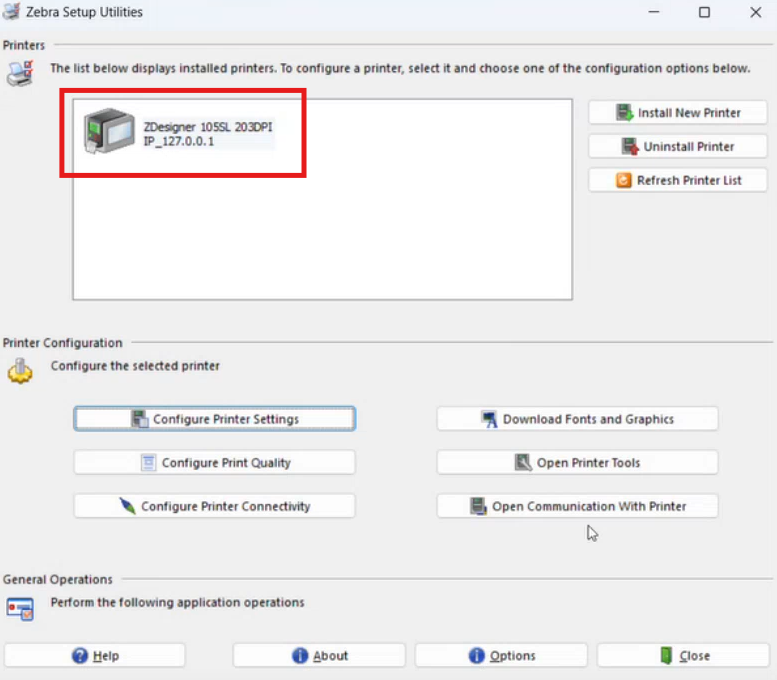
- Open Zebra Setup Utilities and confirm that the newly created printer appears in the list. Use the Configure Printer Connectivity or Open Communication With Printer tools to verify connectivity.
Step 3: Configure the Local Windows Printer
To add the local printer through Windows Printers & scanners:
- Open Settings → Printers & scanners and select Add a printer or scanner.
- When Windows completes its search, select The printer that I want isn't listed, then select Add a printer using a TCP/IP address or hostname.
- Enter
127.0.0.1as the hostname and9100as the port. Complete the wizard and select the appropriate Zebra driver (for example, a ZDesigner series driver) when prompted.
Note
If the configuration is successful, the new printer will appear in your list of installed printers, and you will be able to print a test page from Windows that is received by the emulator.
Step 4: Test Printing from POS
- In POS, configure the register printer to use the local printer created in the previous step.
- Use the POS test print (F7 or Register → Configuration → Select your printer → Test) to send a print job.
- In the emulator UI, confirm that the received print data appears when the job is sent to
127.0.0.1:9100.
Troubleshooting
- Nothing appears in the emulator: Verify that the emulator is running and actively listening on
127.0.0.1:9100. - Windows Firewall blocking connections: Ensure the Windows Firewall allows local TCP connections to port
9100. - Unsupported driver version: If the Zebra driver installer reports an unsupported driver version, use the Zebra Setup Utilities Install New Printer flow to preload compatible drivers before retrying.